博客

  • Understanding Lip Filler Swelling Stages: What to Expect During Recovery

    Understanding Lip Filler Swelling Stages: What to Expect During Recovery

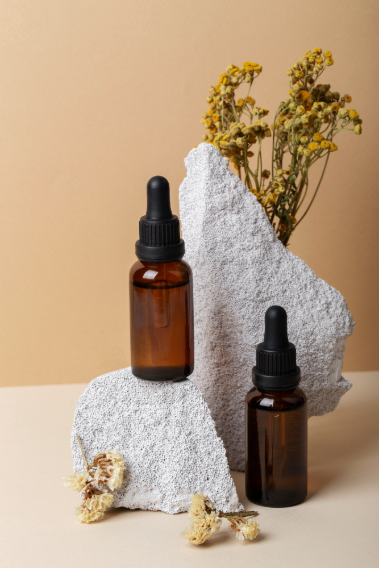
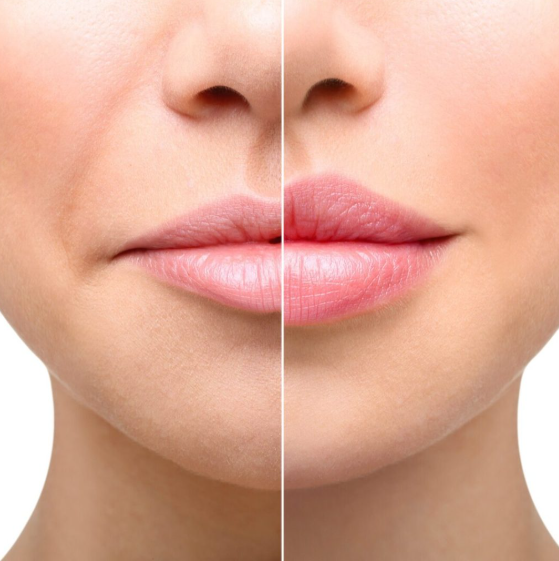
    If you’re considering lip fillers, it’s essential to know what to expect after the procedure. While the process itself is quick and relatively painless, the recovery period can involve some swelling and discomfort. However, these are entirely normal and typically temporary. With the right care, the healing process can be smooth, and you’ll soon be showing off those fuller lips! Let’s walk through the different stages of lip filler swelling and what you can do to manage it.

    The Day of the Procedure

    After receiving your lip fillers, you’ll likely experience some initial swelling. The good news is that the procedure itself doesn’t take long, and while you might notice some minor swelling immediately, it’s nothing to worry about. If your lips appear uneven at first, that’s also completely normal—it’s just your body’s way of responding to the treatment.

    Once you’re done, make sure to rest, apply ice, and relax while your body starts the healing process.

    Day 1: The Swelling Begins

    The morning after your treatment, your lips will likely feel swollen and tender. At this stage, it’s essential to remind yourself that the swollen lips you’re seeing are temporary. Your body is still adjusting, and it’s common to see some asymmetry between your upper and lower lips, with one side potentially more swollen than the other.

    This is part of the healing process, so don’t panic—just continue icing your lips to reduce swelling and discomfort.

    Day 2: More Swelling and Bruising

    By the second day, you may notice that the swelling and inflammation have increased, and you might even see some bruising. This is completely normal. Some people also experience a bumpy texture on their lips, but don’t worry—this will smooth out as your lips continue to heal. Keep icing your lips and try to rest as much as possible during this time.

    Day 4: The Healing Starts

    Around day four, you’ll notice significant progress. While your lips will still be swollen, they will begin to feel less sensitive, and simple tasks like eating and talking should be more comfortable. If you don’t see improvement, it’s always a good idea to check in with your provider, just to make sure everything is progressing well.

    Day 7: Seeing the Results

    By the end of the first week, most of the swelling will have gone down, and you’ll start to see the actual results of your lip fillers. Although a slight amount of swelling might still be present, many patients feel confident enough to go out and enjoy social events. Your lips may not be fully settled yet, but they will be much closer to their final look.

    Day 30: Fully Healed

    After about a month, your lips should be fully healed with minimal to no swelling. This is when you can truly assess the final results. If you’re happy with how they look, great! But if they aren’t quite what you envisioned, don’t hesitate to consult your provider for a touch-up.

    Tips for Speeding Up the Healing Process

    The recovery process is vital for achieving the best results from your lip fillers. Swelling is the most common side effect, but there are steps you can take to reduce it and ensure a smoother recovery.

    1. Cold Compress
      Right after the procedure, and for a few days after, use a cold compress or ice pack on your lips for 10-20 minutes at a time. This will help control swelling. You can alternate with a warm washcloth after a few minutes to maintain circulation and minimize inflammation.
    2. Topical Creams
      To soothe your lips and reduce swelling, consider applying topical ointments containing Arnica or Bromelain. These natural remedies can help calm irritation and reduce bruising, speeding up recovery.
    3. Avoid Heat
      While a hot bath may seem tempting, avoid hot temperatures around your lips for the first week after your procedure. Excessive heat can exacerbate swelling. Once the swelling has gone down, feel free to indulge in a relaxing bath.
    4. Stay Calm
      It’s normal to feel anxious as your lips will be swollen and possibly uneven in the days following your treatment. But remember, this is all part of the process, and things will improve with time. Rest, relax, and keep your mind occupied as your body heals.

    Final Thoughts

    The days following a lip filler procedure may involve some discomfort and noticeable swelling, but knowing what to expect can make the recovery process much easier to navigate. Be patient with yourself, follow the aftercare tips, and soon enough, you’ll enjoy the full results of your luscious lips.

  • Glycolic Acid for Deodorant: Benefits and Potential Risks

    Glycolic Acid for Deodorant: Benefits and Potential Risks

    In recent times, a trend has emerged on social media that’s making people question their traditional deodorant: using glycolic acid on the armpits to reduce body odor. While glycolic acid isn’t an antiperspirant, some dermatologists have found that it can help manage the bacteria responsible for body odor. So, is this a breakthrough or a beauty trend worth skipping? Let’s break down the benefits and risks of using glycolic acid as a deodorant alternative.

    Why Do Armpits Smell?

    Before diving into how glycolic acid works, it’s important to understand why we experience body odor. The smell that comes from your armpits isn’t just from sweat—it’s a combination of sweat and bacteria that thrive in your armpits’ warm, moist environment. After exercising, this mix of sweat and bacteria creates that familiar odor.

    While some products aim to block the sweat itself, others, like glycolic acid, work by lowering the pH of the skin, making it harder for bacteria to survive and produce odor.

    How Does Glycolic Acid Help Reduce Body Odor?

    Glycolic acid, a type of alpha-hydroxy acid (AHA), is commonly used in skincare for exfoliating the skin and reducing hyperpigmentation. When applied to the armpits, it works by lowering the skin’s pH and helping to dissolve dead skin cells. This process prevents the buildup of dead skin, reducing the environment where bacteria thrive, which in turn, helps reduce body odor.

    It’s important to note that glycolic acid won’t stop you from sweating—this is not a replacement for antiperspirants, which block sweat glands. However, by controlling bacteria growth, glycolic acid ensures that your sweat doesn’t carry the same unpleasant smell. And the best part? You only need to apply it a couple of times a week!

    Additional Benefits of Glycolic Acid for Your Armpits

    While glycolic acid’s primary benefit is odor control, it offers several other skin advantages as well. Many of us neglect our armpits when it comes to skincare, but these areas can benefit from some attention. Glycolic acid helps to exfoliate the skin, making it smoother and brighter by reducing hyperpigmentation. If you’ve ever experienced darkened armpits from shaving or waxing, glycolic acid can help lighten them over time.

    Additionally, glycolic acid can soothe irritation from shaving and reduce the appearance of ingrown hairs by promoting healthier skin regeneration.

    Potential Risks and Side Effects

    Like any skincare treatment, glycolic acid comes with a few risks. Some users report mild irritation when first applying glycolic acid to their underarms, including redness, burning, or skin peeling. These effects are typically minor, but if they occur, you may want to consider using a lower concentration.

    If you experience excessive irritation or discomfort, it’s best to stop using glycolic acid and consult a dermatologist. Starting with a gentler formulation is often the best approach, especially if you have sensitive skin.

    How to Apply Glycolic Acid to Your Armpits

    Using glycolic acid as a deodorant alternative is simple. Choose a mild glycolic acid product (around 8-10% concentration) and apply it sparingly to your armpits using a cotton ball. There’s no need to apply it every day—1-2 times a week is enough to see the benefits. Let the product dry before putting on clothing, and you’re good to go!

    Recommended Products
    For a gentle, budget-friendly option, you might want to try The Ordinary Glycolic Acid 7% Exfoliating Toning Solution. While it’s not specifically formulated for armpits, it can still be effective if used cautiously.

    For those with more sensitive skin, Surface Deep Anti-Odorant Pads are an excellent option. Though they come at a higher price point, they are specially designed for the delicate skin under your arms.

    Tips for Safe Use

    • Don’t Overdo It: Only apply glycolic acid 1-2 times per week. Excessive use may lead to irritation or skin rashes.
    • Lower the Concentration If Needed: If you experience burning or discomfort, switch to a lower percentage glycolic acid product.
    • Patch Test: Always test any new skincare product on a small patch of skin before using it on larger areas. Wait for 24 hours to see if any irritation occurs.
    • Not a Substitute for Antiperspirant: Remember, glycolic acid won’t block your sweat glands, so you’ll still sweat. However, it will help reduce odor-causing bacteria.

    Conclusion

    Using glycolic acid as a deodorant alternative can be an effective, natural way to reduce body odor without relying on harsh chemicals. While it’s not a replacement for antiperspirants, glycolic acid offers additional skincare benefits like exfoliation, hydration, and the reduction of pigmentation and irritation. If you’re looking for a gentler, less conventional approach to underarm care, this might be a trend worth trying—just be sure to monitor your skin’s response and use it sparingly!

  • Cryoskin vs. CoolSculpting: Which Treatment Is Right for You?

    Cryoskin vs. CoolSculpting: Which Treatment Is Right for You?

    If you’ve been working hard to lose weight but still can’t seem to get rid of those stubborn fat pockets, you’re not alone. No matter how much you exercise, certain areas of the body—like the hips, thighs, and belly—can hold onto fat. Luckily, non-invasive treatments like Cryoskin and CoolSculpting can help target these trouble spots and give your body the contour you’ve been striving for. But which one should you choose? Let’s take a closer look at both options to help you decide.

    What Are Cryoskin and CoolSculpting?

    Both Cryoskin and CoolSculpting are designed to tackle those persistent fat areas that resist exercise and diet. However, they work in different ways and have distinct features that may influence your choice.

    Cryoskin and CoolSculpting are not weight loss solutions but rather fat-reduction treatments that target specific areas of the body. Certain fats, particularly those with alpha-2 receptors, are more stubborn and harder to burn off. These treatments aim to break down those fat cells, helping to reduce their appearance.

    Cryoskin: An Affordable, Painless Option

    Cryoskin is a popular choice for those looking for a non-invasive treatment that doesn’t require long recovery periods. The procedure involves using a wand to alternate between hot and cold temperatures on the target areas, which helps to eliminate fat cells.

    Pros:

    • More budget-friendly compared to CoolSculpting
    • Quick sessions (typically under 30 minutes)
    • No downtime needed
    • Painless or only mildly uncomfortable

    Cons:

    • Requires multiple sessions (usually 2-4 weeks apart)
    • Results take longer to appear compared to CoolSculpting

    How It Works: Cryoskin treatments use thermal shock to target fat cells. These cells are then flushed through the lymphatic system and eliminated via urine. To achieve the best results, multiple sessions may be required, spaced out over several weeks. There are three types of Cryoskin treatments: CryoSlimming, CryoToning, and CryoFacials. Each serves different purposes, from fat loss to cellulite reduction and even non-invasive facelifts.

    Side Effects: Cryoskin is well-tolerated, and many users describe the treatment as relaxing. Most people experience no discomfort after the procedure.

    CoolSculpting: A One-Time Solution with Big Results

    CoolSculpting is another non-invasive fat-reduction treatment, but it works by freezing fat cells. It’s slightly more intense than Cryoskin and requires a longer commitment during each session.

    Pros:

    • Only one session needed for visible results
    • No downtime required
    • Can result in 20-80% fat reduction in treated areas

    Cons:

    • More expensive than Cryoskin
    • Each session takes around 2 hours
    • Can be slightly uncomfortable

    How It Works: CoolSculpting involves applying a freezing chamber to the target area, where fat cells are frozen and gradually eliminated by the body over the course of six months. Unlike Cryoskin, which alternates between hot and cold temperatures, CoolSculpting only uses freezing cold to break down the fat. While results aren’t immediate, they typically start to show around three weeks post-treatment, continuing to improve up to six months later.

    Side Effects: Some discomfort, such as swelling, bruising, and tenderness, may occur after the procedure. However, these side effects usually go away within a few days.

    Which Treatment Is Right for You?

    When deciding between Cryoskin and CoolSculpting, there are a few factors to consider:

    Cost: Cryoskin is the more affordable option, with sessions typically costing around $300. A package of three sessions will usually set you back about $900, though additional sessions may be necessary, pushing the total cost to around $1,500. CoolSculpting, on the other hand, tends to be more expensive, with prices ranging between $2,000 and $4,000 depending on the location and treatment area.

    Time Commitment: Cryoskin requires several follow-up appointments. Each session lasts about 30 minutes, but you’ll need to schedule additional treatments 2-3 weeks apart. If you’re looking for a more streamlined process, CoolSculpting might be a better option as it typically requires just one session (though each session is longer—around two hours).

    Additional Benefits: Both treatments offer more than just fat reduction. Cold therapy helps to improve blood flow, which increases collagen production and enhances skin elasticity. This means that both Cryoskin and CoolSculpting not only help you achieve a slimmer figure but can also help reduce the appearance of fine lines and wrinkles, giving you a more youthful look overall.

    Conclusion

    Cryoskin and CoolSculpting both offer effective solutions for stubborn fat, but which one is right for you depends on your personal preferences, budget, and time availability. If you’re looking for a more affordable, quick treatment with minimal downtime, Cryoskin might be your best bet. However, if you’re after faster results and don’t mind investing in a more expensive procedure with a longer treatment time, CoolSculpting could be the way to go.

    Whichever treatment you choose, both are excellent options for targeting fat that just won’t budge no matter how much you work out.

  • The Top 10 Essential Oils to Fade Scars and Promote Healing

    The Top 10 Essential Oils to Fade Scars and Promote Healing

    Whether it’s acne scars, a burn from a curling iron, or a post-surgery scar, scars are often a stubborn reminder of the past. While makeup can cover them up temporarily, treating the scars directly offers a more long-lasting solution. Essential oils are a great way to incorporate natural healing into your daily skincare routine, helping to fade scars and rejuvenate the skin. Let’s take a look at the best essential oils that can work wonders on various types of scars.

    1. Frankincense

    Frankincense is known for its skin-healing benefits due to boswellic acid, which promotes cell regeneration. Regular use of frankincense essential oil can help even out skin tone, tighten skin, and encourage the growth of new, healthy skin cells. It’s a great option for scars that need a bit of extra care.

    2. Lavender

    Lavender essential oil isn’t just relaxing for the senses—it also aids in collagen production, which helps repair skin. It’s especially beneficial for fresh scars, as it helps close wounds and reduces inflammation. Lavender oil is ideal for promoting healing in new scar tissue and improving its appearance.

    3. Tea Tree

    Tea tree oil is widely known for its antiseptic and anti-inflammatory properties, making it a go-to for treating wounds and reducing skin irritation. It’s perfect for healing acne scars and can significantly speed up the recovery process when applied consistently. While results typically take about a month, the oil’s gentle but effective nature makes it a must-have in your scar-healing routine.

    4. Cedarwood

    Cedarwood essential oil is fantastic for reducing inflammation, especially for those dealing with acne scars or persistent breakouts. It not only works on scars but can also soothe an itchy, dry scalp when added to shampoo. This versatile oil promotes healthy skin while helping to alleviate discomfort associated with acne.

    5. Rosehip Seed

    Rosehip seed oil is rich in antioxidants and essential fatty acids, which make it an excellent choice for healing scars, especially surgical marks. This oil helps even out skin tone, treat wrinkles, and moisturize the skin. It’s gentle enough to be used as a carrier oil but effective enough on its own for scar treatment. Expect to see noticeable results after about six weeks of regular use.

    6. Vitamin E

    Vitamin E is widely regarded as a great ingredient for skin health, known for its ability to boost collagen production and keep the skin moisturized. While studies on its effectiveness for scar healing are limited, many users swear by it for reducing the appearance of scars over time. However, results can vary, and it may take up to six weeks to notice improvements.

    7. Helichrysum

    Helichrysum essential oil is a more expensive option but well worth the investment due to its powerful antibacterial properties. It’s especially useful for new scars and wounds because it fights off bacteria while promoting faster healing. This oil also boosts collagen production, which is key for reducing scar tissue. Keep in mind that it has a slightly medicinal scent that might not appeal to everyone.

    8. Carrot Seed

    Carrot seed oil is packed with beta-carotene, making it a fantastic choice for fading older scars. It enhances skin cell turnover, encourages collagen production, and can even be helpful for treating active acne. If you’re looking for a solution to lighten and smooth out both old and new scars, carrot seed oil is an excellent option.

    9. Geranium

    For a gentle floral scent and skin-healing benefits, geranium oil is a great choice. It promotes cell regeneration and balances skin tone, making it effective for treating both fresh and old scars. Geranium oil is also great for calming inflammation and can be helpful for a range of skin issues, from scars to skin irritations.

    10. Bio-Oil

    Bio-Oil is a blend of essential oils, including sunflower and lavender, known for its ability to hydrate skin while reducing the appearance of scars, stretch marks, and uneven skin tone. This oil absorbs quickly, making it ideal for use on both old and new scars. It’s a reliable choice for moisturizing and improving the skin’s overall texture.

    How to Apply Essential Oils for Scars

    While oils like Bio-Oil and coconut oil are not concentrated essential oils and can be applied directly to the skin, pure essential oils should always be diluted with a carrier oil to prevent irritation.

    Common carrier oils include olive oil, coconut oil, jojoba oil, or almond oil. If you have sensitive skin, you might want to invest in a high-quality carrier oil like grapeseed or hazelnut oil for added benefits.

    To use essential oils for scars, mix a few drops of your chosen oil with the carrier oil of your choice and apply directly to the scar area. For best results, apply the oil after a shower when your skin is more receptive to absorbing nutrients.

    Essential oils offer a natural, effective way to help fade scars and promote skin healing. With consistent use and patience, you can reduce the appearance of scars and support your skin’s natural regeneration process.

  • Do Face Masks Expire? Everything You Need to Know

    Do Face Masks Expire? Everything You Need to Know

    Face masks come in all shapes and sizes—some give your skin a boost of hydration, others target acne or redness, and a few feel like a mini-spa treatment. But if you’ve got a few forgotten masks lingering in your bathroom cabinet, you might be wondering: do face masks expire? The answer is yes, and understanding how long they last, how to store them, and when they’re safe to use will help you get the most out of your skincare routine.

    How Do Face Masks Work?

    Face masks create a temporary barrier that traps moisture and helps active ingredients penetrate the skin more effectively. By doing so, they provide quick relief for a variety of skin concerns, including dryness, dullness, fine lines, and acne. Whether it’s a hydrating mask, a clarifying sheet mask, or a clay mask, these treatments give your skin a mini-environment to soak up all the nutrients.

    How Long Do Face Masks Last?

    Every face mask typically has an expiration date listed on its packaging. These dates can range from one to three years, but the actual shelf life can vary based on factors like ingredients, how the mask is stored, and whether it has been opened.

    If the mask is unopened, it’s generally safe to use up to six months after its expiration date, although it’s always best to stick to the printed date. Once opened, the mask’s effectiveness may degrade faster, especially if it contains natural ingredients like vitamin C or vitamin E. These ingredients tend to lose their potency over time, so it’s best to use those masks sooner rather than later.

    How Should I Store My Face Masks?

    While many people keep their face masks in their bathroom, a better option is to store them in the fridge. Though face masks still expire in the fridge, the cooler temperature helps preserve some of the active ingredients and prevents them from breaking down too quickly. Plus, the cold sensation can help reduce puffiness and stimulate circulation when you apply the mask, leaving your skin feeling refreshed.

    Is It Safe to Use an Expired Face Mask?

    Using an expired face mask can be risky, especially if you have sensitive skin. Over time, the ingredients lose their effectiveness, and using an old mask might lead to skin irritation, rashes, or even breakouts. However, if you’re determined to use an expired mask, conduct a patch test first. Apply a small amount to your skin and wait for any adverse reactions. If you don’t experience any issues, it might be safe to use on your face.

    Additionally, always check the mask for any changes in color, texture, or smell. If it looks or smells off, it’s best to toss it and move on.

    When Should You Use a Face Mask in Your Routine?

    Face masks are a great addition to any skincare routine, but it’s important to use them at the right time. Depending on the type of mask, you might need to use it once a week or even daily. To get the most out of your mask, follow these steps:

    1. Remove makeup: Start with a clean canvas by removing all makeup from your face.
    2. Clean your skin: Wash your face thoroughly, ensuring that it’s free of dirt, oil, and impurities.
    3. Exfoliate: Gently exfoliate your skin to remove dead skin cells, which allows the mask to penetrate deeper.
    4. Apply toner or serum (optional): If you use a toner or serum, apply it before the mask. Wait a few minutes for it to absorb.
    5. Apply the mask: Follow the instructions on how long to leave the mask on. Some are meant to stay for just a few minutes, while others can be left on overnight.
    6. Finish with toner and moisturizer: After removing the mask, apply toner again to close your pores and finish with a light moisturizer to lock in hydration.

    Conclusion

    Face masks are an excellent way to treat your skin and unwind, but they don’t last forever. While the expiration date on your face masks is a general guideline, it’s important to consider how the mask has been stored and whether it has been opened. If you want to get the most out of your face masks, make sure to use them within one to two years of purchasing them, and store them in a cool, dry place.

    Ultimately, if a mask has expired, it’s better to skip it than risk using a product that might not give you the results you expect—or worse, cause skin irritation. Keep your masks fresh, and your skincare routine will remain effective and safe.

  • Is It Normal to Experience a Breakout After a Facial?

    Is It Normal to Experience a Breakout After a Facial?

    Getting a facial is often seen as the ultimate skincare treat, promising a clear, glowing complexion. However, many people notice that their skin might not look its best right after the treatment. In fact, some might experience a breakout or irritation a few days following a facial. So, is it normal to break out after a facial? Let’s dive into why this happens and what you can do to handle it.

    Why Do Breakouts Happen After a Facial?

    It’s actually quite common for your skin to react after a facial. During a facial, your skin is deeply stimulated, and depending on the type of facial, there might be extractions where clogged pores are cleared. If some of the impurities are not fully removed during the facial, they can continue to rise to the surface of your skin, leading to breakouts in the following days.

    This process is especially likely if you have acne-prone skin or if you already have some blemishes starting to form. While it may feel frustrating, think of it as your skin going through a purification process. The breakout might be the result of toxins being pushed out, but don’t worry—it’s usually temporary.

    What’s Normal After a Facial?

    It’s essential to understand what’s normal and what isn’t when it comes to post-facial reactions. Mild redness or a slight tingling sensation are perfectly normal and should subside within a few hours. However, if you experience extreme redness, a burning feeling, or an unusually hot sensation on your skin, these are signs to look out for. Similarly, excessive sensitivity or bleeding after the facial is not normal, and you should contact your esthetician or dermatologist immediately.

    Generally, you should notice that day two feels much more comfortable, with reduced redness and a calmer complexion.

    How Long Does a Skin Purge Last?

    The term “purge” can sound a little alarming, but it’s essentially your skin’s way of shedding toxins, old skin cells, and impurities. During this process, new skin is revealed, which can cause pimples to form temporarily. Typically, the breakouts related to a purge phase are quicker to heal than regular pimples. They can appear for a few days but often clear up within one to two weeks. In some cases, however, it can last for up to a month as your skin continues to purge deep-seated impurities.

    What Causes a Breakout After a Facial?

    Several factors can contribute to post-facial breakouts. The facial treatments stimulate the skin, and if toxins aren’t fully extracted, they can push to the surface. Additionally, people with oily or acne-prone skin might experience breakouts more frequently after a facial because their pores were deep-cleaned, and impurities from the deeper layers of skin rise up. Some other temporary issues you might face are dryness, flakiness, or irritation.

    Should You Wash Your Face After a Facial?

    A common question after getting a facial is whether it’s okay to wash your face. The short answer is no—not immediately. Your skin is still absorbing the benefits of the facial treatment for several hours afterward, so it’s best to resist washing your face for at least 12 hours. If you must cleanse, opt for a mild, gentle cleanser and be very gentle with your skin.

    What to Avoid After a Facial?

    To help your skin heal and maintain the benefits of your facial, there are a few things you should avoid for the first 24 hours:

    1. Sun Exposure: Your skin will be more sensitive after the facial, and direct sun exposure can lead to irritation or pigmentation. If you must be outside, wear sunscreen and protective clothing.
    2. Makeup: Your pores will be open, so applying makeup could cause them to become clogged and increase the risk of breakouts.
    3. Sweating: Avoid intense physical activities that make you sweat, as sweat can irritate your skin and clog your pores.
    4. Touching or Picking at Your Skin: It’s tempting, but resist the urge to touch your face or pick at any new pimples that might form during the purge. Doing so could cause scarring or worsen the breakout.

    How to Protect Your Skin After a Facial

    After your facial, there are several things you can do to keep your skin happy and healthy:

    1. Stay Hydrated: Drinking plenty of water helps maintain your skin’s elasticity and assists in flushing out toxins from your body, contributing to healthier, glowing skin.
    2. Clean Your Beauty Tools: Your skin is freshly cleaned and detoxified, so make sure the tools you use, like makeup brushes and bedding, are free from bacteria.
    3. Moisturize: Even if your skin feels oily, using a moisturizer is crucial. Many facial treatments can be drying, and a moisturizer helps protect your skin from further irritation.

    Conclusion

    It’s important to remember that experiencing a breakout after a facial is normal and usually a sign that your skin is going through a detoxifying process. While it might seem frustrating, the breakouts will likely clear up on their own as your skin adjusts. Keep in mind that everyone’s skin reacts differently to facials, and for some, the glow and smooth skin you expect may take a little time to appear.

    So, don’t let a few days of purging scare you away from future facials. With the right aftercare, you’ll be on your way to glowing skin in no time.

  • Body Lotion vs. Body Cream: Which One Is Best for Your Skin?

    Body Lotion vs. Body Cream: Which One Is Best for Your Skin?

    When it comes to skincare, one of the best habits you can develop is moisturizing your skin after a shower. But with so many options on the market, you might find yourself standing in the beauty aisle wondering whether to choose a body lotion or a body cream. The good news is that understanding the differences between these products and knowing how to apply them properly will help you make the right choice for your skin type and needs.

    Understanding Body Lotion

    Body lotions are known for their light texture. Typically made from a blend of water, oil, and various moisturizing agents, they are easy to apply and absorb quickly into the skin. Because of their lightweight consistency, lotions are an excellent choice for those with normal to oily skin. They won’t leave a greasy residue, and they’re especially beneficial when used during the warmer months or in humid environments.

    In addition to moisturizing, lotions can also help prevent breakouts. When your skin is properly hydrated, your sebaceous glands are less likely to overproduce oil, which can lead to acne. For daily use on the body, lotions are simple and effective.

    Best for:

    • People with oily skin
    • Full-body application
    • Hot climates or summer months
    • Daytime use

    Exploring Body Creams

    In contrast, body creams have a much thicker consistency due to their higher oil content. Often enriched with nourishing ingredients like shea butter, creams are perfect for individuals with dry skin or those in need of extra hydration during colder months. Though they take longer to absorb and might feel a bit greasy at first, they provide long-lasting moisture, making them ideal for use at night.

    Best for:

    • Those with dry skin
    • Targeting specific dry patches
    • Cooler weather
    • Nighttime application

    The Richness of Body Butter

    If your skin is in need of the ultimate hydration, body butter is your go-to product. With its thick texture, body butter is packed with nourishing butters such as shea, cocoa, and mango. It’s deeply moisturizing, which makes it perfect for areas of the body that experience extreme dryness, like elbows, knees, and hands. Because of its dense nature, body butter is often sold in jars, as it’s too thick to pump out of typical bottles.

    While some people reserve body butter for problem areas, others use it all over their body, especially during the winter when skin is prone to cracking or irritation. It’s also a great product to apply overnight for deep hydration.

    Best for:

    • Very dry skin
    • Dry spots (elbows, knees, hands)
    • Extremely cold climates
    • Overnight hydration

    Key Factors to Consider When Choosing a Body Moisturizer

    When deciding between a body lotion, cream, or butter, there are a few important factors to keep in mind:

    1. Fragrance: Scent is a significant factor because it will stay on your skin for hours. Opt for something that you enjoy and that isn’t overwhelming.
    2. Ingredients: Look for moisturizers that include vitamins like C, E, A, or K. These vitamins have various benefits such as slowing down aging, calming sensitive skin, and improving skin tone. Other helpful ingredients include hyaluronic acid and ceramides, which help lock in moisture.
    3. Non-comedogenic: If you have oily or acne-prone skin, choose a product labeled as non-comedogenic. This means it’s less likely to clog pores and cause breakouts.
    4. Cruelty-free: If animal testing is a concern for you, ensure your moisturizer is cruelty-free.
    5. Price: While expensive doesn’t always equate to better quality, brands like CeraVe offer great products at affordable prices. Their moisturizers are effective and come in fragrance-free versions for sensitive skin.

    Can You Use Body Lotion or Cream on Your Face?

    Although it’s okay to use body lotion on your face occasionally, it’s best to avoid using body creams or butters. These products are designed for thicker, tougher skin on your body and can clog the pores on your face, potentially leading to breakouts and irritation.

    Tips for Applying Your Moisturizer

    1. Know which product is best for each area: Select the right moisturizer depending on your skin type and needs.
    2. Warm it up: Before applying, rub the product between your hands to warm it and make it easier to spread.
    3. Apply while damp: For maximum moisture retention, apply your body moisturizer immediately after showering while your skin is still slightly damp.
    4. Use after hot showers: Hot water can dry out your skin, so it’s essential to apply moisturizer afterward.
    5. Start with a small amount: It’s easier to add more moisturizer than to remove excess.

    Conclusion

    Choosing between body lotion, cream, and butter ultimately comes down to your skin’s needs, the climate, and the time of day. A lightweight lotion is great for daytime use, especially in warmer conditions. Body creams provide extra moisture and are perfect for nighttime hydration, while body butters are reserved for dry spots or extreme weather. By understanding the differences and applying the right product in the right way, you can achieve soft, hydrated skin year-round.

    With these insights, you can confidently choose the best body moisturizer for your skincare routine.

  • How to Turn Eyeshadow Into Eyeliner: Quick and Easy Tips

    How to Turn Eyeshadow Into Eyeliner: Quick and Easy Tips

    If you’re looking to experiment with your eye makeup, turning eyeshadow into eyeliner is an easy and fun way to add a pop of color and creativity to your look. With just a few simple tools, you can create vibrant and unique eyeliner from your favorite eyeshadow shades. Whether you’re aiming for a sharp, defined line or a smudgy, smoky vibe, this technique is incredibly versatile. Here’s everything you need to know about making your own eyeliner at home.

    What You’ll Need

    • Eyeshadow (creamy or powder)
    • Applicator brush
    • Water or an alternative liquid
    • Optional: Setting spray or eye drops

    How to Make Your Own Eyeliner from Eyeshadow

    1. Prep Your Brush
      Start by dampening your fine-tipped applicator brush with water. Make sure the brush isn’t soaking wet—just a little moisture to help the eyeshadow stick and form a smooth, creamy texture.
    2. Dip the Brush in Eyeshadow
      Next, gently roll your brush into your eyeshadow of choice. You want the mixture to have a chalky consistency, so shake off any excess to avoid clumps.
    3. Apply Primer (Optional)
      If you want your eyeliner to last longer and go on smoothly, consider applying a thin layer of eye primer (like Mac Prep + Prime) to your eyelids. This helps your DIY eyeliner stay put all day.
    4. Use a Stiff Brush for Precision
      For the most even and precise lines, use a brush with stiff bristles. A fine angled eyeliner brush is perfect for creating sharp lines. If you don’t have a brush, you can also use your finger for a softer line.

    Alternatives to Water for Mixing

    While water is a simple and effective option, there are a few other liquids that can give your eyeliner a more long-lasting finish:

    1. Eye Drops
      Using eyedrops (such as Refresh Optive) is a great alternative because they are gentle on the eyes and help create a smooth eyeliner consistency. They’re easy to use and often already in your medicine cabinet.
    2. Setting Spray
      If you want your eyeliner to stay in place all day, try using a setting spray (like Urban Decay’s All Nighter). You can either spray it directly onto your eyeliner brush or use it after applying the shadow to lock in the look.

    Tips for Creating Sharp, Defined Lines

    If you’re aiming for a sharp, precise eyeliner look, these tips will help:

    • Use a fine angled brush: This will make it easier to get close to your lash line and create a thin, defined line.
    • Short strokes work best: Apply the eyeliner in small strokes along the lash line for the most even coverage.
    • Fix mistakes quickly: If you make a mistake, don’t panic! Use a Q-tip with a bit of makeup remover to clean up any errors and redefine your lines.

    Tips for a Smoky, Smudged Look

    If you prefer a softer, smudgy eyeliner look, go for dry eyeshadow rather than dampened shadow. Here’s how to do it:

    • Apply with a stiff-bristled brush: Use a stiff brush to load up the eyeshadow, then knock off the excess. Start at the base of your lashes and apply small strokes upwards.
    • Smudge the shadow: Once the shadow is applied, use a soft brush or even your finger to gently smudge it for a smoky effect. This creates a sultry, diffused look that’s perfect for a relaxed, evening style.

    Using Stencils for Perfect Symmetry

    If you struggle with getting your eyeliner symmetrical, using a stencil can be a game-changer. You can buy an eyeliner stencil set or make your own with a piece of paper. Draw the desired shape on the paper, then tape it to your face to guide the application of your eyeshadow. This ensures both eyes are identical, helping you achieve flawless lines every time.

    Remember to Clean Your Brushes

    When working around your eyes, cleanliness is crucial. Always clean your brushes regularly to avoid irritation or infection. Wash them weekly with a brush cleanser or even a dab of shampoo to keep them in top condition.

    Conclusion

    Transforming your eyeshadow into eyeliner is an easy way to experiment with new colors and looks without buying additional products. Whether you’re aiming for bold lines or a more blended, smoky vibe, this DIY technique is versatile, customizable, and fun. By following these simple tips and using the right tools, you’ll be able to create stunning eyeliner looks with ease.

  • How to Heal Acne Scabs: 6 Effective Tips and Products

    How to Heal Acne Scabs: 6 Effective Tips and Products

    If you’ve ever popped a pimple, you know the aftermath—a scab that just won’t go away. While you might try to cover it up with makeup, that unsightly scab can be stubborn, and no amount of concealer seems to help. If you’re dealing with overzealous scabbing, it’s essential to know how to speed up the healing process and take proper care of your skin.

    Let’s dive into how to heal acne scabs effectively, along with some useful tips to prevent them from lingering longer than necessary.

    Do Acne Scabs Heal on Their Own?

    Yes, acne scabs typically heal on their own. When you damage your skin, such as by popping a pimple, your body forms a scab to protect the wound from bacteria and prevent infection. It’s your skin’s natural healing process, so it’s important to resist picking at the scab to allow it to do its job. Over time, with the right care, your scabs will heal, and new skin will emerge underneath.

    However, a few factors can slow down healing:

    • Trauma to the follicle: Constant plucking or improper removal can damage the hair follicle, which may prevent hair from growing back.
    • Vitamin deficiencies: Lack of essential vitamins like B, C, D, and iron can impair your skin’s healing.
    • Stress and poor diet: A balanced diet and stress management are key to supporting skin recovery.
    • Age: As we age, some follicles stop producing new hair, slowing the healing process.

    If your acne scabs are a one-time issue, they will most likely heal within a few weeks without major complications.

    How Long Does It Take for Acne Scabs to Heal?

    Typically, it takes about 3 to 7 days for a scab to heal. The exact time can vary based on your skin’s overall health and how deep the scab is. For the scab to completely fall off and reveal healthy skin beneath, the process may take up to four months, depending on your age and skin condition. You’ll likely see some regrowth and healing within 4 to 8 weeks.

    Tips to Speed Up the Healing of Acne Scabs

    While your skin is doing its thing, there are a few steps you can take to help accelerate the healing process:

    1. Keep Your Skin Moisturized
      Moisture is key for healing. Applying petroleum jelly or Vaseline to the scab helps keep it hydrated and speeds up the healing process. Moist skin heals faster and more efficiently.
    2. Cleanse Your Skin Gently
      Avoid further irritation by cleaning your face gently with warm (not hot) water. Pat your face dry instead of rubbing to prevent dislodging your scab prematurely.
    3. Skip Makeup
      Applying makeup to broken skin is tempting, but it can slow down healing and irritate the scab. If you must cover it up, try using breathable makeup that doesn’t clog pores. However, leaving your skin bare and allowing it to heal is the best option.
    4. Try Hydrocolloid Bandages
      These small, sticky patches are excellent for keeping scabs moist and promoting faster healing. They absorb excess fluid and create a favorable environment for scabs to heal. Simply apply one before bed and let it work overnight.
    5. Use a Warm Compress
      Applying a warm compress to the area can help improve blood circulation and speed up cell regeneration. It can also help reduce itching, which is a common problem when healing scabs.
    6. Avoid Touching the Scab
      As tempting as it might be, resist the urge to pick or scratch at the scab. Doing so will only delay the healing process and may cause scarring. If the temptation is overwhelming, cover the scab with a bandage to keep your hands away.

    What to Do If You Picked Your Scab

    If you’ve already picked at your scab, don’t panic. A new scab will form, but you may have to start the healing process again. Picking the scab increases the risk of scarring, so it’s essential to be patient and give your skin time to recover.

    Once the scab has healed, you can treat any potential scars with natural oils or scar treatments to lighten them and make them less noticeable.

    Preventing Acne Scabs in the Future

    While you can’t prevent pimples from occurring, there are steps you can take to reduce the chances of developing scabs:

    1. Always Cleanse Your Skin at Night
      Whether you wear makeup or not, always cleanse your face before bed to remove dirt, oil, and bacteria that can clog pores and lead to pimples.
    2. Avoid Touching Your Face
      Constantly touching your face transfers bacteria from your hands to your skin, leading to breakouts. Break this habit to keep your skin clean and clear.
    3. Check Your Hair Products
      Some hair products, especially those with oils or fragrances, can transfer to your skin and clog pores, leading to breakouts. If you often experience pimples on your forehead, your hair products could be to blame.

    Conclusion

    Dealing with acne scabs can be frustrating, but with proper care, they’ll heal in no time. Avoid picking at them, keep your skin moisturized, and follow these simple tips to speed up the healing process. With a little patience, your skin will be back to normal and scab-free.

  • How to Fix Over-Plucked Eyebrows: A Step-by-Step Guide

    How to Fix Over-Plucked Eyebrows: A Step-by-Step Guide

    If you’ve ever found yourself lost in the mirror, trying to get that “one” stray hair and ending up with over-plucked eyebrows, you’re not alone. While this might be a common mistake, it’s one that can be fixed! If you’re not heading to a ’90s costume party, you probably want to restore your brows as quickly as possible. Though there’s no instant fix, there are several steps you can take to help your brows recover and grow back beautifully.

    Do Over-Plucked Eyebrows Grow Back?

    The good news is yes, over-plucked eyebrows generally grow back. However, there are a few factors that could affect the regrowth process:

    1. Trauma: Constantly plucking or waxing can cause damage to the hair follicle, which could prevent hair from growing back.
    2. Vitamin Deficiency: Lack of essential vitamins like B, C, D, and iron can hinder hair growth.
    3. Stress and Diet: A balanced lifestyle, including a healthy diet and stress management, is key to supporting hair growth.
    4. Age: As we get older, some hair follicles stop producing new hair, which can slow down eyebrow regrowth.

    If your over-plucked brows are a one-time mistake, your hair will most likely grow back without issue. Just be patient!

    How Long Does It Take for Eyebrows to Grow Back?

    Eyebrow hair grows in three stages: Anagen (growth), Catagen (transition), and Telogen (resting). On average, it takes about three to four months for eyebrows to fully grow back. You’ll start seeing some regrowth after 4 to 8 weeks, but it can take a bit longer to fill in the areas where hair was over-plucked.

    How to Stimulate Eyebrow Growth

    To help speed up the process and encourage your brows to grow back faster, try these methods:

    1. Aloe Vera: Known for its skin benefits, aloe vera is also great for stimulating hair follicles. It’s rich in calcium and magnesium, which promote faster hair growth.
    2. Biotin: This popular supplement helps promote healthier skin, hair, and nails. Consider adding it to your routine to support eyebrow regrowth.
    3. Castor Oil: While not scientifically proven, many people swear by castor oil for encouraging hair growth. It’s often used to help with thinning hair.
    4. Healthy Diet: Eating a diet rich in healthy fats (like olive oil and coconut oil), peptides, and vitamins (especially vitamin E) can support hair growth.
    5. Latisse and Rogaine: These products are well-known for promoting hair growth, but they can come with side effects, such as unwanted hair growth in areas where you don’t want it. Use them cautiously, especially on your face.

    How to Fix Over-Plucked Eyebrows Quickly

    While waiting for your brows to grow back, you can use makeup to fill in any sparse areas. Here are some quick tips to help you achieve a fuller look:

    • Use an eyebrow pencil with an angled brush to fill in gaps.
    • For a more natural look, use liquid eyeliner (matching your brow color) to draw small strokes that mimic hairs.
    • Apply eyebrow gel to shape and define your brows.
    • Use a clean mascara wand with eyeshadow in a matching color to add volume and blend the color seamlessly.
    • Brush your brows upward to create a fuller, lifted appearance.

    If your eyebrow follicles were damaged and hair isn’t growing back, microblading could be a good solution. This semi-permanent procedure creates natural-looking brows by tattooing hair-like strokes into your skin.

    How to Avoid Over-Plucking Your Eyebrows

    Once your eyebrows are restored, you’ll want to avoid over-plucking again. Here are some tips to keep your brows looking natural:

    • Avoid using a magnifying mirror. It can make you obsess over every tiny hair and lead to over-plucking.
    • Pluck your brows after you shower, when your skin is softer and the hairs are easier to remove.
    • Use tweezers with a fine point or an angled edge to grab one hair at a time, giving you more control.
    • Remember, your eyebrows are meant to be sisters, not twins. Don’t stress about making them perfectly symmetrical.

    Conclusion

    Thin brows may be in style for some, but over-plucking can lead to an unwelcome brow disaster. If you’ve found yourself in this situation, don’t worry—your brows will likely grow back with a bit of time and care. In the meantime, use makeup to fill in the gaps, and consider professional treatments like microblading if necessary. Share these tips with your friends or family, so they can avoid or fix over-plucked brows too!