博客

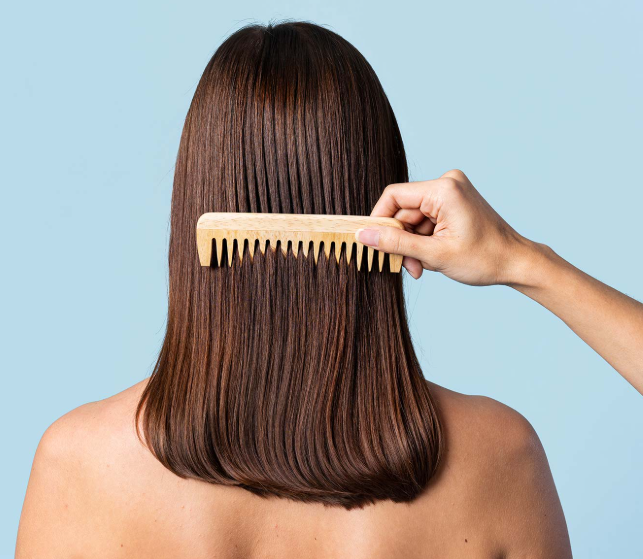
  • A Comprehensive Guide to Hair Extensions: What You Need to Know

    A Comprehensive Guide to Hair Extensions: What You Need to Know

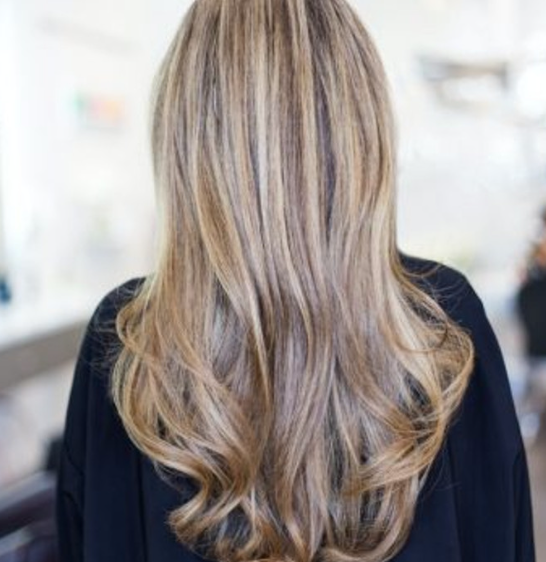
    If you’ve ever chopped your hair off on a whim only to regret it later, you’re not alone. We’ve all had those moments when we impulsively cut our hair and wish we could undo it. Thankfully, there’s a solution—hair extensions! While extensions have gotten a bad rap for causing damage and hair loss, when done correctly, they can enhance your look without harm. The key is choosing the right type for your hair and maintaining them properly.

    Understanding Hair Extensions

    Before diving into the types of hair extensions, it’s essential to know that the choice of hair—whether human or synthetic—can make a significant difference. Let’s break down the basics.

    Human Hair vs. Synthetic Hair

    Human Hair: As the name suggests, this type of hair is made from real human hair. The benefits of human hair extensions include their natural texture, ability to be styled with heat, and long-lasting wear. They’re versatile—allowing you to color, curl, and straighten them just like your natural hair. With proper care, human hair extensions can last up to a year.

    Synthetic Hair: These extensions are made from synthetic fibers designed to mimic real hair. While they are more affordable, they come with a few downsides. For example, synthetic hair cannot withstand heat styling, and it tends to be less durable, often lasting only a few months. They also can’t be color-treated since the chemicals can break down the fibers.

    If you’re looking for a temporary style for an event, synthetic hair may be sufficient. However, if you plan on wearing extensions for an extended period, human hair is generally the better investment.

    Types of Hair Extensions

    There are several types of hair extensions, each with its pros and cons. Understanding these can help you make an informed decision.

    1. Tape-In Extensions

    Tape-in extensions are applied by sandwiching small sections of hair between strips of adhesive tape. This method is popular due to its relatively quick application and natural-looking results. However, you need to avoid oils or heavy conditioning products near the roots, as they can loosen the tape. These extensions typically last 6-8 weeks before needing to be reapplied.

    2. Sew-In (Weave) Extensions

    Sew-in extensions involve braiding your natural hair into cornrows, then sewing the extensions into the braids. This method is ideal for thicker hair and provides a seamless look. However, it can be time-consuming and is best performed by a professional to avoid scalp strain. Sew-in extensions are a more permanent solution, lasting anywhere from 8 to 10 weeks before needing maintenance.

    3. Clip-In Extensions

    Clip-in extensions are one of the easiest and most affordable options. These are temporary extensions that clip directly into your hair, providing instant volume and length. Clip-ins are a great choice for a temporary change, as they’re easy to apply and remove. However, they require some careful styling to ensure the clips don’t show. These extensions can last up to a year with proper care.

    4. Microlink Extensions

    Microlink extensions are applied using small beads that attach the hair to your natural strands without the need for glue or heat. The process is relatively gentle on the scalp, and these extensions can last up to 4 months with proper maintenance. However, they do require professional application, and if the beads are too tight, they can cause discomfort or even hair breakage.

    5. Halo Extensions

    Halo extensions are a non-invasive option that sits on your head like a headband. They don’t require any attachments to your natural hair, making them a low-damage option for adding length and volume. Halo extensions are easy to apply and remove and are great for short-term use, especially for those who want a no-fuss option for events. They’re also perfect for anyone worried about damaging their natural hair.

    How to Maintain Your Extensions

    Regardless of the type of extension you choose, proper care is essential to ensuring they last as long as possible. Here are a few tips:

    • Hydrate your scalp: For extensions like sew-ins, make sure to nourish your scalp to avoid irritation and keep your hair healthy.
    • Use the right products: Avoid heavy oils or conditioners near your extensions, especially tape-ins and microlinks, as these can cause the extensions to slip out or lose their effectiveness.
    • Regular touch-ups: Extensions require regular maintenance, so make sure to visit your stylist for reapplication or adjustments to keep your extensions looking fresh.
    • Wash carefully: Whether you have synthetic or human hair extensions, washing them gently is key to preventing tangling and breakage.

    Final Thoughts

    Hair extensions can be a game-changer for adding length, volume, and texture to your hair, but it’s crucial to choose the right type for your needs. Whether you go for the natural look of human hair or the convenience of synthetic extensions, understanding the various types and how to maintain them will help you enjoy your new style for longer. Always consult with a professional stylist to ensure your extensions are applied and cared for properly, and you’ll be rocking luscious locks in no time!
  • Are Pore Strips Harmful to Your Skin?

    Are Pore Strips Harmful to Your Skin?

    Blackheads and acne are common skin concerns that can have a significant impact on self-esteem, especially in today’s world where clear skin is often the standard. With so many beauty products and skincare solutions available, it’s easy to fall for quick fixes that promise instant results. One of the most popular treatments for blackheads are pore strips, but are they truly effective, and could they be damaging to your skin?

    How Do Pore Strips Work?

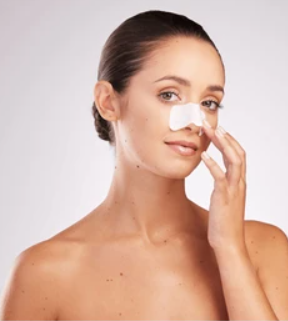
    Pore strips are designed to target enlarged pores, usually around the nose area, and help remove impurities like dirt and dead skin cells. These strips work by adhering to the surface of your skin with an adhesive. When removed, they pull away the superficial debris and, to some extent, shrink the appearance of your pores.

    However, while pore strips can remove surface-level buildup, they don’t actually eliminate the blackhead itself. Blackheads are formed when the sebaceous filaments and oil in the pores become clogged, and pore strips only address the top layer of that blockage. The deeper blockage remains, meaning that the blackhead will likely return after a short time.

    Are Pore Strips Bad for Your Skin?

    Although pore strips can be satisfying to use and may provide temporary results, they come with some potential drawbacks. The adhesive used in these strips can cause skin irritation and redness, especially for those with sensitive skin. If you have conditions like rosacea, eczema, or psoriasis, pore strips may exacerbate these issues.

    Additionally, many pore strips contain alcohol, which can further dry out your skin and strip away its natural protective barrier. While pore strips aren’t likely to cause severe harm, they’re not the most effective solution for long-term skin health, and they can aggravate existing skin problems.

    In short, while they aren’t necessarily “bad” for your skin, pore strips are a short-term fix for a long-term issue and should be used sparingly.

    How to Effectively Treat Blackheads

    If you’re looking to address blackheads more permanently, there are more effective treatments available than pore strips. Chemical exfoliants like salicylic acid and glycolic acid work wonders in unclogging pores, improving skin texture, and preventing new blackheads from forming.

    Salicylic Acid is a well-known ingredient for treating blackheads. It helps break down the buildup inside the pores, making it an essential part of any acne-fighting skincare routine. Products like the Clinique Acne Solutions Clarifying Lotion and CeraVe SA Cleanser contain salicylic acid and are gentle yet effective in clearing up blackheads.

    For those looking for a stronger treatment, glycolic acid is another great option. The Saturday Skin Pore Clarifying Toner uses 10% glycolic acid to exfoliate the skin and minimize pore appearance. Glycolic acid is perfect for removing dead skin cells, giving you a smoother, clearer complexion.

    For stubborn blackheads that persist, retinoids can be a game changer. Retinoids speed up skin cell turnover, preventing pores from clogging and clearing up existing blockages. Stronger retinoids may require a prescription, but there are effective over-the-counter options like Differin Adapalene Gel 0.1% that can help prevent new blackheads and breakouts.

    Final Thoughts

    While pore strips may seem like a quick fix, they only address surface-level skin concerns and can even worsen some skin conditions. For long-lasting results, it’s better to focus on ingredients like salicylic acid, glycolic acid, and retinoids that can treat blackheads at their root. By switching to more effective, targeted skincare products, you’ll see better results without causing irritation or damage to your skin.

  • How to Add Sparkle to Your Holiday Hair with Glitter and Tinsel

    How to Add Sparkle to Your Holiday Hair with Glitter and Tinsel

    As the holiday season approaches, it’s time to get your glam on, and what better way to shine than by adding some sparkle to your hair? Whether you’re gearing up for a festive party or just want to elevate your everyday style, glitter hair sprays and hair tinsel are two fun and easy ways to add some shine and glamour to your look.

    What Is Hair Tinsel?

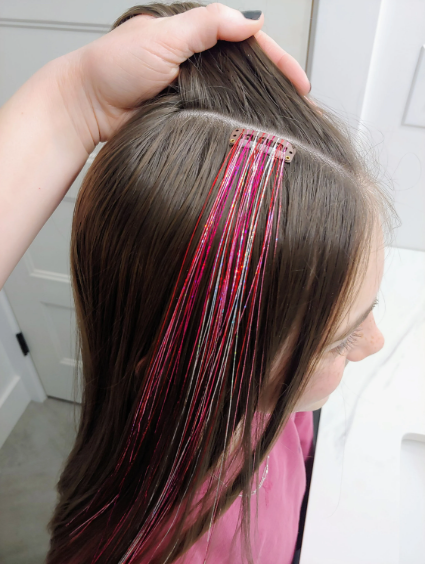
    Hair tinsel is exactly what it sounds like: thin strands of shimmering material that are attached to your hair to add a dazzling effect. It’s a fun and unique way to make your hairstyle pop, especially for special occasions. The strands of tinsel reflect the light, creating a subtle yet eye-catching sparkle in your hair. It’s a fun throwback to the early 2000s, offering a nostalgic vibe while giving your look a chic, glamorous boost.

    Hair tinsel is surprisingly affordable, and the process of adding it to your hair is easier than you might think. One great option is a 47-inch hair extension tinsel kit that comes in 12 colors, perfect for adding some extra sparkle. You can find tutorials online to guide you through the process, and once you get the hang of it, it’s simple to apply.

    Glitter Hair Sprays: Quick and Easy Glam

    If you’re pressed for time or want an easy way to add sparkle without the commitment of tinsel, glitter hair sprays are a fantastic option. These sprays provide an instant, mess-free way to make your hair shimmer and shine. They come in a variety of formulas and shades, so you can choose one that fits your desired look. Plus, they’re quick to apply and easy to remove when you’re done.

    Here are some popular options for glitter hair sprays that are perfect for the holiday season:

    1. Manic Panic Stardust Body and Hair Glitter Spray
      This vegan and cruelty-free glitter spray adds a high-shine sparkle to your hair, and it works on all hair colors. It dries quickly, so you don’t need to worry about glitter fallout, and it washes out easily with shampoo. Available in multiple colors, it’s a versatile product for any holiday look.
    2. Got2b Glow’rious Metallic Shimmer Hair & Body Glitter
      If you’re looking for a metallic finish, this product is for you. Got2b’s metallic shimmer spray gives your hair a radiant, vibrant shine. It’s easy to control the intensity of the glitter, allowing you to adjust the sparkle depending on how far you spray from your hair.
    3. Ebin Egyptian Diamond Hair & Body Glitter Mist Spray
      This hydrating glitter mist not only adds sparkle but also moisturizes your hair. Available in multiple shades, such as platinum diamond, gold, and rose gold, it’s perfect for creating a glamorous, glowing look without any crunchiness. Plus, it dries fast and doesn’t leave a mess.
    4. Electric Bliss Beauty Holographic Glitter Spray
      For the ultimate in glam, Electric Bliss Beauty offers a holographic glitter spray with a wide range of shades. This multi-purpose glitter spray is cosmetic grade and vegan, and it gives off stunning, iridescent hues of blue, pink, and purple, depending on the angle of the light. It’s a great option for creating a statement look.
    5. Unicorn Snot Holographic Glitter Gel
      If you’re looking for a more flexible product, this glitter gel is easy to apply and doesn’t require any adhesive. Simply use your fingers to apply it wherever you want a touch of sparkle. The gel dries clear, leaving behind a shimmering, stardust-like finish. It’s lightweight, long-lasting, and easy to wash off with shampoo.

    Final Thoughts

    Whether you opt for the glitzy allure of hair tinsel or the quick shine of glitter spray, these products are a fun and festive way to elevate your hairstyle this holiday season. Both options offer an easy way to add some sparkle to your hair, making you stand out at any holiday party or gathering. With these products, you’ll be ready to shine bright all season long.

  • TikTok’s Latest Trend: The Return of White Concealer!

    TikTok’s Latest Trend: The Return of White Concealer!

    TikTok has once again brought back a bold beauty trend that’s capturing everyone’s attention: white concealer. If you’re up to date with the latest makeup crazes, you’ll know that this throwback trend is making a major comeback. White concealer was once a staple in the makeup bags of A-list celebrities back in the late ’90s and early 2000s, known for brightening the under-eye area and creating a flawless, glowing look. But now, it’s back in action, and people are experimenting with it in new ways. So, why is everyone so obsessed with white concealer right now?

    What Exactly Is White Concealer?

    White concealer is exactly what it sounds like—a stark, pure white formula used to brighten the skin, particularly the under-eye area. Traditionally, concealers are one or two shades lighter than your natural skin tone to give you a youthful, glowing look. But white concealer takes it up a notch, offering a more intense brightening effect. Instead of applying it on top of foundation like regular concealers, white concealer works best when applied underneath your base to avoid a harsh, unblended look.

    This trend has been fueled by beauty influencers like NikkieTutorials, who took to Instagram to showcase the powerful results of white concealer. Her endorsement has inspired many others to give it a try, adding a playful and dramatic twist to their makeup routines.

    When to Use White Concealer

    White concealer isn’t for everyone. If you prefer a natural, minimalist makeup routine, this might not be the product for you. However, if you love bold, high-coverage looks, white concealer can be a game changer. It brightens dark circles, conceals blemishes and redness, and even gives a lifting effect to the eye area. Essentially, it acts like a highlighter in a concealer form.

    Besides its under-eye use, white concealer can double as an eyeliner, help lighten summer foundation, and be used creatively in other makeup looks. It’s a versatile product that’s making waves in the beauty world.

    Best White Concealers to Try

    If you’re curious to try out this trend, you’ll want to pick up a good white concealer. Here are some highly recommended options that deliver on both coverage and blendability.

    1. ColourPop No Filter Matte Concealer in Pure White
      ColourPop’s No Filter Matte Concealer in Pure White is a top pick for those wanting a full-coverage, long-wearing concealer at an affordable price. This creamy, matte formula provides high coverage and works perfectly for brightening the under-eye area or highlighting key points on the face.
    2. KVD Beauty Lock It Concealer Crème – White Out
      KVD Beauty’s Lock It Concealer Crème in White Out is another fan favorite. Known for its intense pigment and creamy consistency, this concealer offers full coverage and a smooth, blendable finish. It’s also praised for its 24-hour wear, making it a reliable option for all-day use.
    3. E.L.F. Cosmetics 16HR Camo Concealer – True White
      For a budget-friendly option, the E.L.F. Cosmetics 16HR Camo Concealer in True White is an excellent choice. This crease-proof formula provides full coverage and a matte finish without settling into fine lines. It’s lightweight but pigmented enough to give you the coverage you need without feeling heavy on the skin.
    4. L.A. Girl Pro Conceal – Flat White
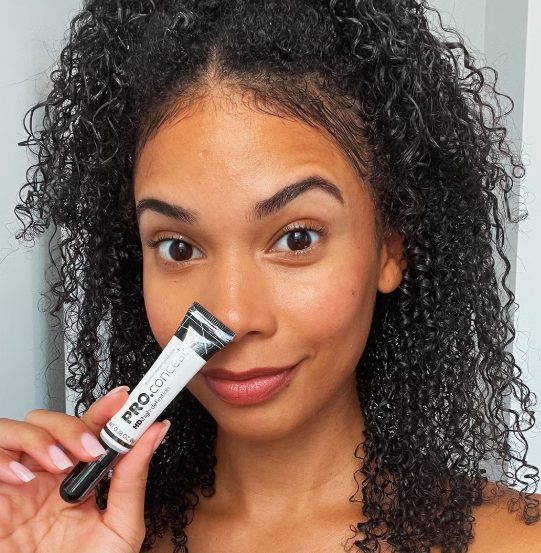
      L.A. Girl Pro Conceal in Flat White is another affordable, highly-pigmented option. This creamy concealer blends seamlessly into the skin, providing a natural finish while still offering the brightness you need. It’s a great pick for those looking for a reliable product at an even more budget-friendly price.

    Final Thoughts

    White concealer is one of those products that might seem intimidating at first, but once you try it, you’ll see the potential it has to transform your makeup routine. Whether you’re looking to brighten your under-eye area, create a flawless base, or experiment with creative makeup looks, white concealer can be a fun and versatile addition to your makeup kit. Just remember, this trend is all about boldness and coverage, so if you’re ready to take your makeup game to the next level, give it a shot!

  • Razor Burn: Causes, Treatment, and How to Heal It Fast

    Razor Burn: Causes, Treatment, and How to Heal It Fast

    Razor burn is a common irritation that many of us experience after shaving, and it can be incredibly uncomfortable. While it’s often a result of shaving, it can also occur for several reasons, including using the wrong shaving products or techniques. If you’ve ever dealt with redness, itching, or burning after shaving, you’re not alone. Here’s what you need to know about razor burn and how to treat it.

    What Causes Razor Burn?

    Razor burn occurs when the skin becomes irritated after shaving. This irritation can manifest as redness, a burning sensation, itchiness, or bumps. Several factors can contribute to razor burn:

    1. Shaving Products
      Using the wrong shaving products can lead to irritation. Shaving creams or gels that don’t provide adequate lubrication can cause the razor to drag across the skin, leading to razor burn. Always use a shaving cream or gel that creates a barrier between the razor and your skin.
    2. Dry Shaving
      Shaving without a proper lubricant is one of the quickest ways to get razor burn. Make sure to use shaving cream, lotion, or a thick conditioner to help the razor glide smoothly.
    3. Exfoliation
      Skipping exfoliation can also cause razor burn. When you shave, dead skin cells can block the razor from making a clean cut. Exfoliating beforehand removes this buildup and prevents the razor from snagging, leading to a smoother shave and less irritation.
    4. Using an Old or Dull Razor
      A dull razor blade can tug at your hair, leading to painful irritation. Always ensure that your razor blades are sharp and clean. Replace your blades regularly to reduce the risk of razor burn.
    5. Shaving Technique
      How you shave also plays a major role. Shaving too quickly, applying too much pressure, or shaving against the grain can all increase your chances of getting razor burn. Make sure you’re using gentle strokes and shaving in the direction your hair grows.

    How Long Does Razor Burn Last?

    Razor burn typically lasts for a few days, depending on the severity. While it usually resolves on its own, there are a few things you can do to speed up the healing process.

    Applying a cold compress to the affected area can help reduce redness and inflammation, providing immediate relief from the burning and itching sensations. If you prefer a more natural remedy, moisturizers or oils like coconut oil can soothe the skin and help it heal faster, though they can leave a greasy residue.

    For a quick-absorbing moisturizer, try products like Lubriderm Daily Moisture Lotion, which hydrates the skin without leaving it sticky. Alternatively, Jergens Ultra Healing Dry Skin Lotion is also a great option, as it works deep within the skin to heal dry, irritated areas.

    How to Treat Razor Burn

    There are several ways to treat razor burn and get relief faster:

    1. Cold Compress
      Applying a cold compress to the affected area can reduce swelling and calm the skin. The coolness helps with inflammation, providing immediate comfort and speeding up the healing process.
    2. Moisturize
      Keeping the affected skin moisturized is key to healing razor burn. Use a non-greasy, hydrating lotion that will soothe the skin and promote healing. Look for products with vitamin B5 or vitamin E, as these ingredients help replenish the skin’s moisture and improve skin texture.
    3. Aloe Vera
      Aloe vera is a tried-and-true remedy for soothing irritated skin. It has anti-inflammatory properties and is great for calming the skin, reducing redness, and helping the skin heal faster. Apply pure aloe vera gel to the affected area to cool and hydrate the skin.
    4. Avoid Further Irritation
      While your skin heals, avoid shaving the area again and be gentle when washing the skin. Harsh products, hot water, or scrubbing can make the irritation worse, so take care to treat your skin gently.

    Preventing Razor Burn in the Future

    To prevent razor burn in the future, consider the following tips:

    • Shave with the grain: Shaving in the direction your hair grows reduces irritation.
    • Use sharp razors: Replace your razor blades regularly to avoid dullness and friction.
    • Hydrate: Always use a good shaving cream or gel to create a barrier between your razor and skin.
    • Exfoliate: Exfoliating before you shave helps remove dead skin cells, allowing the razor to glide smoothly.

    By following these tips and properly caring for your skin, you can avoid razor burn and enjoy a smoother, more comfortable shave.

  • Dealing with Dry Lips During Pregnancy: Causes, Solutions, and Top Products

    Dealing with Dry Lips During Pregnancy: Causes, Solutions, and Top Products

    Pregnancy is a beautiful time, but it often comes with some unexpected changes, including the dreaded dry lips. While glowing skin is often celebrated, many women experience dry, chapped lips, especially during the course of their pregnancy. If you’re dealing with this discomfort, don’t worry—it’s a common issue that’s easy to manage. Here’s why it happens and how you can soothe your lips during this time.

    Why Do Lips Get Dry During Pregnancy?

    Dry lips during pregnancy may seem like a surprising side effect, but it’s a fairly common one. There are several reasons why this happens, and understanding the cause can help you manage it more effectively.

    1. Dehydration
      As your body works to nourish your growing baby, your fluid needs increase. If you’re not drinking enough water, dehydration can set in, leading to dry lips and skin. It’s important to stay hydrated, especially during pregnancy, as it supports both your health and your baby’s development.
    2. Changes in Your Body
      As your body changes to accommodate the baby, your skin may stretch and become thinner, leading to dryness. This can extend to your lips, causing them to feel dry, cracked, and sensitive.
    3. Increased Blood Volume
      During pregnancy, your blood volume increases by up to 50%, which can lead to higher blood sugar levels and frequent urination. This combination can result in dehydration, further contributing to dry lips.
    4. Water Retention
      In the later stages of pregnancy, your body retains more water, which can lead to bloating and stretched skin. This often results in dryness, especially around your lips and other areas of your skin.

    While dry lips are usually nothing to worry about, if they become severe or persist, it could indicate an underlying issue like iron deficiency or gestational diabetes. If this happens, it’s always best to consult your healthcare provider.

    Tips for Relieving Dry Lips During Pregnancy

    Dry, cracked lips can start early in pregnancy and may last throughout, but there are several ways to alleviate this discomfort.

    1. Stay Hydrated
      The most important remedy for dry lips is staying hydrated. Aim for at least 8-12 glasses of water a day. If you struggle to drink enough, try infusing water with fruits or vegetables, or eating hydrating foods like cucumbers and watermelon.
    2. Use a Natural Lip Balm
      Choosing the right lip balm is crucial. Look for products that contain natural, moisturizing ingredients like coconut oil, shea butter, or cocoa butter. These ingredients help lock in moisture and keep your lips soft. Always check that your lip balm is free of harmful ingredients like formaldehyde or salicylic acid.
    3. Avoid Harsh Skin Products
      During pregnancy, it’s best to avoid strong skincare products that might exacerbate dryness. Opt for gentle, fragrance-free soaps and mild skincare products to prevent irritating your skin further.
    4. Breathe Through Your Nose
      Pregnancy can cause swelling in the mucous membranes, making it harder to breathe through your nose. As a result, many pregnant women find themselves breathing through their mouths, which can dry out their lips. Whenever possible, try to breathe through your nose to keep your lips from getting drier.
    5. Keep Lip Balm Handy
      Whether you’re at home or in labor, always keep a good lip balm within reach. The dryness can worsen as you progress through pregnancy, and having your balm on hand can provide immediate relief whenever you need it.

    Top 5 Products for Dry Lips During Pregnancy

    If you’re looking for the best products to manage dry lips during pregnancy, here are some tried and tested options:

    1. Coconut Oil
      This natural moisturizer is incredibly effective for dry lips. Coconut oil hydrates and helps seal in moisture, leaving your lips feeling soft and nourished.
    2. Cocoa Butter
      Cocoa butter is another great natural option. It’s rich in fatty acids that help keep skin moisturized, making it ideal for dry, chapped lips during pregnancy.
    3. Lansinoh HPA Lanolin Nipple Cream
      Although this product is designed for breastfeeding, it’s excellent for dry lips as well. Its rich, thick texture helps to deeply hydrate and repair cracked lips.
    4. Peptides
      Look for lip balms or creams containing peptides, as these can help stimulate collagen production, keeping your lips looking smooth and full.
    5. Hyaluronic Acid
      Hyaluronic acid is a powerful ingredient known for its ability to draw moisture into the skin. It can provide deep hydration for dry lips, helping them stay plump and moisturized throughout the day.

    Final Thoughts

    Dry lips during pregnancy are common, but they don’t have to be a major concern. With the right hydration, skincare products, and a little extra care, you can keep your lips soft and smooth throughout your pregnancy. If dryness persists or becomes severe, be sure to talk to your healthcare provider to rule out any underlying issues.

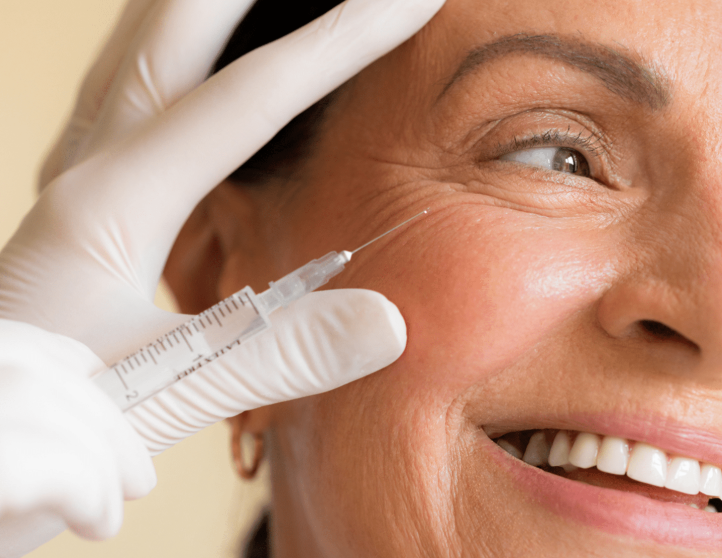
  • Baby Botox: Cost, Benefits, and What You Need to Know

    Baby Botox: Cost, Benefits, and What You Need to Know

    Botox has been a staple in the beauty world for years, primarily popular among those over 50. However, the trend has shifted, and more younger individuals are opting for Botox to prevent signs of aging before they even appear. While Botox is effective, it can be pricey, and sometimes the results can leave you with a stiff or frozen appearance. Enter Baby Botox – a subtle alternative for those who want to refresh their look without the dramatic change.

    What is Baby Botox?

    Baby Botox is essentially a smaller, more refined dose of Botox. Unlike traditional Botox, which uses larger amounts to target deeper wrinkles, Baby Botox focuses on micro-doses that provide a more natural, youthful look. The goal is to smooth out fine lines and prevent wrinkles without losing the ability to make facial expressions.

    While it’s not for babies (despite the name), Baby Botox offers a delicate approach to facial rejuvenation. It works by subtly relaxing the muscles, allowing the face to remain mobile while still reducing the appearance of lines, giving you a youthful glow without the “frozen” look that sometimes comes with traditional Botox.

    How Does Baby Botox Differ from Regular Botox?

    Both Baby Botox and traditional Botox contain the same active ingredient, botulinum toxin, but the key difference lies in the dosage. Baby Botox uses smaller, more precise injections of Botox, usually in micro-droplets, that don’t completely freeze the muscle. This technique results in a softer, more natural look while still reducing wrinkles.

    Baby Botox is ideal for treating areas like crow’s feet, frown lines, and even wrinkles around the mouth and chin. It can also be used to address excess sweating and tighten the skin on the neck or decolletage.

    Who Should Consider Baby Botox?

    Dermatologists often recommend starting Baby Botox treatments in your mid-to-late twenties (around 25 years old) as a preventative measure. The idea is to act before deep wrinkles form, allowing you to maintain a youthful look for years to come. Starting at this age can prevent the formation of permanent lines and wrinkles, keeping your skin smooth without the need for more invasive treatments later on.

    Though it may sound drastic, beginning Baby Botox early can help “train” your facial muscles to avoid wrinkles. By starting with small doses, you can keep your skin wrinkle-free without fully freezing your facial expressions.

    What Does Baby Botox Cost?

    The cost of Baby Botox varies depending on factors like the practitioner’s experience and the number of areas treated. Typically, Baby Botox is more affordable than traditional Botox, as fewer units are required. However, pricing can still be similar if you’re seeing an expert with a high level of skill, as you’re paying for their expertise and precise technique rather than just the product.

    It’s crucial to choose a skilled practitioner who understands facial anatomy and can administer the injections correctly. This ensures that you get the best results without any unexpected side effects.

    How Long Does Baby Botox Take to Show Results?

    Baby Botox usually takes a bit longer to show full results compared to regular Botox, but you can typically expect to see improvements within 2 to 3 days. The results are not permanent, and Baby Botox typically lasts around 3 months. After this period, your muscles will gradually return to their natural state, allowing you to begin seeing wrinkles and expression lines again.

    Baby Botox works best as a preventative treatment, so if you begin early, the effects can last much longer, potentially helping you avoid more pronounced wrinkles down the road. For many, yearly touch-ups are enough to maintain a smooth, youthful appearance.

    Tips for Maximizing Your Baby Botox Results

    1. Stay Hydrated: Drinking plenty of water helps your skin stay hydrated and supports the effectiveness of your treatment.
    2. Maintain a Solid Skincare Routine: Use a good sunscreen (SPF 50), hydrating moisturizer, and vitamin C serum to protect and nourish your skin alongside your Baby Botox treatment.
    3. Do Your Research: Before booking your appointment, talk to your practitioner about your goals and ask to see before-and-after photos of their previous work. This will help ensure you’re comfortable with their approach.
    4. Avoid Heavy Makeup on the Day of Your Appointment: Going makeup-free will allow the practitioner to see your natural skin and ensure the Botox is applied effectively.
    5. Be Aware of Potential Side Effects: While Baby Botox is considered a low-risk procedure, common side effects can include swelling, minor bruising, and headaches. Serious side effects are rare but may include muscle weakness or difficulty with bladder control. Always consult your doctor before proceeding, especially if you’re pregnant or have any medical concerns.

    Conclusion

    Baby Botox is a great option for those looking to maintain youthful skin without the frozen, dramatic look sometimes associated with traditional Botox treatments. It offers a natural, subtle way to smooth out fine lines and prevent deeper wrinkles, all while preserving your ability to express yourself. With minimal side effects and a shorter recovery time, Baby Botox can be a fantastic preventative treatment for those in their twenties and beyond.

  • 5 Tips for Successfully Training Your Hair

    5 Tips for Successfully Training Your Hair

    Greasy hair can be frustrating, and many of us, including celebrities, often find it hard to manage. If you’re tired of dealing with excess oil, hair training might be the solution you’ve been looking for. While the idea has been around for some time, it’s recently gained more attention as a way to reduce greasy hair by decreasing the frequency of washes. So, how does it work, and how can you get started? Let’s break it down.

    What is Hair Training?

    Hair training, or scalp training, is all about reducing how often you wash your hair to help your scalp balance oil production. The idea is that by cutting back on shampooing, your scalp learns to regulate oil naturally, which can result in less grease and healthier-looking hair. This isn’t to be confused with the “no-poo” movement, which involves eliminating shampoo and conditioner entirely.

    The goal of hair training is to allow your hair to return to its natural state without being overexposed to the drying effects of regular shampoo. This can lead to a more manageable scalp that doesn’t overproduce oil to make up for what’s been stripped away by frequent washes.

    Does Hair Training Actually Work?

    The effectiveness of hair training is still debated. Some dermatologists believe it can help regulate oil production by encouraging a gentler hair care routine. Others, however, argue that there’s no scientific evidence to support the claim. Regardless, washing your hair less frequently isn’t harmful, and many people find it works for them. If you’re tired of greasy hair, it’s worth giving it a try.

    Why Washing Less Can Improve Hair Health

    Over-washing your hair strips it of natural oils, which triggers your scalp to produce more oil to compensate. This cycle can lead to an oily scalp and greasy hair. When you reduce the frequency of hair washing, your scalp has time to adjust and can begin to produce oil at a more balanced rate.

    Additionally, frequent washing can leave you with itchy, flaky skin from product build-up or an overproduction of oil. By washing less, you allow your scalp to function more naturally, which helps improve hair health in the long term.

    How to Begin Hair Training

    If you’re used to washing your hair daily, transitioning to washing it less frequently can be a bit of a shock. Start gradually by washing every other day for a few weeks, then move to every third or fourth day as your scalp adjusts. This process helps you avoid the greasy look while allowing your hair to acclimate to the new routine.

    5 Tips for Effective Hair Training

    1. Experiment with Wash Frequency How often you wash your hair depends on your hair type and how much oil your scalp produces. Start by figuring out the ideal wash schedule for your hair and try to adjust without overproducing natural oils. Those with curly hair, for example, may find they need to wash less frequently than those with straight or fine hair.
    2. Consider Your Hair Type Hair training works for most hair types, but some textures are naturally better suited for it. Curly or coily hair often doesn’t need to be washed as frequently because sebum has a harder time traveling down the hair shaft. If you have straight or fine hair, you might need to adjust more slowly as you train your scalp.
    3. Choose the Right Shampoo The type of shampoo you use plays a big role in how well hair training works. Shampoos with harsh detergents can dry out your scalp, causing it to overproduce oil. Opt for gentler shampoos that keep your scalp healthy and retain moisture, preventing excess oil production.
    4. Use Dry Shampoo Dry shampoo is a game-changer when it comes to hair training. It helps absorb oil and freshens up your hair between washes. The key is to apply it before your hair becomes too greasy. This helps keep oil at bay before it even has a chance to spread.
    5. Brush Your Hair Daily Brushing your hair regularly is essential, even if you think it will spread the oils. Brushing helps exfoliate your scalp and distributes the natural oils throughout your hair, which can enhance shine and prevent your scalp from overworking. Brushing from the scalp to the ends helps keep your hair nourished and shiny.

    How Long Does It Take to See Results?

    Everyone’s hair is different, so the time it takes to see results from hair training can vary. On average, most people begin to notice positive changes after two to three months of consistent practice. By this time, your scalp should have adjusted to the new routine, and you should experience less oil buildup and healthier hair.

    Hair training is a gradual process, but with the right approach and patience, it can help you achieve a more balanced, oil-free scalp and healthier-looking hair.

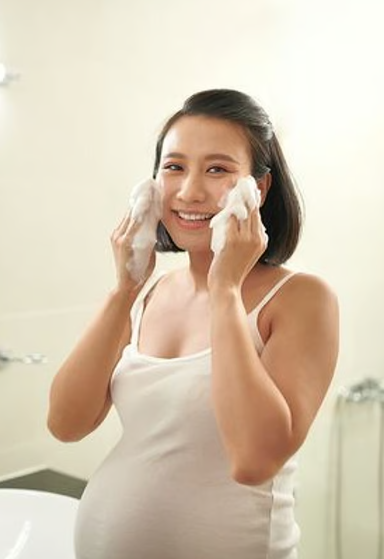
  • A Mom’s Guide to Pregnancy-Safe Skincare

    A Mom’s Guide to Pregnancy-Safe Skincare

    Pregnancy can be an exciting yet challenging journey for your skin. While you might be expecting that radiant glow, many women experience skin changes, such as dryness, acne, and stretch marks. But that doesn’t mean you have to give up on skincare altogether. In fact, there are plenty of pregnancy-safe products that can help you maintain healthy, glowing skin throughout your pregnancy.

    Common Skin Issues During Pregnancy

    Pregnancy often brings along some unexpected skin changes. While every woman experiences pregnancy differently, some of the most common skin issues include:

    • Stretch marks
    • Acne and breakouts
    • Increased skin sensitivity
    • Dry skin
    • Spider veins
    • Melasma (darkening of the skin)
    • Hair growth and hair loss

    If you already suffer from conditions like eczema, psoriasis, or rosacea, these might improve or worsen during pregnancy. Fortunately, there are safe skincare options to help manage these concerns.

    Ingredients to Avoid During Pregnancy

    When you’re pregnant, it’s essential to be mindful of the skincare products you use. Certain ingredients can be harmful to both you and your baby, so here are a few to avoid:

    1. Retinoids: These popular anti-aging ingredients can be dangerous during pregnancy as they are linked to birth defects. Avoid products containing retinol or prescription retinoids.
    2. Arbutin: Often found in brightening products, arbutin can break down into hydroquinone, which isn’t safe during pregnancy. Instead, look for products with Vitamin C or niacinamide for skin brightening.
    3. Formaldehyde: This known carcinogen can increase the risks of miscarriage and infertility. It’s rare to find in skincare, but it’s always good to check labels.
    4. Spironolactone: This acne treatment is not safe for pregnancy, as it may be linked to birth defects. Opt for safer alternatives like azelaic acid for acne.
    5. Parabens: These preservatives can mimic estrogen and potentially disrupt hormone balance. It’s best to avoid products that contain parabens during pregnancy.

    Pregnancy-Safe Skincare Products

    Now that you know what to avoid, here are some safe products to use during pregnancy:

    1. Gentle Cleansers and Moisturizers: Opt for fragrance-free, gentle products that won’t irritate your skin. These will help keep your skin clean and hydrated without the risk of sensitivity.
    2. Antioxidants: Vitamin C, E, K, B3, and green tea are all great options to help reduce wrinkles and keep your skin looking youthful. These antioxidants protect your skin and fight signs of aging.
    3. Low Doses of Salicylic Acid: While higher concentrations are best avoided, small doses of salicylic acid found in cleansers can be safe for acne treatment. Just steer clear of strong peels or oral medications containing this ingredient.
    4. Hyaluronic Acid: Perfect for tackling dry skin and stretch marks, hyaluronic acid is safe for use during pregnancy. It helps your skin retain moisture and keeps it feeling hydrated.
    5. Benzoyl Peroxide: This acne-fighting ingredient can be used in moderation, but it’s always a good idea to consult your doctor or dermatologist before using it during pregnancy.

    Can You Use Vitamin C Serum During Pregnancy?

    Yes! Vitamin C is an excellent pregnancy-safe option for maintaining youthful, radiant skin. It helps protect your skin from environmental damage and supports collagen production, which is vital for maintaining healthy skin. Apply your Vitamin C serum in the morning before sunscreen for maximum benefits.

    Is Hyaluronic Acid Safe During Pregnancy?

    Hyaluronic acid is one of the best ingredients to use while pregnant. As your hormones change, your skin may become drier and more prone to stretch marks. Hyaluronic acid helps increase skin hydration, making it ideal for keeping your skin moisturized and plump throughout your pregnancy.

    Are Serums Safe to Use During Pregnancy?

    Yes, many serums are safe to use during pregnancy as long as they don’t contain harmful ingredients like retinol or certain acids. Anti-aging serums are a great choice if they are free from these ingredients, and they can help you maintain a healthy glow. Be sure to check the ingredient list to ensure that the serum is pregnancy-safe.

    Can You Use Salicylic or Glycolic Acid During Pregnancy?

    Both salicylic acid (BHA) and glycolic acid (AHA) can be safe for use in small doses. These acids work as exfoliants and can help treat acne and improve skin texture. However, high concentrations, especially in peels and oral medications, should be avoided. If you want to use a peel, stick to those with lower levels of AHA for a safe and gentle treatment.

    Final Thoughts

    Now that you know which skincare products are safe during pregnancy, you can continue to care for your skin without worry. Hydration, gentle exfoliation, and using the right antioxidants are essential for glowing skin. Always be mindful of ingredients and consult with your healthcare provider if you’re unsure about any products.

    Remember, pregnancy is a beautiful journey, and taking care of yourself, both inside and out, will help you feel your best as you embrace this new chapter.

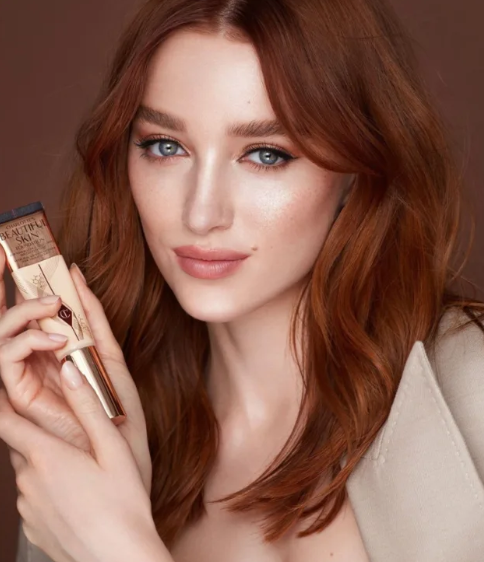
  • Charlotte Tilbury Beautiful Skin Foundation: A Detailed Review

    Charlotte Tilbury Beautiful Skin Foundation: A Detailed Review

    Charlotte Tilbury has been a beauty powerhouse for the past few years, with her products consistently flying off the shelves. One of her standout items, the Hollywood Flawless Filter, became a favorite for a dewy, glowing finish. Following that success, she introduced the Beautiful Skin Foundation, a product that has sparked a lot of buzz but also garnered mixed reviews. So, is it really worth the hype? Let’s dive into the details to see if this foundation lives up to the promise.

    What is the Beautiful Skin Foundation?

    Charlotte Tilbury’s Beautiful Skin Foundation is a medium-coverage liquid foundation formulated with skincare benefits. Infused with hyaluronic acid, this foundation aims to hydrate and plump the skin while offering a breathable, skin-like finish. The goal is to achieve a smooth, bright, and fresh complexion, similar to other popular foundations with skin-enhancing formulas like the Nars Light Reflecting Foundation.

    The formula features several key ingredients:

    • Hyaluronic acid helps maintain moisture, keeping your skin hydrated throughout the day.
    • Rose complex targets issues like dullness, pigmentation, and dryness, aiming to restore a healthy glow.
    • Coconut extract strengthens the skin’s barrier, contributing to a youthful appearance.

    Additionally, the foundation boasts vegan-friendly and recyclable packaging, making it part of a growing movement in the beauty industry toward sustainability.

    How Does It Apply?

    In terms of coverage, this foundation offers a medium finish, meaning it allows some of your natural skin to show through, but still does a solid job of evening out skin tone and covering hyperpigmentation. It’s particularly effective in concealing spots and blemishes, though you may need an extra layer for more stubborn areas.

    What’s particularly impressive is how hydrating the foundation feels, especially for those with oily skin, as it provides a dewy finish that doesn’t look greasy. However, if you have large pores, this may not be the best match for you. The formula tends to separate around the pores, which can make them more noticeable. For those dealing with this issue, pairing the foundation with a pore-minimizing primer might help, but the product itself doesn’t claim to deliver a pore-blurring effect.

    Is It Long-Wearing?

    The Beautiful Skin Foundation is designed to be long-lasting, with claims that it will stay put for up to 16 hours without caking or creasing. Given the presence of skincare ingredients, the formula blends seamlessly into the skin, providing a natural, hydrated look throughout the day.

    While it does hold up well, it’s important to note that the shade range could use improvement. With only 30 shades, the collection tends to lean toward lighter tones, leaving those with deeper skin tones with fewer options. Charlotte Tilbury’s efforts to cater to a broad range of skin tones are evident, but we’d love to see a more inclusive lineup in the future.

    Final Thoughts: Is It Worth It?

    In conclusion, the Charlotte Tilbury Beautiful Skin Foundation is a solid choice for many. Its blend of skincare ingredients and medium coverage makes it a go-to option for a natural, dewy finish. If you have large pores, you might want to look elsewhere, but for those looking to enhance their skin’s appearance without heavy coverage, this foundation is a great pick.

    At $44, it’s priced similarly to other high-end foundations like Nars, but it delivers that same glowy, skin-like finish. If you’re searching for a foundation that’s both a makeup product and a skincare treatment in one, this might just become your new everyday staple.