博客

  • 5 Simple Homemade Remedies to Remove Sun Tan

    5 Simple Homemade Remedies to Remove Sun Tan

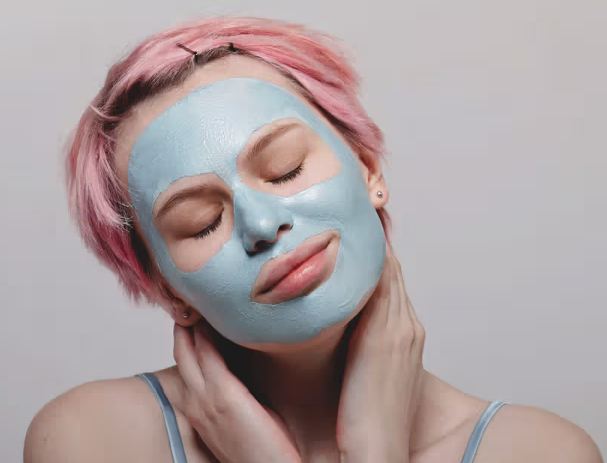
    As summer approaches, the excitement of wearing bright, colorful dresses, feeling the fresh breeze, and enjoying the warm weather is unmistakable. However, there’s one common problem that holds many of us back from fully enjoying the season—sun tan. The fear of darkened skin often stops us from spending time outdoors. For many women, especially in Asia, this becomes a significant concern. But don’t worry! There are a number of easy and natural remedies to combat this issue, most of which can be found right in your kitchen or bathroom cabinet. In addition to using remedies, it’s important to stay hydrated, cleanse your face regularly, and apply sunscreen before stepping outside. Let’s explore some simple and effective home treatments.

    Lemon Juice for Tan Removal

    Lemon is well known for its natural bleaching properties, making it an excellent remedy for sun tan. To use, simply apply fresh lemon juice to the affected areas and let it dry. Rinse with water after it has dried. Alternatively, you can mix sugar with lemon juice and gently scrub it onto your skin. Sugar has great cleansing properties, and this scrub will work wonders when applied 2-3 times a week for quicker results.

    Yogurt for Skin Lightening

    Yogurt is another great remedy for sun tan as it cools the skin and reduces redness, all while tightening the pores to prevent bacterial growth. To use, mix one cup of plain yogurt with the juice of half a cucumber and half a tomato. Add a tablespoon of gram flour (besan) and apply this mixture to your face and neck. Let it dry for 30-45 minutes, then rinse with lukewarm water. You can also apply fresh yogurt directly to your skin daily before your bath. For enhanced results, mix in some lime and tomato juice.

    Aloe Vera for Skin Nourishment

    Aloe vera is famous for its skin-healing properties, and it’s a quick and effective way to lighten tan lines. Apply fresh aloe vera gel directly to the tanned skin areas before bedtime, and wash it off with water the following morning. Aloe vera not only helps lighten the skin but also nourishes and hydrates it.

    Potato for Skin Bleaching

    Raw potato is an excellent natural bleaching agent and can help soothe sunburns. To use, peel and chop two to three medium-sized potatoes, then blend them into a paste. Apply the paste generously to the affected areas and let it dry for about 30 minutes. Rinse with cold water afterward. For better results, mix a little lemon juice into the potato paste before applying it to your skin.

    Cucumber for Cooling and Brightening

    Cucumber juice works wonders for soothing the skin and reducing the effects of sun exposure. The vitamin C in cucumbers also helps to keep the skin hydrated. Mix two tablespoons of fresh cucumber juice with one tablespoon of lime juice, and add a pinch of turmeric for added benefits. Apply this mixture to your face and neck, leave it on for 30 minutes, and rinse with water. You can also rub freshly cut cucumber slices directly onto your skin for a cooling effect.

    In addition to these remedies, gram flour can be used as a paste mixed with water, rose water, or lemon juice for an excellent scrub. Milk and milk cream are also great for treating sunburned skin. Other natural remedies include sandalwood, almond powder, and oatmeal, which can help nourish and soothe the skin.

    By using these simple homemade remedies, you can easily reduce the effects of sun tan and enjoy a glowing complexion all summer long.
  • How to Apply Lipstick Like a Pro for Long-Lasting Results

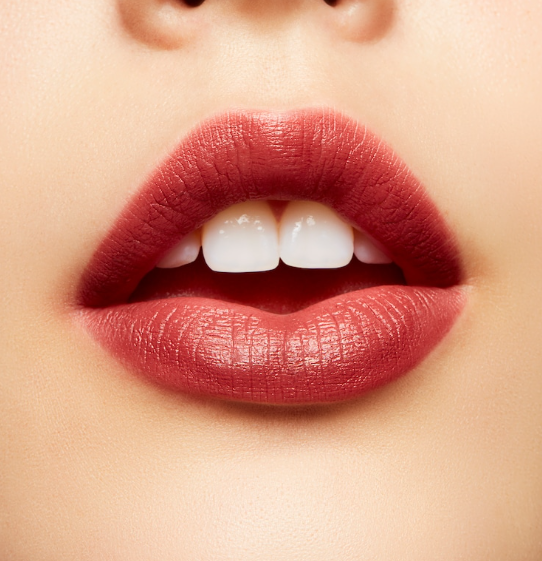
    How to Apply Lipstick Like a Pro for Long-Lasting Results

    Achieving perfectly applied lipstick is more than just swiping color onto your lips. It’s about creating a clean, polished look that stays put throughout the day. To help you achieve a flawless finish that lasts, here’s a step-by-step guide on how to apply lipstick properly for a long-lasting effect.

    1. Prepare Your Lips
      Before applying any lipstick, it’s important to ensure your lips are smooth and hydrated. Gently exfoliate your lips using a sugar scrub, a toothbrush, or a mascara brush to remove any dry skin. Be gentle to avoid irritation.
    2. Moisturize with Lip Balm
      Apply a thin layer of lip balm to keep your lips soft and smooth. This step helps create a base for your lipstick and ensures it glides on easily.
    3. Prime Your Lips
      If you find that your lip liner isn’t showing up as well as you’d like, try priming your lips. You can use a lip primer, translucent powder, concealer, or foundation to create a smooth surface. This will also help your lipstick last longer by allowing the color to adhere better.
    4. Outline Your Lips
      Using a lip liner, start by defining your lower lip line. Then, make an “X” shape at your cupid’s bow to mark the center of your upper lip. Next, draw a line along the top lip from the outer corners toward the cupid’s bow. This will help frame your lips and keep the lipstick from feathering.
    5. Fill in the Outline
      Once the outline is complete, connect the lines and slightly open your mouth. Draw along the edges of your lips, staying within the natural lip lines. This will define the shape of your lips.
    6. Fill Your Lips with Liner
      Using the same lip liner, fill in your entire lip area. This step gives the lipstick something to adhere to and helps it last longer.
    7. Apply Lipstick
      Now it’s time for your lipstick. Carefully apply the lipstick to your lips, following the outline you created. If you’re worried about messing up the edges, use a lip brush to apply the lipstick precisely, keeping the edges sharp and neat.
    8. Blot and Set
      Take a tissue and gently press it against your lips to remove any excess lipstick. This will prevent it from smudging and help it stay in place longer.
    9. Define the Shape
      For extra definition, use an angled brush with a small amount of concealer. Apply it around the edges of your lips to accentuate their shape and create a clean finish.
    10. Add a Glossy Touch (Optional)
      If you want a glossy finish, add a small amount of gloss to the center of your lips. This will give your lips a subtle shine without the gloss dripping or melting away.

    By following these steps, you’ll have perfectly applied lipstick that stays in place and looks fresh all day. For more tips and tricks, be sure to check out additional tutorials to elevate your makeup routine. Enjoy your beautiful lips!

  • 10 Natural Ways to Treat Grey Hair at Home

    10 Natural Ways to Treat Grey Hair at Home

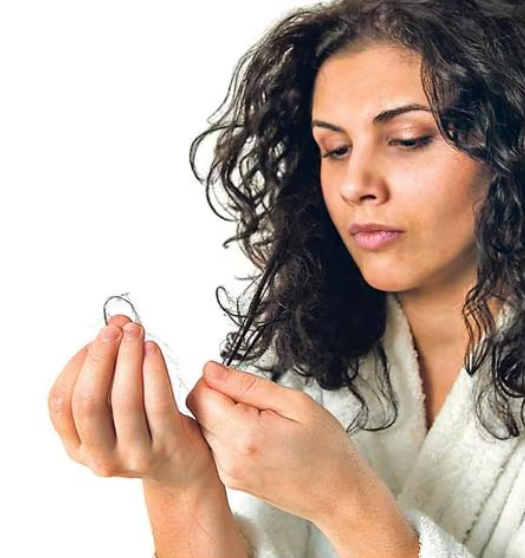
    Grey hair is a concern for many, affecting not just older adults but also younger people. While the natural aging process causes hair to turn grey, no one likes to see this change happen. Although chemical treatments are available, they often come with unwanted side effects, such as hair damage, dryness, and hair loss. Luckily, there are several natural remedies that can help delay the process or manage grey hair without harsh chemicals. Here are 10 effective and easy-to-try natural treatments you can use at home.

    1. Coconut Oil and Lemon
      A blend of coconut oil and lemon juice can work wonders on grey hair. Mix the two ingredients and massage the mixture into your scalp for about 15 minutes daily. This remedy not only helps reduce greys but also strengthens your hair, adding volume and texture.
    2. Onion Juice or Lemon Juice
      Onion juice, combined with lemon juice or barley grass, can help treat grey hair naturally. Mix these ingredients to form a paste, then massage it into your scalp. Regular use will show results in a short period.
    3. Amla (Indian Gooseberry)
      Amla is well-known for its ability to treat various hair issues, including grey hair. Soak amla pieces for a few hours, then mix with eucalyptus oil. Store this mixture overnight in an iron jar, and the next morning, massage it into your hair along with egg, curd, and lemon juice. Alternatively, boil amla in coconut oil until it turns black, and once cooled, massage it into your scalp.
    4. Curry Leaves
      Curry leaves are another excellent natural remedy for grey hair. Boil the leaves in coconut oil, let the mixture cool, and then apply it to your hair. This will nourish your hair and help restore its natural color.
    5. Henna
      Henna is a popular and effective way to cover grey hair. Combine henna with castor oil and lemon juice, then apply it to your hair. Leave it on for about an hour before washing it out with shampoo.
    6. Amaranth
      Amaranth leaves are useful for combating grey hair. Apply the juice of fresh amaranth leaves to your hair to restore its original color.
    7. Ribbed Gourd
      To tackle premature greying, dry ribbed gourd pieces in the shade and soak them in coconut oil for four days. After boiling the mixture until it turns black, massage it into your scalp to reduce grey hair.
    8. Black Seed Oil and Olive Oil
      Black seed oil mixed with olive oil has been used for years to treat grey hair. Combine equal parts of both oils and massage the mixture into your scalp. Leave it on for an hour before washing it out. This remedy not only addresses greying but also adds shine and stimulates hair growth.
    9. Rosemary and Sage
      For a natural darkening effect, boil equal parts rosemary and sage for about 30 minutes. Allow the mixture to cool for three hours, then apply it to your hair. Shampoo your hair once dry and repeat the process regularly for the best results.
    10. Potato Peel Rinse
      Boil the peels of five potatoes in two cups of water and let it simmer for five minutes. After removing it from the heat, strain the liquid and let it cool. Add a few drops of lavender or rosemary oil, and use this mixture to rinse your hair after shampooing. Do not rinse it out for lasting benefits.

    These natural treatments can help you manage grey hair more effectively without resorting to harsh chemicals. By incorporating these remedies into your hair care routine, you can help maintain your natural hair color for a longer period.

  • 5 Simple and Natural Ways to Treat Pimples at Home

    5 Simple and Natural Ways to Treat Pimples at Home

    Pimples are a common skin issue that affects many people, from teens to adults. Whether caused by hormonal changes, weather, or other environmental factors, acne can be both annoying and frustrating. While expensive treatments may promise quick results, they often come with unwanted side effects or high costs. Fortunately, there are several natural remedies that can help reduce pimples and improve skin health without the risk of harsh chemicals. Here are five simple and effective home remedies you can try.

    1. Ice Cubes for Swelling and Redness
      If you’re dealing with swollen or red pimples, ice cubes can be your best friend. The cold temperature helps reduce inflammation and tightens the skin by constricting blood vessels, which can also minimize the appearance of pores. Simply rub an ice cube on the affected area for a few minutes. You can also use rosewater ice cubes for added benefits, as rosewater has soothing properties that can help calm your skin.
    2. Fresh Tomatoes for Acne
      Tomatoes contain natural acids that are great for breaking down pimple walls and fighting bacteria within your pores. To use, cut a tomato in half and gently rub the inside of the tomato on your face, applying one half on one side and the other half on the other side. This simple remedy can help reduce pimples over the course of a few days.
    3. Tea Tree Oil for Antiseptic Action
      Tea tree oil is well-known for its natural antiseptic properties. It can help kill the bacteria that contribute to acne. Simply apply a drop or two of tea tree oil directly to the pimple using a clean dropper. Be sure not to overapply, as concentrated tea tree oil can be too strong for the skin. This treatment can significantly reduce the size and redness of pimples over time.
    4. Aspirin Paste to Fight Redness
      Aspirin, often used for pain relief, can also help reduce pimple redness. To use it, crush one aspirin tablet and mix it with a small amount of water to form a paste. Apply the paste to your pimples and leave it on overnight. In the morning, you’ll notice that the redness has decreased, and the pimple may have shrunk.
    5. Toothpaste as a Drying Agent
      Toothpaste can be a useful drying agent when applied to pimples. It helps absorb excess oil and dries out the pimple. However, it’s important to use toothpaste that is free from harsh chemicals and artificial additives. Avoid using this remedy on sensitive skin, and make sure to wash it off thoroughly after leaving it on for a few hours.

    These are just a few of the many natural ingredients you can use to treat pimples effectively. Other options include:

    • Green tea
    • Crushed garlic paste
    • Apple cider vinegar
    • Honey
    • Lemon juice
    • Salicylic acid
    • Rose oil
    • Lavender oil
    • Turmeric

    Incorporating these natural remedies into your skincare routine can help you reduce pimples and achieve clearer, healthier skin. Remember, consistency is key, and results may take a few days to become visible.

  • 11-Step Guide to Flawless Bridal Makeup

    11-Step Guide to Flawless Bridal Makeup

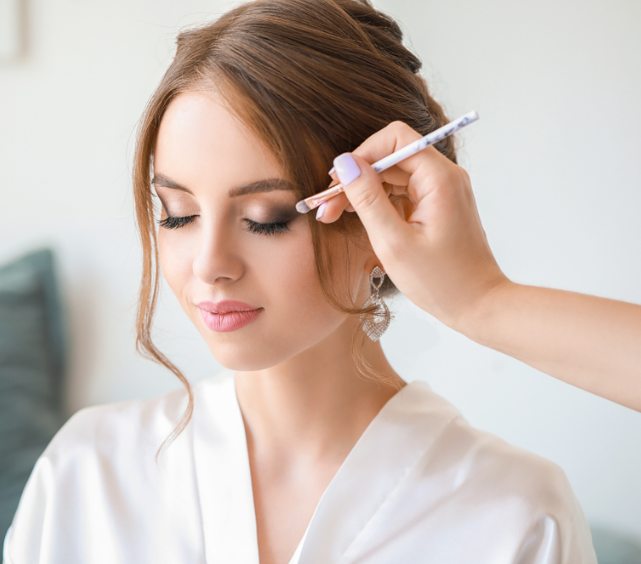
    Your wedding day is a once-in-a-lifetime occasion, and achieving the perfect bridal look starts with the right makeup. Whether you’re doing it yourself or working with a professional, this 11-step bridal makeup tutorial will ensure you look stunning and radiant. Here’s how to prepare and execute flawless bridal makeup for any skin type.

    1. Prep Your Skin
      Before applying makeup, make sure your skin is clean and moisturized. Start by washing your face and applying a light moisturizer. Avoid introducing new products or exfoliating with harsh scrubs on the day of your wedding. If you have a blemish, treat it with Visine but leave the rest of your skin untouched. A clean, soft complexion is the best foundation for makeup.
    2. Select the Right Makeup Shades
      Choose your makeup based on your skin tone and undertone. Skin tones can vary from fair to deep, and makeup brands use different terminologies for shades. Check if you have a cool or warm undertone by holding silver and gold jewelry to your skin. If gold looks better, your undertone is warm; if silver suits you more, your undertone is cool. This will guide you in selecting the most flattering foundation and makeup colors.
    3. Apply a Primer
      A primer is essential to ensure your makeup lasts throughout the day, from vows to photos. It smooths out fine lines and minimizes pores. Apply a thin layer of primer after moisturizing, ensuring your face and eyelids are covered to create a flawless base.
    4. Foundation Application
      After priming, apply foundation to even out your complexion. The trick is to start in the center of your face and blend outward using a brush or sponge. Select a foundation that matches your undertone: cool undertones benefit from pink or blue-based foundations, while warm undertones suit yellow or golden bases. For an even finish, apply thin layers, blending carefully to avoid visible lines.
    5. Concealer for Imperfections
      Concealer helps cover blemishes and dark circles, but should be applied after foundation. Use a concealer that matches your skin tone, and apply it with a brush or finger to problem areas. Blend it well to avoid harsh lines, and set it with a light dusting of powder for a flawless finish.
    6. Add Highlighter and Bronzer
      A highlighter can make your skin glow and give your face a fresh, youthful look. Apply it sparingly to areas like your cheekbones, nose, and brow bone. If you’re using a liquid highlighter, apply it after foundation, creating a subtle glow. For bronzer, lightly contour your face in the shape of a “3” on each side—starting at the forehead, moving down the cheeks, and finishing under the jawline.
    7. Contouring for Definition
      Set your foundation with a translucent powder to prevent shine, and then apply bronzer to contour the sides of your face, emphasizing your natural bone structure. A medium-sized brush works best to gently dust bronzer along the hairline, under the cheekbones, and on the jawline. Be subtle—less is more when it comes to contouring.
    8. Blush Application
      Blush adds a touch of color to your cheeks. Choose a blush that complements your skin tone: soft rose or peach tones are perfect for fair skin, while deeper hues like coral or plum suit darker skin tones. Apply it to the apples of your cheeks and blend upwards toward the hairline.
    9. Enhance Your Eyes
      To make your eyes pop, use eyeliner and eyeshadow that complement your eye color. Avoid harsh black liners, opting instead for softer shades like brown, gray, or green. For eyeshadow, use cream shadows on the lids and powder in the crease for a layered effect. Highlight the inner corners of your eyes and the area under your brows to open up your eyes and create a bright, fresh look.
    10. Mascara and Eyebrows
      Mascara is crucial for making your eyes stand out. Use waterproof mascara to prevent smudging. Before applying mascara, curl your lashes for extra volume. Apply mascara from the root to the tip, using a side-to-side motion. Fill in your brows with a powder slightly darker than your natural color, following their natural shape.
    11. Lip Color
      For long-lasting lips, use a lip stain instead of regular lipstick. Start by moisturizing your lips with a hydrating balm. Let it absorb before applying your chosen lip color, which should complement your blush. A lip stain will stay on longer than regular lipstick, ensuring your lips remain perfect throughout the day.

    By following these steps, you can achieve a flawless bridal look that enhances your natural beauty and ensures you feel confident on your big day. Whether you’re going for a soft, romantic style or a more glamorous look, these makeup techniques will help you shine as you walk down the aisle.

  • 15 Essential Bridal Makeup Tips to Ensure a Flawless Wedding Look

    15 Essential Bridal Makeup Tips to Ensure a Flawless Wedding Look

    Your wedding day is one of the most significant events of your life, and the makeup you choose can make or break your overall appearance. Whether you plan on doing your own makeup or hiring a professional, here are 15 key bridal makeup tips to help you achieve a stunning and flawless look that complements your dress and hair.

    1. Less is More with Makeup
      Avoid overloading on makeup. Many brides make the mistake of applying too many layers of heavy foundation, dark eye makeup, or overly bold lipstick. The goal is to enhance your natural beauty, not to transform yourself into someone else. Keep it simple, subtle, and true to your personal style to ensure you look your best in photos.
    2. Steer Clear of Glitter and Sparkle
      Glittery makeup may seem fun, but it’s best avoided for your wedding. Flash photography can cause sparkle particles to reflect in photos, creating white spots on your face. These can be edited out, but it’s costly and time-consuming.
    3. Match Your Makeup to Your Outfit
      Your makeup should complement your hair and dress, creating a cohesive look. For example, if you’re wearing a soft, romantic dress, bold eye makeup or bright lipstick might clash. Choose makeup that matches the vibe of your outfit to achieve a harmonious appearance.
    4. Keep It Simple with an Updo
      If you’re opting for an elaborate updo with accessories, make sure your makeup is fresh and understated. A soft, rosy look works well with elegant updos and will ensure you look polished without overpowering your overall look.
    5. Inspiration from Magazines and Red Carpets
      Look through bridal magazines and red carpet photos to gain inspiration for your look. These platforms can give you a clear sense of how professional makeup artists design a complete look for celebrities, which might spark some great ideas for your own big day.
    6. Collect Photos of Looks You Love
      Start gathering images of makeup styles that you love. These can serve as a reference for your makeup artist or help guide you if you plan on doing your own makeup. Think about looks you’ve seen in real life or on social media that caught your eye.
    7. Prioritize Skin Care
      Good makeup starts with healthy, well-prepped skin. Begin a skincare routine well in advance of your wedding day. Regular facials, cleansing, exfoliating, and moisturizing will help create a smooth canvas for your makeup. Hydrated, glowing skin will enhance the final look.
    8. Avoid Picking at Blemishes
      If you get a breakout right before the wedding, resist the urge to pick at it. A blemish is far easier to cover than a scab, so focus on concealing rather than picking.
    9. Plan Your Waxing in Advance
      If you plan to wax your brows or any other areas of your face, do it at least a week before your wedding. Waxing too close to the big day can lead to irritation or redness, which you’ll want to avoid.
    10. Consider Teeth Whitening
      Whiter teeth can brighten your smile and enhance your overall appearance. Consider professional whitening or over-the-counter products to give your smile a boost before the wedding.
    11. Choose Your Makeup Artist Wisely
      If you’re hiring a makeup artist, it’s essential to find someone who understands your vision. Ask for recommendations from friends, your wedding planner, or the venue coordinator. Always review the artist’s portfolio to ensure their style matches what you’re looking for.
    12. Schedule a Trial Run
      Never experiment with your makeup on your wedding day. Schedule a trial session with your makeup artist before the wedding to make sure you’re happy with the look. This will give you the opportunity to make any necessary adjustments and avoid any last-minute surprises.
    13. Stay Hydrated
      Drinking plenty of water is crucial for keeping your skin plump and radiant. Dehydrated skin can look dull and make your makeup application difficult, so make sure you’re hydrating leading up to the big day.
    14. Set Your Makeup
      To ensure your makeup lasts throughout the day, use a setting spray or powder. This will help keep everything in place and prevent makeup from melting or fading, especially if you’re outdoors or in hot conditions.
    15. Embrace Natural Features
      Your wedding day is the perfect time to showcase your natural beauty. While makeup can enhance your features, remember to let your personality shine through. Stay true to your style and use makeup to enhance, not mask, who you are.

    By following these expert tips, you’ll not only look gorgeous but also feel confident on your big day. Whether you choose to go with a professional makeup artist or do it yourself, these guidelines will help you achieve a flawless look that reflects your unique style.

  • How to Achieve a Perfect Pastel Makeup Look: Step-by-Step Tutorial

    How to Achieve a Perfect Pastel Makeup Look: Step-by-Step Tutorial

    Pastel makeup is a soft and enchanting look that complements a wide range of outfits, especially for daytime events. It’s fresh, light, and perfect for adding a touch of elegance without being overpowering. Whether you’re preparing for a casual outing or a special occasion, pastel makeup offers a unique and beautiful way to enhance your features. This tutorial will guide you through creating a flawless pastel look for your face, eyes, and lips with simple steps.

    Preparing Your Skin

    The first step to achieving any flawless makeup look is to start with clean, moisturized skin. Begin by washing your face with a mild soap or face wash suited to your skin type. If you have dry skin, follow up with a moisturizing lotion or cream to keep your skin hydrated. For those with oily skin, opt for a mattifying face wash like Himalaya Herbals or Neutrogena. Once your face is clean and fresh, you’re ready to apply makeup.

    Products You’ll Need

    Gather the following makeup essentials before you begin:

    • Foundation, concealer, and setting powder
    • Blush (preferably in soft pink or peach)
    • Bronzer
    • Eye primer
    • Eyeshadow palette (pastel shades)
    • Eyeliner (black or brown), white eyeliner
    • Mascara
    • Soft pastel lipstick shades
    • Makeup brushes and tools

    Step 1: Apply Your Base

    Start by applying concealer to cover any dark spots, blemishes, or under-eye circles. Blend it well using a sponge or makeup brush. Next, apply foundation to even out your complexion, ensuring a smooth base. Set your foundation with a light dusting of face powder to lock everything in place. Once your base is ready, apply a primer to your eyelids to create a smooth canvas for eyeshadow.

    Step 2: Pastel Eyeshadow Look

    For the pastel eyeshadow look, begin by applying an eye primer to your lids to help the eyeshadow adhere better and last longer. After the primer, take a light pastel color as a base for your eyelids. Blend it gently into the outer corners of your eyes, coordinating with the outfit you’re wearing.

    Next, apply a creamy light brown eyeshadow across your lids, blending it smoothly. For a pop of color, choose a pastel shade like soft pink, lavender, or sky blue and apply it to the center of your eyelid. Blend it out towards the outer corner for a soft gradient effect. Apply a subtle golden or brown eyeshadow along your lower lash line for added definition.

    For a bright-eyed effect, use white eyeliner on your waterline to make your eyes appear larger and more awake. Finish your eye look with black or brown eyeliner along the upper lash line and a coat of mascara to define your lashes. If you like, you can also add false lashes for extra volume.

    Finally, lightly dust some shimmer on your eyelids to create a shiny, captivating finish. Repeat the process on the other eye, and your eyes will be ready for any occasion!

    Step 3: Pastel Lips

    To complete your pastel makeup look, focus on creating soft, pastel lips. Begin by prepping your lips with a lip balm or Vaseline to ensure they’re hydrated. If your lips are discolored, apply a layer of foundation or concealer to neutralize the natural lip color. Next, choose a pastel lipstick shade such as soft peach, pink, or coral. Apply the lipstick evenly and blend for a smooth finish.

    For an extra touch of gloss and a soft shine, apply a clear or pastel gloss over the lipstick. This will add a refreshing, youthful appearance to your lips, perfect for a pastel makeup look. You’re now ready to take on the day with fresh, vibrant makeup.

    Conclusion

    With these simple steps, you can achieve a beautiful pastel makeup look that is perfect for any occasion. The soft, subtle shades of pastel tones enhance your features while keeping your look light and fresh. Whether you’re heading to a brunch, a day out with friends, or just want a sweet, elegant look, pastel makeup is a timeless choice that never goes out of style.

  • 5 Essential Makeup Items Every Girl Should Have in Her Bag

    5 Essential Makeup Items Every Girl Should Have in Her Bag

    Makeup is an art that enhances your natural beauty and adds a touch of glamour to any look. However, having the right tools and products in your makeup bag is crucial to achieving a flawless finish. Whether you’re heading out for a night out, running errands, or just need a quick touch-up, there are certain makeup essentials every girl should carry with her. Here’s a list of the five must-have beauty products that should always be in your bag to keep you looking fresh and fabulous throughout the day.

    1. Eye Makeup Kit

    Your eye makeup kit is a crucial part of your makeup essentials. It should include an eyebrow pencil, eyeliner, mascara, kajal, and, if you prefer, eyeshadow. Bold, defined eyes are often seen as a symbol of beauty, and these products help you achieve that. Use the eyebrow pencil to define your brows, especially if they are sparse. If you have naturally full brows, you can skip this step. Apply kajal or eyeliner to your waterline for a more defined look, and mascara to enhance your lashes. If you like to experiment, you can also carry an eyeshadow to complete the look.

    2. Foundation and Concealer

    Foundation and concealer are the foundation of any great makeup look. These products help create an even skin tone and cover up blemishes, dark circles, and imperfections. Start by applying foundation to even out your complexion. Afterward, use a concealer to hide any dark circles, pimples, or blemishes. This combination ensures your skin looks flawless and radiant throughout the day.

    3. Primer

    Primer is an essential product that should not be overlooked. It helps to create a smooth surface by filling in fine lines and minimizing pores, making your makeup last longer. If you have visible pores or an uneven skin texture, apply a primer after your foundation and concealer. It ensures that your makeup stays in place and creates a more polished finish.

    4. Blush and Contouring Tools

    Blush adds a natural flush of color to your cheeks, giving you a healthy, radiant glow. Along with a blush kit, make sure you have a blush brush in your makeup bag. Blush is perfect for highlighting your cheekbones and contouring the face. It brings a youthful appearance to your makeup look and makes your face look more sculpted. Whether you prefer a soft pink or a bold red, having blush on hand is key to completing your look.

    5. Lip Makeup

    Lip products such as lipstick, lip gloss, and lip liners are the final touch that completes your makeup. Having a few lip shades in your bag ensures that you can switch up your look depending on the occasion or your outfit. Keep at least three to four lipsticks in varying shades to complement different looks, from neutral nudes to bold reds. Lip gloss can also add shine and a subtle pop of color for a more casual look.

    With these five essential makeup items, you’ll be ready to tackle any situation, from a day at work to an evening out. Having these products in your bag ensures you’re always prepared for a quick touch-up, keeping your makeup fresh and flawless all day long.

  • How to Achieve a Perfect Bold Red Lip for Christmas: A Simple Tutorial

    How to Achieve a Perfect Bold Red Lip for Christmas: A Simple Tutorial

    With Christmas just around the corner, everyone is eagerly preparing for the holiday season – and that includes getting the makeup just right. For many, the festive season is the perfect time to rock bold and dramatic looks, and nothing says festive quite like a stunning red lip. Red lipstick is iconic during the holidays; it adds a mature, elegant touch to your look and enhances your complexion, especially if you have paler skin. Whether you’re celebrating with family or heading out to a holiday party, a bold red lip is sure to make a statement.

    But how do you achieve that flawless red lip that lasts throughout all your festivities? Applying red lipstick might seem simple, but there are a few common mistakes that can spoil the overall effect, such as uneven lines or smudging. In this step-by-step tutorial, we’ll show you how to achieve a perfectly bold red lip to complement your Christmas look.

    What You’ll Need:

    Before you get started, make sure you have these essential items:

    • Lip scrub
    • Lip balm
    • Red lip liner
    • Bold red lipstick
    • Lipstick brush
    • Concealer and concealer brush

    Step-by-Step Guide to Bold Red Lipstick

    Step 1: Prep Your Lips

    To achieve smooth, flawless lips, start by exfoliating. Use a lip scrub to gently remove any dead skin or flakes. This is crucial, as dry, flaky lips can cause the lipstick to look uneven and crack. After scrubbing, apply a layer of lip balm to hydrate your lips. If you notice too much excess balm, simply blot with a tissue to remove the excess moisture.

    Step 2: Line Your Lips

    Next, take your lip liner – it should match the shade of your lipstick – and outline your lips. Carefully trace the natural shape of your lips, ensuring the lines are neat. This will define your lips and provide a perfect guide for applying the lipstick. Lip liner also helps prevent the lipstick from feathering and ensures it lasts longer.

    Step 3: Fill in Your Lips with Liner

    Now, fill in the entire lip area with the same lip liner you used to outline the edges. This will create a strong base for the lipstick, helping it adhere better and last longer. It also ensures that the color looks uniform across your lips.

    Step 4: Apply the Lipstick

    Using a lipstick brush, carefully apply your bold red lipstick over the lined lips. The brush gives you more control, ensuring a smooth, precise application. After applying, blot your lips lightly with a tissue to remove any excess product. This will help set the lipstick and prevent it from smudging.

    Step 5: Add a Second Layer for Longevity

    To make your red lip last throughout the day or evening, add a second coat of lipstick. This will deepen the color and ensure it stays put. Afterward, use concealer around the edges of your lips to clean up any smudges and sharpen the lines, giving you a polished, precise finish.

    Step 6: Final Touch

    And there you have it – a beautiful, bold red lip ready for the holidays. Whether you’re attending a Christmas dinner or partying with friends, this festive look is sure to make an impact.

    With just a few simple steps, you’ve mastered the art of the bold red lip. Enjoy the festive season with confidence and a stunning makeup look that complements your holiday spirit!

  • How to Do a Perfect Pedicure at Home – Step-by-Step Guide

    How to Do a Perfect Pedicure at Home – Step-by-Step Guide

    Having beautifully manicured feet can make a big difference, especially when you’re showing them off in sandals or pretty shoes. However, the harsh winter and a busy schedule can take a toll on your feet, leaving them dry and rough. But don’t worry – you don’t need to visit a salon every time you want a pedicure. With just a few simple steps, you can achieve a salon-quality pedicure at home. Dedicate just 20 to 30 minutes every week to pamper your feet, and you’ll see amazing results.

    Step-by-Step Guide for a Perfect Pedicure at Home

    A home pedicure follows a similar routine to a manicure, with a few specific tools and techniques focused on foot care. Here’s a detailed guide to help you get the best results.

    Essential Tools for a Home Pedicure:

    Before you begin, make sure you have all the necessary tools ready:

    • A tub for soaking your feet
    • Nail clippers
    • Nail file
    • Cuticle stick (or orange stick)
    • Nail buffer
    • Pumice stone or scrub brush
    • Clear top and base coat
    • Your choice of nail polish color

    In addition, keep bath salts for soaking, cuticle trimmers, cuticle oil, and lotion for a massage on hand. Start by removing any old nail polish from your toenails.

    1. Soak Your Feet

    Fill a tub with lukewarm water and add a generous amount of bath salts. Bath salts not only relax your feet but also help soften the skin. The warm water will work to loosen calluses, making them easier to remove. Soak your feet for 10 to 15 minutes. Since the skin on your feet is tougher than that on your hands, it’s essential to give your feet extra time to soften.

    2. Trim and Shape Your Nails

    After your feet have softened, gently pat them dry with a towel. Now, it’s time to trim your nails to the desired length and shape. Be careful not to cut too short or too close to the skin. Use a nail file to smooth the edges and avoid sharp corners that could cause ingrown nails. Buff your nails to smooth out any ridges.

    3. Treat Your Cuticles

    Using a cuticle stick, gently push back your cuticles. If you have excess cuticle growth, you can carefully trim it with a cuticle trimmer. This step is crucial for a clean, polished look.

    4. Exfoliate Your Feet

    For dry, cracked heels, a pumice stone is a must. Gently rub the pumice stone over your heels and the balls of your feet in circular motions. This will remove dead skin and calluses, leaving your feet smooth and soft.

    5. Moisturize and Massage

    Once your feet are exfoliated, apply a generous amount of moisturizer or foot lotion. Massage it into your feet, paying special attention to your heels and the arches. This will help keep your feet hydrated and soft.

    6. Apply Nail Polish

    After your feet have been exfoliated and moisturized, it’s time to add the finishing touches. Start by applying a base coat to protect your nails. Then, apply your favorite nail polish color in thin layers. Finish with a clear top coat to seal in the color and give your nails a glossy shine.

    By following these simple steps, you can achieve a salon-quality pedicure in the comfort of your own home. With regular care, your feet will stay soft, smooth, and beautiful.