分类: Hair Style

  • Mastering the Wet Hair Look: The 7 Best Products for the Perfect Style

    Mastering the Wet Hair Look: The 7 Best Products for the Perfect Style

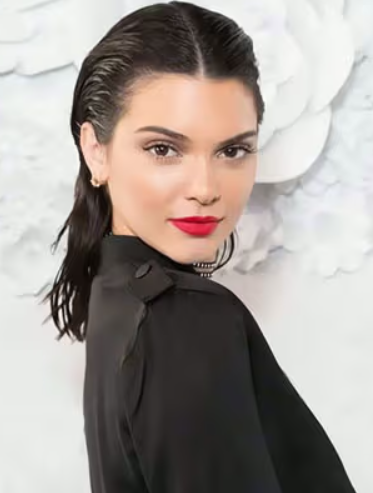
    The wet hair look has been one of the most iconic and versatile hairstyles of recent years, embraced by celebrities like Kim Kardashian, Gigi Hadid, Rosie Huntington-Whiteley, and J.Lo. This chic, effortless style can take you from a red carpet event to a casual outing, always ensuring you look polished and camera-ready. The key to achieving this look is a combination of shine, body, and texture. Whether you’re styling it for a night out or just want that fresh, post-shower appearance, we have the perfect tips and product recommendations to help you master the wet hair look.

    How to Achieve the Wet Hair Look

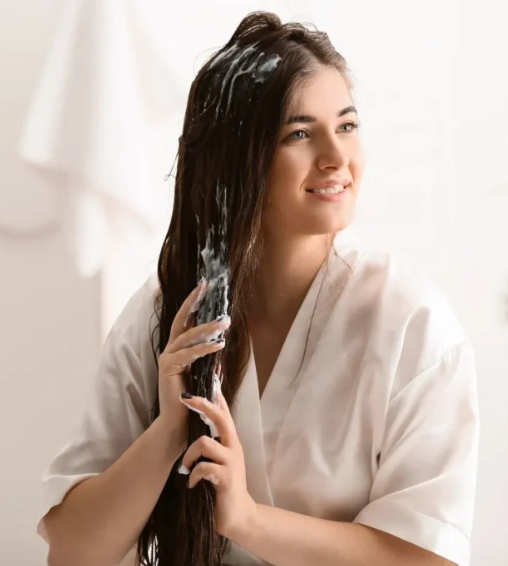
    The first step in creating the wet hair look is to start with damp hair. While you don’t want your hair to be soaking wet, it should have enough moisture to keep it malleable. Begin by towel-drying your hair or using a blow-dryer for a few minutes, ensuring it stays damp but not dripping.

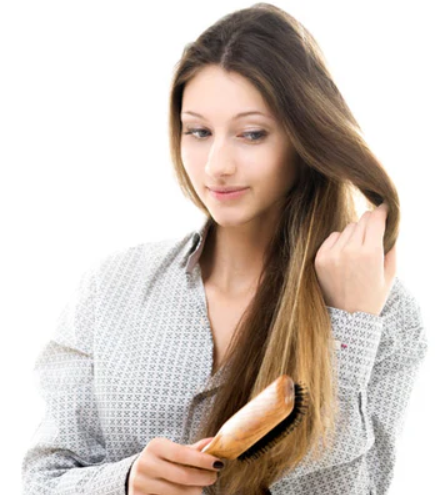
    Next, avoid using a brush as it can cause unnecessary breakage and split ends. Instead, reach for a wide-tooth comb to gently detangle and separate your hair. If your hair is naturally straight and lacks texture, now is the time to add a texturizing product. Spritzing on a texturizing spray or mousse will create volume and texture, which is essential for the wet hair look.

    A great choice for a texturizing spray is Not Your Mother’s Beach Babe Texturizing Sea Salt Spray, which adds that beachy texture. Alternatively, for a frizz-free look, SheaMoisture Curl Mousse for Frizz Control will keep hair smooth and controlled.

    Creating the Perfect Shine and Hold

    To get the right balance of shine and hold, you’ll need to combine creams and gels. A quarter-size amount of each product should be enough—work them together in your hands before evenly distributing them throughout your hair.

    For a great budget-friendly cream, OGX Argan Oil of Morocco Curling Perfection Curl-Defining Cream is a wonderful choice. It provides a smoothing effect and leaves hair shiny without weighing it down. If you’re looking for something a bit more luxurious, the SheaMoisture Curl Enhancing Smoothie is perfect for adding texture and shine, especially for thicker or curly hair.

    As for gels, Got2b Ultra Glued Invincible Styling Gel is highly effective in maintaining a slick, perfect finish without the crunch.

    Finishing Touches for a Glossy, Polished Look

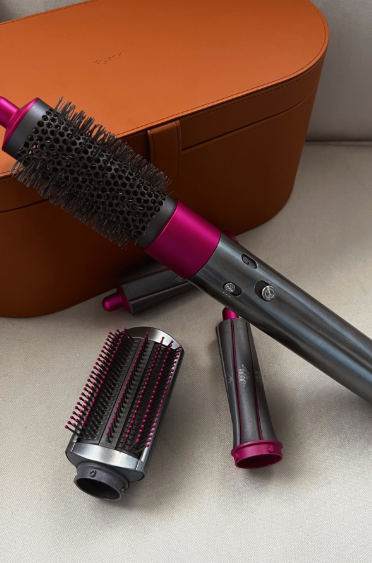
    Once the products are applied, comb through your hair again with a wide-tooth comb to ensure the product is evenly spread and there are no clumps. This step is crucial to avoid uneven texture. Before blow-drying, apply a heat-protectant spray to avoid damage and frizz. Set your blow-dryer on a low or cool setting to prevent disturbing the product, and let the heat help shape your hair without creating unwanted flyaways.

    Once your hair is styled, you can either leave it loose for a natural, tousled look or opt for a sleek ponytail or bun for a more polished appearance. The final touch for achieving that glossy, wet look is all about shine. Garnier Brilliantine Shine Glossing Spray is the perfect product to create a high-shine finish, enhancing that fresh, damp appearance. To lock it all in place, finish off with a spritz of hairspray. Moroccanoil Luminous Hairspray is a fantastic option for a long-lasting, non-crunchy hold.

    Conclusion

    With these products and steps, you can easily achieve the iconic wet hair look at home. The key is to focus on texture, shine, and the right amount of hold to ensure your hair looks healthy, glossy, and full of life. Whether you’re looking for a sleek, polished style or a more relaxed, tousled vibe, this timeless look is versatile and easy to recreate with the right products.

  • The Best At-Home Hair Dye Options That Aren’t Boxed Dye

    The Best At-Home Hair Dye Options That Aren’t Boxed Dye

    Dyeing your hair at home can be a fun and cost-effective way to change up your look, but it’s not always as straightforward as it seems. Many of us are tempted by boxed dye, but it’s known to cause more harm than good. From its chemical-heavy ingredients to its difficulty in removal, boxed dye often leads to flat, dull hair or even long-term damage. But don’t worry – there are better alternatives that can give you vibrant, lasting color without the drawbacks of boxed dye. Let’s dive into the best options for achieving salon-quality color from the comfort of your home.

    Why Avoid Boxed Dye?

    Boxed hair dye can sometimes feel like a quick fix, but it often lacks the depth and richness you get from more professional products. One of the biggest problems with boxed dye is the damage it causes to your hair, particularly because of the ammonia and other chemicals. If you’ve ever tried to remove black boxed dye, you know how difficult it can be. Plus, the color can look flat and unappealing unless you go through the extra step of adding dimension.

    For a healthier, more vibrant look, it’s better to opt for non-toxic, semi-permanent dyes or color-depositing products. These options are easier on your hair and provide beautiful, customizable shades without the harsh chemicals.

    1. Color Depositing Shampoos and Conditioners

    If you’re looking for a temporary color boost without a full dye job, color-depositing shampoos and conditioners are a great choice. These products add subtle tint and refresh your color between dye sessions, giving your hair a soft, vibrant hue without the intensity of traditional hair dye.

    Color-depositing shampoos are ideal for those who want to keep their color fresh, especially for shades like red or orange. Products like Keracolor Clenditioner, Moroccanoil Color Depositing Mask, and Celeb Luxury Viral Colorwash are perfect for maintaining color vibrancy without a major commitment.

    For a more vibrant, semi-permanent color, brands like Punky Color and Overtone are excellent options. These conditioners are richer in pigment and will leave you with a bold, salon-quality finish. Overtone even offers products specifically designed for dark hair, ensuring your color shows up vividly on brunettes and other darker shades.

    2. Semi-Permanent Hair Dyes

    For those ready to take the plunge into more permanent color changes without the harsh chemicals of boxed dye, semi-permanent dyes are an excellent option. These dyes are ammonia-free and much gentler on your hair.

    Manic Panic is a classic choice that has been loved by many for its vibrant shades and safe ingredients. Their range of colors comes with beautiful undertones, and the dye fades gradually over a few weeks, giving you a more natural transition. Manic Panic is easy to mix for a custom shade, and it hydrates your hair while providing rich, lasting color.

    Arctic Fox is another popular semi-permanent dye that offers an array of bold, fun colors, including everything from lavender to turquoise. Arctic Fox dyes are free from harmful chemicals, making them a gentle yet effective way to change your hair color. While it’s not specifically marketed for brown hair, Arctic Fox’s vibrant pigments can still give darker shades a pop of color with some extra mixing.

    Both Manic Panic and Arctic Fox provide excellent options for those looking for vibrant, fun colors that are safe for their hair. These dyes are long-lasting, cruelty-free, and free of harsh chemicals, allowing you to experiment with different shades without worrying about damage.

    Final Thoughts

    When it comes to at-home hair dyeing, there are plenty of alternatives to boxed dye that will leave your hair looking vibrant and healthy. Color-depositing shampoos and conditioners are great for maintaining your color, while semi-permanent dyes offer a deeper, more lasting change. With the right tools and products, you can achieve stunning, salon-worthy hair color without the damage. Whether you’re looking to refresh your existing shade or try something completely new, these at-home options will give you the flexibility and results you crave.

  • How to Detangle Your Hair Without Causing Split Ends

    How to Detangle Your Hair Without Causing Split Ends

    We’ve all experienced the frustration of dealing with tangled hair, and while it’s tempting to yank through the knots, doing so can cause more harm than good. If you’re aiming for smooth, healthy hair, it’s important to adopt the right techniques and use the right tools for detangling. Here’s everything you need to know about safely detangling your hair and preventing split ends.

    Why Detangling the Right Way Matters

    Detangling is one of the most crucial steps in maintaining healthy hair. Brushing or combing too harshly can lead to breakage, frizz, and split ends. In 2020 and 2021, haircare routines took the spotlight, and with the rise of new techniques and products, it’s clearer than ever that how we treat our hair makes a significant impact on its health.

    Whether you’re trying to tame tangles after a long day or detangle to avoid split ends, the right method can make all the difference. Let’s take a closer look at how you can detangle your hair the right way, no matter the hair type.

    Detangling Dry Hair

    If your hair is in between washes and you’re struggling with tangles, avoid brushing it dry, as this can lead to breakage. Instead, always use a wide-tooth comb, which is gentler than a regular bristle brush.

    Before you start detangling, spray a hair detangler or leave-in conditioner to help smooth the hair and make it easier to work through the knots. Products like Mizani 25 Miracle Milk, Marc Anthony Grow Long Biotin Leave-In Conditioner Spray, and The Honest Company Sweet Orange Vanilla Conditioning Detangler work wonders for this step.

    Next, detangle your hair in small sections, starting from the tips and working your way up. This method will give you more control and prevent unnecessary strain on your hair. If the tangles are mild, you can even try finger-combing to avoid using a tool.

    Detangling Wet Hair

    If you prefer to detangle your hair after showering, it’s easier to do when your hair is still damp. In the shower, after applying your shampoo, reach for a wide-tooth comb to work through any knots. Avoid using your fingers, as this can be rougher on your strands.

    For the best results, use a moisturizing shampoo that won’t strip your hair’s natural oils. We recommend Redken Extreme Shampoo for damaged hair or Biolage Hydrasource Shampoo. After shampooing, don’t skip conditioner—make sure to squeeze out excess water before applying to ensure the conditioner stays on your hair rather than slipping off.

    Once the conditioner is on, use your fingers or a wide-tooth comb to detangle, gently working through any tangles. This process will help smooth out the hair, reduce frizz, and prevent breakage.

    Detangling Curly Hair

    Curly hair often presents a unique challenge when it comes to tangles, as it tends to be drier and more prone to knotting. If you have curly hair, always aim to detangle it while it’s wet or damp. Using conditioner is crucial, as it helps to soften the hair and make it more manageable.

    Let the water from the shower help you detangle by gently massaging the knots out under the stream. If you can’t do this immediately, apply a leave-in conditioner or oil to your dry hair. Using nourishing products like Marc Anthony Strictly Curls Deep Hydrating Mask or Sheamoisture Hair Masque with Shea Butter will add moisture and make detangling easier.

    For curly hair, finger combing is often the best technique, as it allows you to feel for tangles and work through them gently. If you need to use a tool, the Denman brush is a curly hair favorite that helps with detangling without disturbing your curl pattern. A wide-tooth comb like the Paul Mitchell Pro Tools Detangler Comb is also a good option.

    When detangling curly hair, always start from the tips and slowly work your way up toward the roots. This minimizes damage and avoids unnecessary friction that can lead to split ends. Remember, being patient and gentle is key to preserving the integrity of your curls.

    Tips for Detangling Without Damage

    1. Use the Right Tools: Always use a wide-tooth comb or your fingers for gentler detangling. Brushes with stiff bristles can cause more harm than good, especially on damp or dry hair.
    2. Detangle When Wet: Wet hair is more flexible, making it easier to detangle without causing breakage. Always apply a detangling product before combing through your hair.
    3. Work in Sections: Section your hair before detangling, starting with the tips and moving upward. This will help you focus on small areas at a time and prevent over-stretching the hair.
    4. Be Gentle: Don’t tug at knots. Instead, gently work through tangles with your fingers or comb. Avoid using excessive force, as this can cause unnecessary stress on your hair.
    5. Hydrate Regularly: Keep your hair moisturized with conditioners, oils, and leave-in products. Well-hydrated hair is less prone to tangling and breakage.

    Final Thoughts

    Detangling your hair the right way can significantly reduce the risk of split ends and hair breakage. Whether you have straight, wavy, or curly hair, the key is to use the right tools, apply nourishing products, and be gentle. With these simple steps, you can keep your hair healthy, smooth, and free from tangles. Happy detangling!

  • Does Dimethicone Cause Hair Loss? Everything You Need to Know

    Does Dimethicone Cause Hair Loss? Everything You Need to Know

    Silicones in hair products are a topic that often sparks debate. While they’re frequently used in shampoos, conditioners, and styling products, many people wonder if they’re really safe for our hair in the long run. Dimethicone, a commonly used silicone, is no exception to this scrutiny. While it’s not inherently harmful to your health, is it causing damage to your hair?

    What Is Dimethicone?

    Dimethicone is a type of silicone widely found in hair and skincare products. It’s a silicone-based polymer that works by creating a smooth, slippery layer over the surface of your hair. This coating makes hair easier to detangle and adds a shiny, conditioned look. However, because Dimethicone is non-water-soluble, it can build up on your hair over time, leading to potential issues if not properly managed.

    Despite its smoothing benefits, Dimethicone isn’t necessarily great for everyone. Although it doesn’t cause hair loss directly, it can affect the overall health of your hair, especially if used too often.

    How Does Dimethicone Affect Hair?

    Dimethicone can weigh down hair, making it feel greasy or limp, especially for individuals with fine hair. The silicone creates a barrier that prevents moisture from entering your hair, which can lead to dryness over time. For curly hair, this can be a particular problem because it might alter your natural curl pattern and make your hair feel more brittle. Additionally, if you have fine or thinning hair, Dimethicone can leave your strands looking flat and lifeless.

    While it doesn’t directly cause hair loss, the buildup from Dimethicone can lead to split ends, frizz, and hair breakage. This can make your hair look thinner, but it won’t cause your hair to fall out directly.

    Who Should Be Cautious with Dimethicone?

    Certain hair types and conditions should be particularly cautious when using products with Dimethicone. If you have curly or coily hair, which is naturally more prone to dryness, the heavy silicone can exacerbate your hair’s condition, leaving it dry, brittle, and more susceptible to breakage.

    Those with fine or thinning hair should also be careful with Dimethicone. It has a tendency to weigh hair down, reducing volume and causing it to appear flat. If your goal is fuller, more voluminous hair, Dimethicone might not be the best choice.

    How to Remove Silicone Buildup

    If you’ve been using Dimethicone-based products and notice your hair becoming weighed down, dry, or flat, it’s important to remove the buildup. Here are a few ways to do that:

    1. Apple Cider Vinegar Rinse

    Apple cider vinegar is a great natural remedy for removing buildup from your hair. It helps strip away silicones without causing damage. For added effectiveness, mix it with a little baking soda to create a paste that can help lift stubborn residue.

    2. Clarifying Shampoos

    Clarifying shampoos are formulated specifically to remove buildup from hair products like silicones, oils, and other residues. However, they can be quite harsh on your hair, so it’s essential to use them sparingly—about once a month. A good clarifying shampoo will cleanse your hair deeply, but make sure to follow up with a deep conditioner to prevent drying out your strands.

    3. Use Water-Soluble Alternatives

    If you’re looking to avoid buildup altogether, opt for hair care products that contain water-soluble silicones, which are easier to wash out of your hair. These are less likely to cause long-term buildup and allow your hair to retain moisture more effectively.

    Dimethicone vs. Dimethiconol: What’s the Difference?

    Dimethicone and Dimethiconol are both non-water-soluble silicones with similar functions, but there are slight differences. Dimethiconol has a higher molecular weight and includes more alcohol, which can offer better protection against environmental factors like humidity. However, it’s also less hydrating than Dimethicone. Both ingredients work in similar ways, so if you’re looking to avoid silicones altogether, keep an eye out for both in your hair products.

    Are Silicones Bad for Your Hair?

    The answer is not a simple yes or no. While silicones, including Dimethicone, can create a temporary smoothness and shine, excessive use can lead to buildup and hair damage. The key is moderation. If you use silicones sparingly and incorporate clarifying shampoos into your routine, they won’t do any significant harm. But if you overuse them, they can prevent moisture from entering your hair, leading to dryness, frizz, and potential breakage.

    If you notice issues like excessive dryness, greasy buildup, or lackluster hair, it might be a good idea to switch to a silicone-free routine for a while to give your hair a break. But when used properly and in moderation, silicones like Dimethicone are not inherently bad for your hair.

    Conclusion

    While Dimethicone isn’t likely to cause hair loss, it can affect the health and appearance of your hair if used incorrectly. Pay attention to how your hair responds and be mindful of using products with Dimethicone if you have curly, fine, or thinning hair. Regular maintenance and proper cleansing can help you avoid buildup and keep your hair looking its best. Ultimately, Dimethicone can work wonders when used in moderation, but overuse or improper care can lead to unwanted effects.

  • Dyson Airwrap Styler: Is It Really Worth the Investment?

    Dyson Airwrap Styler: Is It Really Worth the Investment?

    In the world of hair tools, the Dyson Airwrap Styler has become a game-changer, especially for those seeking flawless blowouts without the heat damage. Whether you’re aiming for sleek, straight hair or voluminous curls, this styling tool promises to deliver—without causing the dryness and breakage typically associated with traditional heat styling. But with a hefty price tag, is it really worth the splurge?

    Why the Dyson Airwrap Is Gaining Popularity

    The Dyson Airwrap Styler is a versatile tool designed to style your hair using airflow rather than relying solely on high heat. This technology aims to reduce damage and keep hair healthy, offering a safer alternative to conventional blow dryers and curlers. The concept behind it is simple: less heat, less damage, and better overall hair health.

    This has made it an especially popular choice for individuals with fine or coarse hair, and even those who often struggle with hair loss due to excessive heat styling. The key appeal of the Dyson Airwrap is that it promises to give you a polished look with much less harm to your strands.

    Pros of the Dyson Airwrap

    1. Versatility

    One of the major benefits of the Dyson Airwrap is its versatility. It comes with a base wand and multiple attachments, including barrels for curling, a smoothing brush, and a straightening tool. Whether you want beachy waves or a sleek finish, the Airwrap can tackle a wide range of styles. This makes it an all-in-one solution for different hair types and styling preferences.

    2. Healthier Hair

    Compared to traditional styling tools, the Dyson Airwrap uses airflow to style hair, significantly minimizing the exposure to direct heat. This means your hair is less likely to dry out or suffer from heat damage. The intelligent heat control technology ensures that it never gets too hot, so you won’t be left with frizzy, brittle ends after styling.

    3. Reduced Styling Time

    Once you get the hang of using the Dyson Airwrap, styling becomes incredibly quick. For those who are always in a rush or spend too long perfecting curls with a traditional curling iron, this tool can cut styling time in half. It’s particularly helpful for busy mornings when you need a polished look in a short amount of time.

    Cons of the Dyson Airwrap

    1. High Price Tag

    The most obvious drawback of the Dyson Airwrap is its price. At around $600, it is undoubtedly a luxury item. While it’s an investment for those who frequently style their hair, it might not be a feasible option for everyone, especially when there are plenty of other styling tools on the market at lower price points.

    2. Curls Don’t Always Last

    Many users have reported that while the Dyson Airwrap provides beautiful curls initially, they sometimes drop or lose their volume as the day goes on. The longevity of your curls depends more on the products you use and your hair type than on the Airwrap itself. It can take some time and experimentation to figure out the best technique and product combination to keep your style intact all day.

    3. Short Barrels for Long Hair

    If you have long hair, the barrels may not be long enough to handle the full length of your strands. Some people have complained that their hair doesn’t fit properly around the barrel, especially when curling, leading to frustration and a less-than-ideal result. While Dyson does offer a longer barrel, it may create tighter curls, which aren’t the look everyone desires.

    Is the Dyson Airwrap Worth It?

    When considering whether the Dyson Airwrap is worth the investment, it comes down to your hair needs and styling habits. For those who regularly blow-dry or curl their hair, this tool can save a lot of time and effort while minimizing damage. If you’re someone who frequently styles your hair, the Dyson Airwrap can provide consistent results without the added risk of heat damage, which makes it a great choice for maintaining hair health.

    However, for those on a budget or who don’t style their hair often, this may not be a necessary purchase. It requires some practice to master, and the high cost might not justify the benefits if you’re not styling your hair frequently.

    In conclusion, the Dyson Airwrap is a fantastic product for those who are committed to a healthy hair routine and want to streamline their styling process. If you can afford it and style your hair regularly, the Dyson Airwrap will likely be a worthwhile investment.

  • How to Fix Yellow-Toned Bleached Hair

    How to Fix Yellow-Toned Bleached Hair

    We’ve all been there—an at-home hair dyeing session that seemed like a good idea at the time but ended with unexpected yellow or brassy results. Whether it’s due to an impulsive decision or a failed DIY attempt, the frustration of yellow-toned bleached hair is real. But don’t worry, there’s no need to hide under a hat or wait for your hair to grow out. There are simple ways to fix this issue and get your hair back to a more natural, cooler shade.

    Why Did My Hair Turn Yellow?

    The main reason your hair turns yellow after bleaching is due to underlying pigments in your hair. Darker hair contains warm tones like red and yellow that are harder to lift during bleaching. When you bleach, these warm tones often stay behind, giving your hair that yellowish hue. Additionally, leftover bleach chemicals, minerals, or even hard water can interact with your hair and contribute to an off-color.

    But don’t stress! Yellow hair is fixable, and with the right products and techniques, you can restore a cooler, more neutral blonde look.

    How to Fix Yellow Bleached Hair

    If your hair turned yellow after bleaching, don’t panic—there are several options to correct it. From purple shampoos to professional touch-ups, here are the best ways to fix those unwanted yellow tones.

    1. Use Purple Shampoo

    One of the quickest and easiest fixes for yellow or brassy hair is purple shampoo. Purple shampoo works by neutralizing yellow tones, as purple sits opposite yellow on the color wheel. By using it, you can tone down the warmth and achieve a more neutral blonde.

    To use purple shampoo, simply apply it in the shower as you would any regular shampoo. Lather it in, let it sit for the recommended time on the bottle (usually 3-5 minutes), then rinse it out. Be cautious not to leave it on too long, as leaving it for extended periods may result in a lavender tint.

    Some of the best purple shampoos for toning yellow hair include Redken Color Extend Blondage and Biolage ColorLast Purple Shampoo. Both are well-known and trusted in the hair care industry for reducing brassiness and brightening up blonde hair.

    2. Bleach It Again

    If purple shampoo isn’t quite enough, you can try bleaching your hair again. However, make sure to wait a few days between bleach sessions to avoid over-processing your hair. Keep in mind that bleaching again can be damaging, so it’s essential to use products that protect and nourish your hair during the process.

    If you do decide to bleach again, incorporate a bond-building treatment like Olaplex No. 3 Hair Perfector. Olaplex helps repair the bonds in your hair that are broken during bleaching, keeping your hair healthier throughout the process.

    3. Use an Ashy Blonde Hair Dye

    If you want a more immediate fix, using an ashy blonde hair dye can effectively neutralize yellow tones. Look for a dye labeled as “ash” or “cool” as these are formulated to combat brassiness and give you a more neutral blonde color.

    One option to consider is L’Oréal Paris Superior Preference Fade-Defying + Shine Permanent Hair Color in 7A—a dark ash blonde that works well for neutralizing yellow. If you prefer a slightly lighter shade, try L’Oréal Paris Excellence Crème Permanent Hair Color in 8.5A for a champagne blonde hue.

    Boxed hair dye can be an affordable and effective solution if you’re looking for an easy fix. Don’t be afraid to use it if a professional color session is out of reach.

    4. Go Darker

    If you’re frustrated with the yellow tones but don’t want to go blonde anymore, it might be time to embrace a darker shade. Going back to brunette or even black will cover the yellow while giving your hair a healthier look. Darker shades are especially great for those who want to protect their hair from further damage, as darker dyes are less harsh on the hair than bleaching.

    For a gentle yet effective option, try using Arctic Fox hair dye, which is known for its vibrant colors and gentle formula. You can also look into Manic Panic or Punky Color for other bold, semi-permanent color options.

    5. Embrace Bold Colors

    Feeling adventurous? If you’re tired of the yellow and want to try something completely different, now might be the time to experiment with fun, bold colors! Bright hues like blue, purple, or pink can completely transform your look while masking any yellow undertones.

    These colors are often more forgiving, and many brands, such as Arctic Fox, offer vibrant shades that are non-damaging and long-lasting. Just make sure to perform a strand test before applying the dye to ensure you’re happy with the results.

    Final Thoughts

    Yellow-toned bleached hair can be frustrating, but with the right products and techniques, it’s possible to correct the color and restore your hair to a more neutral, flattering shade. Whether you choose purple shampoo, a second bleach session, or even a hair dye refresh, there are multiple ways to fix the problem and get your hair looking the way you want. Just remember to take care of your hair along the way and be mindful of the products you’re using to avoid further damage.

  • A Comprehensive Guide to Hair Extensions: What You Need to Know

    A Comprehensive Guide to Hair Extensions: What You Need to Know

    If you’ve ever chopped your hair off on a whim only to regret it later, you’re not alone. We’ve all had those moments when we impulsively cut our hair and wish we could undo it. Thankfully, there’s a solution—hair extensions! While extensions have gotten a bad rap for causing damage and hair loss, when done correctly, they can enhance your look without harm. The key is choosing the right type for your hair and maintaining them properly.

    Understanding Hair Extensions

    Before diving into the types of hair extensions, it’s essential to know that the choice of hair—whether human or synthetic—can make a significant difference. Let’s break down the basics.

    Human Hair vs. Synthetic Hair

    Human Hair: As the name suggests, this type of hair is made from real human hair. The benefits of human hair extensions include their natural texture, ability to be styled with heat, and long-lasting wear. They’re versatile—allowing you to color, curl, and straighten them just like your natural hair. With proper care, human hair extensions can last up to a year.

    Synthetic Hair: These extensions are made from synthetic fibers designed to mimic real hair. While they are more affordable, they come with a few downsides. For example, synthetic hair cannot withstand heat styling, and it tends to be less durable, often lasting only a few months. They also can’t be color-treated since the chemicals can break down the fibers.

    If you’re looking for a temporary style for an event, synthetic hair may be sufficient. However, if you plan on wearing extensions for an extended period, human hair is generally the better investment.

    Types of Hair Extensions

    There are several types of hair extensions, each with its pros and cons. Understanding these can help you make an informed decision.

    1. Tape-In Extensions

    Tape-in extensions are applied by sandwiching small sections of hair between strips of adhesive tape. This method is popular due to its relatively quick application and natural-looking results. However, you need to avoid oils or heavy conditioning products near the roots, as they can loosen the tape. These extensions typically last 6-8 weeks before needing to be reapplied.

    2. Sew-In (Weave) Extensions

    Sew-in extensions involve braiding your natural hair into cornrows, then sewing the extensions into the braids. This method is ideal for thicker hair and provides a seamless look. However, it can be time-consuming and is best performed by a professional to avoid scalp strain. Sew-in extensions are a more permanent solution, lasting anywhere from 8 to 10 weeks before needing maintenance.

    3. Clip-In Extensions

    Clip-in extensions are one of the easiest and most affordable options. These are temporary extensions that clip directly into your hair, providing instant volume and length. Clip-ins are a great choice for a temporary change, as they’re easy to apply and remove. However, they require some careful styling to ensure the clips don’t show. These extensions can last up to a year with proper care.

    4. Microlink Extensions

    Microlink extensions are applied using small beads that attach the hair to your natural strands without the need for glue or heat. The process is relatively gentle on the scalp, and these extensions can last up to 4 months with proper maintenance. However, they do require professional application, and if the beads are too tight, they can cause discomfort or even hair breakage.

    5. Halo Extensions

    Halo extensions are a non-invasive option that sits on your head like a headband. They don’t require any attachments to your natural hair, making them a low-damage option for adding length and volume. Halo extensions are easy to apply and remove and are great for short-term use, especially for those who want a no-fuss option for events. They’re also perfect for anyone worried about damaging their natural hair.

    How to Maintain Your Extensions

    Regardless of the type of extension you choose, proper care is essential to ensuring they last as long as possible. Here are a few tips:

    • Hydrate your scalp: For extensions like sew-ins, make sure to nourish your scalp to avoid irritation and keep your hair healthy.
    • Use the right products: Avoid heavy oils or conditioners near your extensions, especially tape-ins and microlinks, as these can cause the extensions to slip out or lose their effectiveness.
    • Regular touch-ups: Extensions require regular maintenance, so make sure to visit your stylist for reapplication or adjustments to keep your extensions looking fresh.
    • Wash carefully: Whether you have synthetic or human hair extensions, washing them gently is key to preventing tangling and breakage.

    Final Thoughts

    Hair extensions can be a game-changer for adding length, volume, and texture to your hair, but it’s crucial to choose the right type for your needs. Whether you go for the natural look of human hair or the convenience of synthetic extensions, understanding the various types and how to maintain them will help you enjoy your new style for longer. Always consult with a professional stylist to ensure your extensions are applied and cared for properly, and you’ll be rocking luscious locks in no time!

  • Top 10 Most Popular Celebrity Hairstyles for Men

    Top 10 Most Popular Celebrity Hairstyles for Men

    Hairstyles are a key part of personal style, especially for men, as they can significantly influence how someone is perceived. A great haircut can enhance confidence and add to one’s overall appearance. Over time, celebrities have set hair trends that millions have tried to emulate. Whether it’s for a more mature or youthful look, there’s a celebrity hairstyle for everyone. Here’s a look at some of the most iconic male celebrity hairstyles that have stood out and are worth trying.

    1. David Beckham’s Versatile Cuts:

    David Beckham is arguably one of the most influential figures in the world of celebrity hairstyles. From his iconic buzz cuts to slicked-back styles, Beckham has introduced a range of looks that have been followed worldwide. His ability to constantly switch up his style has kept him at the top of hair trend lists for over two decades, making him a style icon for men everywhere.

    2. Johnny Depp’s Edgy Styles:

    Known for his roles in films like Pirates of the Caribbean, Johnny Depp’s hairstyles are as iconic as his acting career. Depp has worn everything from messy, disheveled hair to slicked-back styles, always managing to look effortlessly cool. His hairstyles are a favorite among men who like to add a bit of edge and personality to their look.

    3. Justin Bieber’s Trendy Cuts:

    Justin Bieber became a style icon for many young men, thanks to his signature hairstyles that have evolved over the years. From his early days with a floppy fringe to his more mature, short styles, Bieber’s haircuts have always been a go-to for teens and young adults looking to keep their hair looking fresh and cool.

    4. Cristiano Ronaldo’s Faux Hawk:

    Cristiano Ronaldo’s athletic ability is matched by his stylish hair choices. The footballer is known for his gelled faux hawk, a look that remains neat and in place, even during intense football matches. His sleek, high-maintenance hairstyle makes him a trendsetter for men who want a sharp, polished look.

    5. Leonardo DiCaprio’s Classic Cuts:

    Leonardo DiCaprio’s hairstyles, especially his looks from Titanic, continue to inspire men seeking a sophisticated yet approachable style. Known for his timeless and mature haircuts, DiCaprio has worn everything from clean, neatly combed styles to more rugged, wavy looks, always keeping it classy.

    6. Neymar Jr.’s Youthful Fringe:

    Brazilian footballer Neymar Jr. is known for his distinctive haircuts, and his current look with a long fringe and shaved sides has made waves across the globe. His bold hairstyle is particularly popular among younger men and reflects his fun, adventurous personality both on and off the field.

    7. Brad Pitt’s Iconic Hairstyles:

    Brad Pitt has been a style icon for decades, with his hairstyles evolving as much as his acting career. Whether he’s sporting a long, flowing mane or a more polished, short look, Brad Pitt’s haircuts are perfect for those who want a versatile style that can easily transition from casual to formal.

    8. Adrian Sina’s Cool Short Cuts:

    Adrian Sina, the lead vocalist of the Romanian band Akcent, has been a trendsetter for short hairstyles, especially in Europe and Asia. His current look, with shaved sides and a voluminous top, is sleek and modern, making it ideal for men who want a bold, edgy haircut.

    9. Justin Timberlake’s Classic Comb-Over:

    Justin Timberlake’s hairstyle is a go-to for men with thicker, silkier hair. His comb-over style is both timeless and youthful, offering a clean, polished look that’s perfect for men who prefer a more sophisticated, classic appearance. Timberlake’s style is often emulated by those who want to maintain a stylish yet low-maintenance look.

    10. George Lamb’s Unique Look:

    George Lamb, a British television and radio presenter, is known for his distinctive, stylish haircuts. His look is sleek and modern, making him a great choice for men looking to combine a professional yet trendy hairstyle. His unique approach to hair makes him an ideal inspiration for those who prefer longer, more defined hairstyles.

    Conclusion:

    A good hairstyle can transform your entire look, and choosing the right one is key to enhancing your confidence and personal style. From classic looks to edgy styles, these celebrity hairstyles provide plenty of inspiration for men of all ages. Whether you want to sport a short, sleek cut or a longer, more textured style, these stars have proven that a great hairstyle is a crucial part of looking and feeling your best.

  • Top 10 Most Iconic Female Celebrity Hairstyles of All Time

    Top 10 Most Iconic Female Celebrity Hairstyles of All Time

    A great hairstyle has the power to transform your entire look, and when it comes to inspiration, celebrities often set the bar. Over the years, many women have turned to their favorite stars for hairstyle ideas, and the influence of these celebrity haircuts is undeniable. From bold cuts to timeless classics, celebrity hairstyles have become the ultimate source of hair inspiration. Here’s a rundown of the top 10 most iconic and popular female celebrity hairstyles that have stood the test of time.

    1. Jennifer Aniston’s “Rachel” Cut:

    One of the most iconic hairstyles of all time, Jennifer Aniston’s “Rachel” cut from the TV show Friends became a trend that millions of women embraced. Introduced during the 90s, this layered, voluminous look remains a popular request in salons worldwide, proving its lasting appeal.

    2. Meg Ryan’s Shag:

    Meg Ryan’s signature shaggy hairstyle was perfect for her quirky, yet effortlessly chic persona. This cut, with its tousled layers, became a favorite for women seeking a carefree yet stylish look. It remains a go-to choice for those wanting to achieve a mix of playful and sophisticated.

    3. Dannii Minogue’s Sleek Bob:

    Dannii Minogue’s sleek bob is a symbol of modern elegance. The clean lines and glossy finish of this haircut give off a polished, no-nonsense vibe, making it an ideal choice for women who want a sophisticated yet low-maintenance style. Many celebrities have since adopted this chic cut.

    4. Victoria Beckham’s Posh Pageboy:

    Victoria Beckham’s Posh Pageboy cut perfectly encapsulates her sophisticated and structured style. The asymmetrical bob with sharp angles became a favorite among women who admired her chic, edgy persona. It’s a timeless look that exudes confidence and elegance.

    5. Princess Diana’s Iconic Royal Look:

    Princess Diana’s hair became synonymous with grace and elegance. Her short, layered cut, styled with volume, made her one of the most photographed women in the world. Her look continues to inspire, as women across the globe still seek to replicate her sophisticated yet approachable hairstyle.

    6. Michelle Obama’s Classic Cut:

    Michelle Obama’s classic cut was both modern and dignified, making her a style icon. Her sleek, shoulder-length bob exuded confidence and poise, earning her a place among the most influential celebrity hairstyles. Her hairstyle was not only admired for its beauty but also for the way it represented empowerment and grace.

    7. Mia Farrow’s Pixie Cut:

    Mia Farrow’s pixie cut, made famous in the 1960s for her role in Rosemary’s Baby, was a revolutionary hairstyle at the time. This bold, short cut challenged conventional beauty standards, and many women adopted it to create an effortlessly chic look that remains timeless today.

    8. Farrah Fawcett’s Feathered Flip:

    Farrah Fawcett’s feathered flip is a hairstyle that defined the 70s. This voluminous, textured look with layers was synonymous with Fawcett’s free-spirited and glamorous image. Though she’s no longer with us, her hairstyle is still a favorite and continues to influence hair trends.

    9. Marilyn Monroe’s Blonde Curls:

    Marilyn Monroe’s platinum blonde curls have become synonymous with old Hollywood glamour. This iconic hairstyle remains a symbol of sensuality and elegance. Whether styled loosely or tightly curled, her blonde locks have inspired countless women to embrace their inner bombshell.

    10. Blake Lively’s Layered Tresses:

    Blake Lively’s long, layered hair became a major trend, especially during her time on Gossip Girl. Known for her effortlessly chic beach waves and voluminous layers, Lively’s hairstyle has inspired women to embrace natural-looking, textured hair. Her glamorous yet approachable look continues to be widely replicated.

    These celebrity hairstyles have not only shaped trends but also continue to influence the way women view their hair. Whether you’re looking for something timeless or a modern twist on a classic, these iconic styles offer endless inspiration.

  • Top 10 Bun Hairstyles to Try for Every Occasion

    Top 10 Bun Hairstyles to Try for Every Occasion

    Bun hairstyles are a timeless favorite that can elevate any look. Whether it’s a formal event or a casual outing, a bun adds a touch of sophistication and style. However, we all know how easy it is to get stuck in a hair rut, doing the same style over and over again. If you’re looking for some variety, here’s a roundup of 10 stunning and popular bun styles to inspire your next look. From casual to glamorous, these hairstyles will take your hair game to the next level.

    1. Elegant Wavy Bun:

    When you’re aiming for elegance, the wavy bun is the perfect choice. This style incorporates soft waves throughout the hair, adding volume and texture to your bun. It’s ideal for formal occasions and adds a touch of sophistication to your look.

    2. Loose Top Bun:

    The loose top bun combines a relaxed feel with refined charm. With soft twists and gentle bangs, this style can be worn for both casual and formal events. It’s effortlessly chic, making it perfect for any wardrobe choice.

    3. Messy Bun:

    The messy bun is a classic, and for good reason. Despite its casual appearance, it’s a surprisingly sophisticated choice that can complement both formal and casual outfits. You can personalize it with accessories like pins, clips, or flowers for a more customized look.

    4. Twisted Side Bun:

    For a more intricate bun, try the twisted side bun. Adding twists and strands to a side-updo creates a beautifully textured and elegant look, perfect for events where grace and sophistication are key.

    5. Sleek Updo:

    Sleek and polished, the sleek updo is a simple yet stunning hairstyle. With curled strands carefully clipped into place, it’s a refined look that’s perfect for those who love clean, minimalist styles. This updo works well for any formal gathering.

    6. Pulled Back & Soft Bun:

    This soft, feminine updo is ideal for an elegant event. It’s a delicate style that pulls the hair back into a loose, graceful bun. The softness of the updo offers a gentle, sophisticated look that complements any formal occasion.

    7. Renaissance Buns:

    Inspired by the Renaissance era, this hairstyle combines loose curls with braids, creating a look that’s both romantic and regal. This bun style is perfect for adding elegance to a fancy dress or when you want to feel like royalty at a special event.

    8. High Side Bun:

    If you’re looking for something playful and fun, the high side bun is a great option. It’s a great way to break away from the traditional low side bun, adding an element of whimsy and charm to your look. Perfect for those who love to add some fun energy to their hairstyle.

    9. Embellished Updo:

    Nothing says elegance quite like an embellished updo. Adding floral accessories or a decorative headband gives your bun an extra touch of beauty and femininity. This style is especially perfect for spring or summer when you want to add a bit of floral flair to your outfit.

    10. Tuck & Twist Bun:

    The tuck and twist bun is all about surprise. While it may look simple from the front, the back reveals an intricate twist and fold that adds a cool, chic touch to your overall style. This look is great for more relaxed events, like street parties or casual gatherings.

    These bun styles offer something for every occasion, from casual outings to formal events. By experimenting with these various looks, you can switch things up and always feel confident with your hairstyle!