分类: Beauty

  • Brow Lamination: The Truth Behind the Trend

    Brow Lamination: The Truth Behind the Trend

    Brow lamination is quickly gaining popularity, and it’s easy to see why. This beauty treatment promises to give you sleek, full, and defined brows without the need for daily effort. Whether you’re dealing with unruly brows or want to achieve a more polished look, brow lamination is here to help. Celebrities like Cardi B and Lizzo have embraced the trend, and now it’s your turn to learn more about this brow-transforming treatment.

    What Exactly is Brow Lamination?

    At its core, brow lamination is a process that uses a chemical solution to straighten and lift the brow hairs, setting them in place for a smooth, well-groomed look. The result is like having your brows professionally styled and shaped for up to six weeks. This treatment can give you the appearance of fuller, perfectly groomed brows with little effort.

    The technique is similar to a perm, but instead of curly hair, you’re working with straightening and lifting the brows. It’s ideal for anyone looking to tame unruly brows or those who want to achieve a voluminous, sleek look.

    What to Expect During Your Appointment

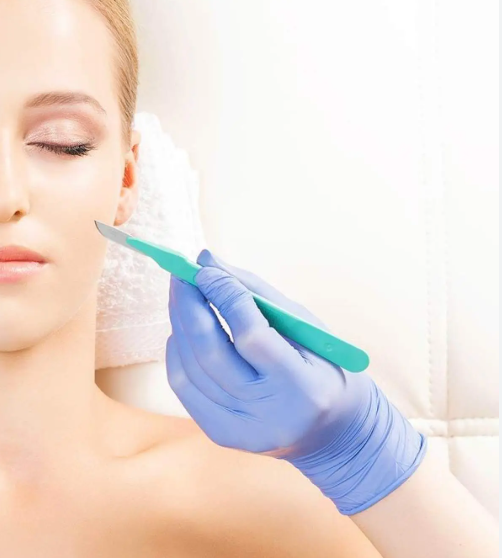
    A typical brow lamination session takes around 20 minutes. The process starts with a lifting cream applied to your brows, which softens the hair and makes it easier to manipulate. Once the hairs are combed into the desired shape, a neutralizer is applied to lock the style in place. Finally, a nourishing oil is used to give the brows a shiny, healthy finish.

    If you want additional services, such as eyebrow tinting or waxing, these can be done in the same session, adding about 10 to 20 minutes to the overall treatment.

    Can I Do Brow Lamination at Home?

    While there are DIY brow lamination kits available, it’s important to approach home treatments with caution. Just because you can do it yourself doesn’t necessarily mean you should. It’s essential to follow instructions carefully, and you should always conduct a patch test before applying any chemicals to your brows to avoid allergic reactions.

    Additionally, using vaseline around your brows can help prevent over-processing. If you do attempt it at home, be sure to have a professional stylist’s contact information handy in case you need help fixing any mistakes.

    Alternatives to Chemical Lamination

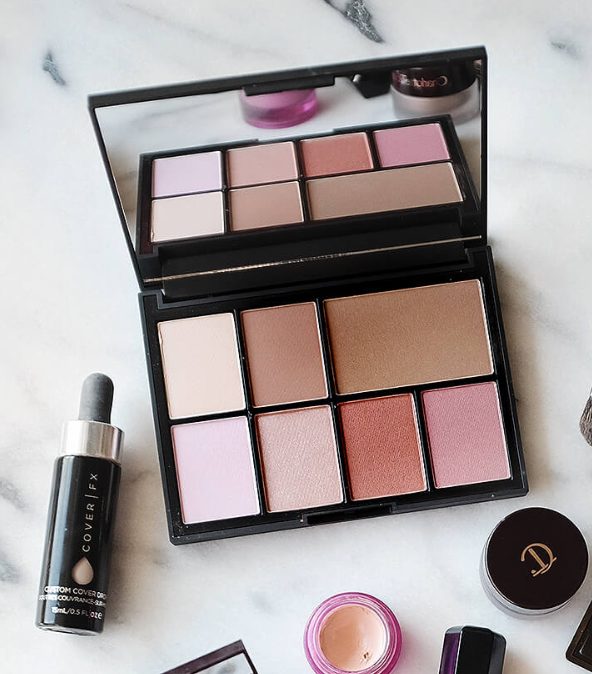
    If you love the laminated look but want to avoid chemicals, there are some great products that can give you a similar effect. One of the easiest and most popular options is West Barn Co Soap Brows, which allows you to shape and hold your brows in place without the use of harsh chemicals. Simply apply the product with the included brush, shape your brows, and enjoy a natural, fluffy finish that’s easily removable at the end of the day.

    Another great option is Anastasia Beverly Hills Clear Brow Gel, which provides a natural look with nourishing ingredients that strengthen your brows while keeping them in place. It gives a polished finish without the stiffness of traditional brow gels.

    Keeping Your Brows Looking Great Between Appointments

    After your brow lamination treatment, proper care is key to maintaining the health and appearance of your brows. Just like you would with your hair, you should nourish and moisturize your brows regularly.

    • Castor Oil: A simple yet effective remedy for keeping your brows healthy is castor oil. Apply it with a clean mascara spoolie every night to keep your brows hydrated and encourage growth.
    • Lash Brow and Toxx: For those willing to spend a bit more, products like Lash Brow and Toxx contain ingredients like hyaluronic acid, keratin, and biotin, which nourish both your brow hairs and the skin underneath, helping to prevent damage and dryness.

    Brow Lamination vs. Microblading

    While both brow lamination and microblading aim to enhance the appearance of your brows, they are quite different in terms of technique and results.

    • Microblading involves using tiny needles to create hair-like strokes in your brows, giving them a fuller, more defined look. It’s a more invasive procedure that can take up to two hours, and the results last for about a year before a touch-up is needed. However, it requires more aftercare, including avoiding makeup on your face for several days, and can cost between $450 and $750.
    • Brow Lamination, on the other hand, is less invasive and much more affordable. The procedure takes about 20 minutes, costs around $100, and requires minimal aftercare. However, the results are not permanent and will need to be maintained with appointments every 6 to 8 weeks.

    Conclusion

    Brow lamination is a great alternative to more permanent eyebrow treatments like microblading. It’s quick, affordable, and provides stunning results for anyone looking to tame their brows. Whether you’re opting for a professional treatment or trying it at home, be sure to follow the instructions carefully and take good care of your brows to keep them looking their best. For those who want a similar look without the chemicals, there are plenty of products that can help you achieve the laminated brow effect at home.

  • Mushroom Blonde Hair: The New Trend Celebrities Are Loving

    Mushroom Blonde Hair: The New Trend Celebrities Are Loving

    Mushroom blonde is quickly becoming the go-to hair color, and it’s easy to see why. Whether you have blonde or brown hair, this versatile shade is an effortless way to add depth and dimension to your locks. Celebrities like Hailey Bieber, Gigi Hadid, and Margot Robbie are making the switch from their bright blonde hues to this softer, muted color, and it’s becoming a trend that’s hard to ignore.

    What is Mushroom Blonde?

    Mushroom blonde is a trendy, muted hair color that sits somewhere between dark blonde and light brown. It’s often referred to as “bronde” because of its in-between tone. What sets this color apart from other ash tones is its gray undertones, which give it a sophisticated, cool look. It’s a fantastic choice for those who want to transition to darker hair but aren’t ready to fully commit to brunette shades.

    If you’re unsure about going darker but still want to tone down your blonde, mushroom blonde is a perfect middle ground. It allows you to ease into a darker color without the harsh contrast of a dramatic change.

    Is Mushroom Blonde Low Maintenance?

    One of the best things about mushroom blonde is how easy it is to maintain. This shade blends naturally with your roots, making it perfect for those who want to extend the time between salon visits. Unlike platinum blonde hair, which can show regrowth quickly, mushroom blonde allows you to go longer without worrying about noticeable roots. It’s a practical option for those looking to save time and money on frequent touch-ups.

    How to Achieve Mushroom Blonde Hair

    To get the mushroom blonde look, you’ll need to start with a light blonde base. If you have virgin brown hair, your stylist will likely bleach your hair to lift it a few levels and then apply a cool blonde color on top. If you already have bleached blonde hair, all that’s required is adding icy blonde highlights or lowlights to create the mushroom tone.

    While it’s possible to attempt this look at home, I highly recommend visiting a professional colorist. Achieving the perfect mushroom blonde requires skill and the right shades, especially if you want to minimize damage. However, if you’re determined to try it yourself, here are a few tips for at-home success:

    Achieving Mushroom Blonde at Home

    If you have naturally brown hair, the process is relatively straightforward. You can use boxed hair color like L’Oreal Superior Preference in 7A Dark Ash Blonde, which provides a cool blonde shade similar to mushroom blonde. It’s also effective for blending in with bleached hair, but make sure to address your roots to ensure even color coverage.

    For those with bleached hair, a toner can help neutralize any brassiness and create that cool, muted mushroom blonde. Wella’s Shinefinity Zero Lift Glaze in 06/02 Dark Blonde Natural Matte is an excellent choice to cancel out warm tones and provide a more natural, muted finish.

    While experimenting with home hair color can be tempting, be prepared for some trial and error. If things don’t turn out as expected, your colorist can always help you fix it.

    Caring for Mushroom Blonde Hair

    Once you’ve achieved your beautiful mushroom blonde color, keeping your hair healthy is key. Here are some tips to help maintain the color and keep your locks looking shiny and vibrant:

    1. Never Skip Conditioner
      Dyed hair tends to be more brittle, so it’s essential to use conditioner regularly. Opt for a lightweight conditioner like Olaplex Hair Perfector No. 3 to protect your strands without weighing them down.
    2. Use a Hair Mask
      To keep your hair soft and glossy, try incorporating a hair mask into your routine. Briogeo’s Don’t Despair, Repair Mask is great for over-processed hair, providing deep hydration and nourishment.
    3. Protect Your Hair from Heat
      If you’re using heat styling tools, always apply a heat protectant. Chi Silk Infusion is a fantastic option, offering a glossy finish without the heavy feeling.

    Final Thoughts

    Mushroom blonde is a gorgeous, low-maintenance hair color that’s gaining popularity among celebrities and beauty enthusiasts alike. Whether you’re looking to transition from platinum blonde or simply add some depth to your brunette locks, this cool, ashy shade is a perfect choice. With its easy upkeep and sophisticated look, mushroom blonde might just be the color to try next!

  • Does Sudocrem Help Acne? Here’s What You Need to Know

    Does Sudocrem Help Acne? Here’s What You Need to Know

    If you’ve ever been to the UK or Ireland, chances are you’ve heard people rave about Sudocrem. This multi-purpose cream has been a household staple for years, especially for treating diaper rash. But as its popularity grows, many people are curious if Sudocrem can do more than just soothe babies’ bottoms—specifically, does it work for acne?

    Let’s dive into the details about Sudocrem, its ingredients, and how it can be used for acne treatment.

    What Exactly is Sudocrem?

    Sudocrem is an antiseptic cream originally designed to treat diaper rash in babies. It’s made with five key ingredients:

    • Zinc Oxide: Known for its astringent properties, it helps calm inflammation, prevent infection, and absorb excess oil.
    • Benzyl Alcohol: This ingredient works as a preservative and has mild pain-relieving properties, often used to dry out infections.
    • Benzyl Benzoate and Benzyl Cinnamate: These are known for their soothing properties and help reduce inflammation.
    • Lanolin: A moisturizing agent derived from sheep’s wool, it helps prevent irritation, itching, and dryness.

    Together, these ingredients form a barrier on the skin, which is why Sudocrem works so well for treating skin conditions like diaper rash and eczema.

    Benefits and Alternative Uses for Sudocrem

    Though it was originally created for babies, Sudocrem has found many uses beyond diaper rash. Some of the common alternative applications include:

    • Anti-aging: Zinc oxide promotes the production of elastin, which can reduce the appearance of fine lines and wrinkles.
    • Eczema Relief: Sudocrem can help relieve eczema symptoms by fighting infections and reducing inflammation.
    • Moisturizing Dry Skin: Lanolin helps the skin retain moisture, which is great for dry areas of the body.
    • Bed Sores: Much like diaper rash, bedsores are a type of skin irritation that Sudocrem can help soothe.
    • Treating Minor Cuts and Scrapes: The antibacterial properties of Sudocrem make it effective for small skin lesions.

    Sudocrem and Acne: Does it Work?

    Now, let’s address the burning question—does Sudocrem help acne?

    The answer is yes, it can. While it’s not marketed as an acne treatment, many people use Sudocrem as a spot treatment for acne, especially cystic acne. The key ingredient here is Zinc Oxide, which is commonly found in many acne products because it helps absorb excess oil and shrink pores.

    Additionally, Benzyl Alcohol has drying properties that can help reduce inflammation and soothe pain associated with acne, making it effective for treating cystic acne. Sudocrem can also aid in reducing the appearance of acne scars over time, as it helps accelerate wound healing and brightens dark spots thanks to its zinc content.

    Does Sudocrem Clog Pores?

    This is where things can get a bit tricky. Sudocrem’s lanolin content can be comedogenic, meaning it has the potential to clog pores. If you have oily skin, this could lead to more breakouts. However, if you have dry or combination skin, the moisturizing properties of lanolin may actually help prevent irritation.

    For those with balanced skin, Sudocrem may be a great addition to your routine without causing further breakouts. But if you have oily skin, it’s best to be cautious and monitor how your skin reacts.

    How to Use Sudocrem for Acne

    For acne treatment, it’s important to apply Sudocrem to clean, dry skin. Use a small amount, gently dabbing it onto problem areas. You can apply it as a spot treatment before bed and let it work overnight. Just remember to use a light layer to avoid any potential irritation.

    Are There Any Side Effects?

    Generally, Sudocrem is safe for most people, but if you have sensitive skin or an allergy to any of its ingredients, it could cause redness, irritation, or burning. It’s especially important to avoid using it if you have rosacea, as the benzyl alcohol could aggravate the condition.

    Where to Buy Sudocrem

    If you’re in Europe, Sudocrem is easy to find in most drugstores. However, if you’re in the US, it’s a bit trickier to get your hands on it. While it’s available on sites like eBay, it’s not commonly found in American stores.

    Conclusion: Should You Use Sudocrem for Acne?

    So, does Sudocrem help with acne? Yes, it can be an effective treatment for acne and acne scars due to its combination of anti-inflammatory, oil-absorbing, and healing ingredients. However, it’s not suitable for everyone, especially those with oily skin prone to clogged pores.

    Is Sudocrem a miracle product? While it’s certainly versatile and affordable, whether it’s the right choice depends on your skin type. For many people, it’s a great option, but it’s always a good idea to patch-test first.

    Next time someone asks about Sudocrem’s benefits, you’ll have all the answers ready!

  • Derol Lip Plumper: Is It Really Effective?

    Derol Lip Plumper: Is It Really Effective?

    If you’re looking for fuller lips but want to avoid injections or fillers, lip plumpers can be a great alternative. Derol Lip Plumper has gained popularity recently, especially on TikTok, with users raving about its ability to plump lips without the need for needles or downtime. But does it live up to the hype? Let’s find out.

    How Do I Use Derol Lip Plumper?

    Achieving a fuller pout without needles is easy with Derol Lip Plumper. You can apply it in a few different ways depending on your needs. It can be used as a base to smooth and hydrate your lips before applying other products like lip balm or gloss. Alternatively, you can apply it on top of lipstick for added shine and a subtle plumping effect.

    Derol Lip Plumper is available in both daytime and nighttime formulations. The daytime version provides an instant hydration boost and plumps the lips with a touch of shine, while the nighttime formula works to nourish and hydrate your lips while you sleep, giving you fuller lips by morning.

    One standout feature of Derol Lip Plumper is its inclusion of nourishing ingredients like vitamin E and collagen, which help keep your lips soft and healthy while they’re plumped.

    How Long Does It Take to See Results?

    You’ll notice a slight difference in your lips immediately after applying the Derol Lip Plumper. The tingling sensation signals that the product is working, and your lips will look fuller right away. If you use it consistently, you’ll see even better results over time. With regular use of the full Derol Lip Plumper set, you can expect to see more significant results within two weeks.

    The daytime formula provides instant plumping, while the nighttime version continues to work on your lips, making them softer and fuller by morning.

    Does It Hurt?

    While it’s not painful, the sensation of applying Derol Lip Plumper can be a bit intense. The peppermint and ginger in the formula create a mild burning and tingling feeling that is similar to the discomfort you might experience from spicy food or extremely chapped lips. It’s not unbearable, but it’s definitely noticeable.

    The tingling lasts for about five minutes, and while it may feel odd at first, it’s a sign that the plumper is working. If you have sensitive skin, the burning sensation might last a bit longer, but it’s typically tolerable.

    Is Derol Lip Plumper Cruelty-Free?

    Yes! Derol Lip Plumper is cruelty-free. Unlike some other lip plumpers that use bee venom as an active ingredient, which can harm honeybees, Derol uses a blend of peppermint oil and ginger to create that signature tingling sensation. This means no bees are harmed in the process, and you can feel good about your beauty routine.

    Can Derol Lip Plumper Damage My Lips?

    One common issue with many lip plumpers is that they can leave your lips dry or irritated over time. Some plumpers, especially those that use bee venom, can cause inflammation or allergic reactions. However, Derol Lip Plumper is designed to be gentler on your lips. The added collagen and vitamin E help keep your lips hydrated and prevent dryness, even with daily use. These ingredients also work to prevent fine lines and peeling, which is a bonus for anyone concerned about the long-term health of their lips.

    The Verdict

    Lip plumpers are a popular alternative for those who want fuller lips without the needles, but not all of them are created equal. Some products use harsh ingredients that can irritate the skin or harm animals. Derol Lip Plumper, on the other hand, has earned its reputation thanks to its effective formula and cruelty-free ingredients.

    It’s affordable, works quickly, and doesn’t dry out your lips, making it a standout in the world of lip plumping products. The combination of plumping action and nourishing ingredients like vitamin E and collagen ensures your lips will stay soft and smooth while they become fuller.

    If you’re looking for a lip plumper that delivers results without the harsh chemicals, Derol is definitely worth trying.

  • Should You Wash Your Hair Before A Haircut? Here’s Why You Should

    Should You Wash Your Hair Before A Haircut? Here’s Why You Should

    When it’s time for a hair appointment, I make sure I’m the best client possible. I bring a coffee for my stylist, a few pictures of the cut and color I have in mind, and, most importantly, freshly washed hair.

    There’s a misconception floating around about not washing your hair before a haircut, but trust me, it’s not a rule you should follow. In fact, arriving with clean hair is not just polite, it also ensures you get the best cut possible.

    Why You Should Always Wash Your Hair Before Your Appointment

    1. Clean Hair is a Courtesy
      Dirty hair is uncomfortable for both you and your stylist. When your hair is greasy, you’re less likely to run your hands through it, which is exactly what your stylist needs to do to work with your hair. It’s not a pleasant experience for anyone to work with unwashed hair, and it can make the whole process less enjoyable. Arriving with clean hair is common courtesy that will make the session smoother.
    2. A Better Cut
      Your stylist needs to understand how your hair behaves in its natural state before cutting. Clean hair gives your stylist insight into your hair type, texture, and how it naturally falls. If you show up with dirty hair, they won’t have a clear understanding of how your hair reacts after washing, and your cut might not be as precise. A fresh wash allows your stylist to give you a cut that works with your hair’s natural flow, so you can style it easily once you’re home.

    How to Prepare for Your Haircut

    1. Style Your Hair Like Normal
      It’s not the time to experiment with a new part or style. If you typically part your hair in a certain way, keep it that way before your appointment. Your stylist will need to know your usual part to ensure your cut is even and works with your hair’s natural lines.
    2. Skip the Hair Products
      Clean hair is much easier to work with than hair coated in products. After washing, avoid using mousse, hairspray, or styling gels. While a light application of heat protectant or conditioner is fine, avoid overloading your hair with products before you head to the salon. This will give your stylist a cleaner canvas to work with.
    3. Clarify Your Hair
      If you use styling products regularly, you might want to apply a clarifying treatment a day or two before your appointment. This will help remove any product buildup and leave your hair in its most natural state. I personally love using Ion Crystal Clarifying Treatment, especially if you have hard water, as it helps remove minerals that can also accumulate in your hair.

    What About Washing After Your Haircut?

    You may wonder if you should wash your hair as soon as you get home from your appointment. Don’t worry—it won’t harm your cut. In fact, washing your hair after a haircut can help you get familiar with styling your new look.

    Your stylist has all the tools and products to get your hair styled perfectly, but it can take some time to master styling your cut at home. It’s normal to need a few tries before you feel confident with your new style. After cutting off 8 inches for a sleek bob, it took me about a week to figure out the best way to style it. So, don’t worry if you struggle at first!

    Struggling to Style Your New Hair?

    If you’re finding it hard to recreate your salon look, don’t panic. You can always go back to your stylist for advice. They can give you helpful tips on how to style your hair and suggest products that will make it easier to manage.

    Final Thoughts

    Washing your hair before your haircut is simply a courtesy, and it will make the process smoother for both you and your stylist. Clean hair allows for a more precise cut, and skipping the product buildup makes your stylist’s job easier. If you’re making a big change to your hairstyle, give yourself some time to get the hang of styling your new look. And remember, washing your hair after your appointment is totally fine—it gives you the chance to practice your new style!

  • How Often Should You Dermaplane? A Complete Guide

    How Often Should You Dermaplane? A Complete Guide

    Dermaplaning may sound intimidating at first, as it involves gently scraping away the outer layer of skin with a scalpel, but it’s actually a quick, painless process that can be done at home. If you’re looking for an effective way to exfoliate without relying on harsh scrubs or chemical peels, dermaplaning is the solution.

    While you can visit a professional for the full spa experience, it’s easy to do it yourself at home with the right tools. Before diving in, though, it’s important to understand the basics of dermaplaning. Here’s everything you need to know:

    What Is Dermaplaning?

    Dermaplaning, developed in the 1970s, is a method of exfoliating the skin that not only removes dead skin cells but also peach fuzz and dirt. This technique uses a small, specialized scalpel or blade, which a trained professional will use at a precise angle to safely remove these layers. At home, you’ll use a tool designed for safety, though you should still be cautious to avoid cuts.

    The Pros and Cons of Dermaplaning

    Like any beauty treatment, dermaplaning comes with its advantages and disadvantages. Let’s break them down:

    Pros

    • Easy to do at home
    • Quick procedure
    • Encourages collagen production, which can help reduce fine lines
    • Removes peach fuzz for a smoother complexion
    • Works well with most skin types
    • Enhances the absorption of skincare products
    • Painless
    • No harsh chemicals involved
    • Helps fade discoloration and scarring

    Cons

    • Not recommended for those with acne, acne scars, active breakouts, sensitive skin, rosacea, or eczema
    • Results are temporary and need to be repeated
    • Can become costly if done frequently
    • Requires precision, as improper technique could result in cuts, which might get infected
    • Results may vary based on the quality of the tool used

    How Often Should You Dermaplane?

    One of the most common questions people ask about dermaplaning is, “How often should I do it?” Generally, dermaplaning should be done once a month. If your skin is more resilient, you may be able to do it every two weeks, but it’s important to avoid overdoing it.

    Can You Dermaplane Too Often?

    Yes, over-dermaplaning (or over-exfoliating) can lead to skin irritation. Removing too many layers of skin makes your face more vulnerable to irritants and contaminants. If you notice your skin becoming overly sensitive, or if it starts to look shiny—indicating that essential oils and proteins have been stripped away—it’s a sign to slow down. Minor red bumps can occur after dermaplaning, but these typically resolve on their own without treatment.

    Should You Dermaplane With Wet or Dry Skin?

    For the best results, make sure your skin is completely dry when dermaplaning. Though the process is similar to shaving, this is a crucial difference. You can shower beforehand if you like, but it’s important to thoroughly dry your face before starting.

    Here’s how to do it:

    1. Cleanse your face with a gentle cleanser to remove makeup, dirt, and oils.
    2. Dry your face completely.
    3. Gently pull your skin taut.
    4. Hold the dermaplaning tool at a 45-degree angle and lightly glide it down your face (always move from top to bottom).
    5. Avoid using the tool on sensitive areas like your eyelids, nostrils, and hairline.
    6. Finish the treatment by applying a hydrating serum, followed by a moisturizer to lock in hydration. If you’re heading outside afterward, don’t forget to apply SPF to protect your fresh skin.

    Can I Use Vitamin C After Dermaplaning?

    After dermaplaning, it’s important to be mindful of the products you apply, especially if your skin is sensitive. Vitamin C is a powerful hydrating ingredient but can be irritating if your skin isn’t accustomed to it. The same applies to other active ingredients like retinol or AHAs and BHAs. Stick with gentle, hydrating products right after dermaplaning, and save the stronger treatments for use between sessions.

    Conclusion

    Dermaplaning is a fantastic way to rejuvenate your skin, leaving it feeling smooth, bright, and fresh. Not only does it enhance the effectiveness of your skincare routine, but it also creates a flawless base for makeup. As for how often to dermaplane, once a month is typically enough, though you may be able to do it every two weeks if your skin tolerates it.

    If you’re new to dermaplaning, be careful not to overdo it, and always pay attention to how your skin reacts. If you experience irritation or discomfort, it’s best to consult with a dermatologist. For the vast majority of people, dermaplaning is a great addition to your skincare routine that can provide noticeable improvements in skin texture and appearance.

  • Five Minutes to Glowing Skin: My Effortless Glow Routine

    Five Minutes to Glowing Skin: My Effortless Glow Routine

    I’ve always been a bit of a skincare and makeup enthusiast, constantly experimenting with new tricks to enhance my routine. Recently, a makeup artist taught me an important lesson about using powder—less is definitely more! Instead of piling it all over your face in hopes of keeping makeup in place, applying it strategically helps maintain a fresh look without going overboard. When you try to eliminate all shine, it can leave your skin looking flat and dull. A little shine is a good thing, and incorporating highlighters and luminizers adds the perfect dimension to your skin, making it look fresh and glowing.

    Before diving into makeup, it’s essential to focus on a few skin basics. Good skin is the key to any glowing look, and that starts with taking care of yourself. Drink plenty of water, aim for a balanced diet, get enough sleep, and try to stay calm—those are the basics! Washing your face twice a day is also crucial. I prefer using warm water and a gentle cleanser over harsh foaming products. My current favorite is Dr. Hauschka’s cleansing milk. Twice a week, I treat my skin to an exfoliating mask, such as the Andalou Naturals glycolic pumpkin mask and the Fresh Black Tea Perfecting Mask.

    I also swear by exfoliating more often than recommended—about every other day. Using a gritty washcloth when washing my face has made a huge difference in removing product buildup and dead skin cells. If you don’t exfoliate, makeup won’t apply smoothly, no matter how great the products are. Moisturize generously; your skin will thank you for it! And don’t forget about your makeup brushes—washing them regularly is essential to avoid breakouts.

    Perfecting Your Base

    Start by applying your preferred foundation. I don’t always wear foundation, but I think a little layer helps protect your skin from environmental factors. My go-to foundation is Bobbi Brown’s Moisture Rich Foundation— it matches my skin tone perfectly. I use a stippling brush to apply it for a smooth, even finish.

    For concealing dark circles, I use a creamy formula and gently tap it in with my ring finger, getting as close to the lash line as possible and covering the inner corners. If I have blemishes, I use a heavier concealer to cover those up. To set everything in place, I apply translucent powder under my eyes and wherever I’ve applied concealer, using a small, semi-fluffy brush. If the day is going to be long or muggy, I’ll set my foundation lightly with powder, concentrating on areas like my eyelids, chin, nostrils, and forehead. I use a small blush brush for precise powder application since the goal is to keep that healthy glow intact.

    Amping Up the Glow

    For a natural finish, I prefer to use cream products instead of powders. Cream blushes, highlighters, and eyeshadows blend seamlessly into the skin, creating a softer, more natural look. For blush, I use Bobbi Brown’s cream blush in two shades of pink. I apply the darker shade beneath my cheekbones for contour and the lighter one above the cheekbones for a subtle lift, blending them out toward my temples.

    Luminizers are a must-have for adding that ethereal, glowing effect to your skin. I’m obsessed with Fresh’s Satin Luster Face Palette, which has peach, pink, and white highlighters. Depending on my skin tone, I choose the one that complements me best. I apply the white highlighter as eyeshadow in my inner corners, and then smudge it onto my temples for a soft glow.

    But why stop there? I also use a Maybelline white sparkly eye pencil under my eyes, concentrating on the inner corners, and sometimes layer it with a liquid glitter liner for a dramatic pop. The same eye pencil works wonders on my cupid’s bow, adding a touch of sparkle to my lips.

    For a fuller lip effect, I love using a white-gold lip gloss. NARS Lip Gloss in Albatross is a must-have for this. I dab it in the center of my lips for added dimension and fullness. I usually apply a sheer red lipstick first, as it wears off nicely and provides a great base for the gloss.

    Once I’ve applied blush and highlighted my skin, I keep things simple. A swipe of mascara and a thin line of eyeliner on top, and that’s it! The key to this look is keeping it natural and effortless.

  • Effortless Beauty: My No-Makeup Makeup Routine

    Effortless Beauty: My No-Makeup Makeup Routine

    For me, the best kind of beauty look is the “no makeup” makeup—it’s fresh, effortless, and takes just a few minutes. It’s perfect for those days when you want to feel polished but not overdone. I love the natural, undone look that feels authentic and relaxed. While there’s definitely a time for a bold eye or a dramatic lip, I believe that embracing your natural self can be just as stunning. One of the best decisions I’ve made recently is to stop wearing eye makeup, especially mascara—it’s so liberating! No more struggling to remove stubborn mascara at the end of the day.

    If you’re looking for simple yet effective products to help you achieve that laid-back beauty look, here are a few of my must-haves:

    1. Maybelline Dream Fresh BB Cream – This BB cream is a game-changer. It’s light, easy to apply, and gives a fresh, flawless finish at an unbelievably affordable price.
    2. Dior Addict Lip Glow – This lip balm is magic! It enhances your natural lip color, leaving you with a soft, subtle tint that looks like your lips but better.
    3. Topshop Cream Blush in Prime Time – This cream blush is perfect for a natural flush. It blends beautifully into the skin, giving a fresh, youthful glow without any heavy buildup.
    4. Make Up For Ever Diamond Powder in White Gold 2 – A touch of this shimmering powder in the inner corners of your eyes and on your cupid’s bow adds a radiant highlight that brightens up your face without the need for heavy eye makeup.
    5. Sachajuan Ocean Mist – For that effortlessly tousled, textured hair, I love this product. My trick is to add a few loose curls with a clampless curling iron, then brush them out and scrunch in some of this ocean mist. The result? A chic, messy, high-fashion vibe.
    6. Anastasia Tinted Brow Gel – Perfect for fuller, defined brows without the need for pencil or powder. This gel tames and adds color to brows, making them look natural and polished.
    7. Kevin Murphy Motion Lotion – This is my secret weapon for curly hair. It works wonders on fine, straight hair like mine, helping to define curls and give them movement. It’s perfect for giving life to second-day hair!

    Recently, I came across an updated take on the no-makeup makeup look that I adore. I saw a picture of the stunning Fillipa Berg on Free People’s blog and was captivated by the gold highlighter under her eyes. It’s a beautiful, subtle alternative to the usual eyeliner for making your eyes pop. I think the By Terry Cream Eyeshadow in Beyond Gold would achieve this gorgeous look perfectly.

  • My Updated Daytime Beauty Routine

    My Updated Daytime Beauty Routine

    I’ve been wanting to share my updated beauty routine for a while now, and I finally get the chance to do so! As a beauty enthusiast, I tend to have a lot to say, so fair warning—this post may be on the longer side. I’ve used many products that have become staples in my routine, and while not everything I use is pictured (some of my favorite makeup products are too well-loved to photograph), I’ll link to everything I mention. Stay tuned for my nighttime routine in a future post!

    Skincare: Every morning, I start by cleansing my face with a Fresh Soy Cleanser, using a textured washcloth to gently scrub my skin. Next, I apply the Dear By Tone Up Booskin toner with a cotton pad, followed by a few drops of Hylamide Glow Serum, which gives my skin a subtle, natural glow. During the winter, when I tend to look a bit pale, this serum helps bring some life back to my complexion. If I have a bit more time, I’ll use a Korean sheet mask for added hydration before moving on to makeup.

    Before applying makeup, I make sure to saturate my skin with moisture. Right now, I’m loving Dr. Jart’s Cermadin cream. It acts as a perfect base for makeup and provides protection during chilly shoots. For sun protection, I’ve been using MISSHA’s waterproof sun milk for years—it’s lightweight and non-greasy, which I love. If I have any breakouts, I apply an acne serum to speed up healing.

    Primer: For my makeup base, I always start with Bare Minerals Skin Revver-Upper, which contains glycolic and salicylic acid to plump up the skin instantly. While it has a unique scent, it’s definitely worth it! If I know I’ll be shooting for a long time or facing unpredictable weather, I’ll also apply Hourglass’s Mineral Veil Primer. It’s amazing at making makeup waterproof, which means it will stay intact no matter what the day throws at me.

    Foundation: I switch between a few foundations depending on the day, but here are my current favorites. I’m particularly loving CoverFX’s Custom Cover Drops, which is a concentrated foundation serum that you mix with skincare products. As a skincare enthusiast, this product is a dream! I mix it with a drop of honey skin oil and apply it using a stippling brush, and the result is a beautiful, dewy complexion.

    Another staple is Bare Minerals Broad Spectrum Foundation in Fair. I’ve been using Bare Minerals since I was 13, and I’m still obsessed! It gives a flawless finish and photographs beautifully without ever looking cakey. If I’m dealing with a breakout, this is my go-to foundation.

    Concealer, Bronzer, and Highlighter: Recently, I discovered Benefit’s Erase Paste, which has become my favorite under-eye concealer. Its salmon hue helps to correct dark circles, and its creamy texture means a little goes a long way.

    When it comes to achieving glowing skin, I can’t recommend BECCA Cosmetics’ Shimmering Skin Perfector Poured enough. I use the shade Moonstone, and it adds an incredible glow that I love to layer under my foundation. For bronzing, I contour my temples and cheek hollows with Becca’s Lowlight/Highlight palette, which gives a subtle and natural look—even on pale skin like mine.

    Eyes and Brows: I’m all about cream eyeshadows, and ever since I tried Charlotte Tilbury’s Eyes to Mesmerize, I’ve been hooked. I use the shades Jean and Marie Antoinette as bases almost every day. Charlotte Tilbury’s Vintage Vamp palette, with its rose-hued smokey shades, is another favorite of mine.

    Marc Jacobs’ Velvet Noir mascara is my go-to for lashes right now. One coat gives me the perfect volume and length, and it’s intensely black, which I love. While I don’t usually wear false eyelashes, I always keep a few pairs in my makeup bag. The cheap ones from Liftly are surprisingly great!

    For my brows, I’ve finally found the perfect product: Dior’s Brow Styler Ultra Fine Precision Pencil. This pencil is so fine, it mimics real brow hairs with every stroke, and it’s become my absolute favorite brow product.

    Lips and Cheeks: I’m quite selective about my lipsticks, but Chanel’s Rouge Coco in 418 Misia is one I always reach for. It’s one of those shades that flatters everyone, and I apply it with my fingers for a more natural, sheer stain. I also recently picked up LadyKin’s One Touch Bling Glow Lipstick in Fall Rose, and I’m obsessed with the color and formula—plus, it’s only six dollars!

    When it comes to blush, I love mixing several shades to create a customized look. The Narsissist Cheek Studio is perfect for this, as the colors are stunning. I’m also a huge fan of Becca’s Beach Tint Shimmer Souffle in Guava, which provides a natural flush and works as a skin luminizer.

    Recent Additions: I’ve recently added a few new products to my daytime skincare routine, and I’m excited to continue testing them out and sharing my thoughts soon!

  • The Secret to Glowing Skin: My SK-II Facial Treatment Essence Experience

    The Secret to Glowing Skin: My SK-II Facial Treatment Essence Experience

    Taking care of my skin has never been more crucial than it is now. It’s remarkable how much our bodies can change over time, and for me, my skin has become more challenging to manage as I’ve aged. Looking back, I regret not fully appreciating the flawless skin I had in my younger years. Unfortunately, I’m one of those people cursed with the adult acne gene, and it has been a real struggle to get it under control. Recently, my skin has undergone some intense treatments and medications that left it dry and flaky. While these efforts were necessary to fight acne, my skin now desperately needs some tender loving care.

    When SK-II reached out to me to try their iconic Facial Treatment Essence, I was beyond excited. I had heard glowing reviews from makeup artists and friends, so I was eager to see if it lived up to the hype. After using it for a month, the results are nothing short of impressive. My skin no longer feels tight or dry, and I can actually see a healthy glow that I hadn’t seen in months. It’s as if my skin is starting to return to its former self. One of the most noticeable improvements has been the fading of acne scars and sunspots, something I attribute to the Facial Treatment Essence. This product has played a significant role in restoring my confidence after dealing with problematic skin for so long.

    As I prepare for our wedding day, I really wanted to feel good about the way I look, and this product has been a game-changer. Feeling my best on such an important day is crucial to me, and thanks to the Facial Treatment Essence, I’m starting to see a light return to my complexion that had been missing for months. Even my dermatologist noticed the change and asked what I’ve been using at home. The difference is visible in every photo we take for this blog.

    If you’ve never used an essence before, you might be wondering how to fit it into your skincare routine. I personally use the Facial Treatment Essence right after cleansing and patting my face dry. I splash a few drops of the essence onto my palms or a cotton pad and gently press it into my face and neck. At first, it might seem surprising because the essence feels almost like water, but it absorbs quickly into the skin, and you’ll feel the difference almost immediately. If you’re looking for a miracle product to enhance your skincare regimen, I highly recommend giving this essence a try. It’s a cult favorite for a reason, and it absolutely lives up to the reputation. I’m definitely going to keep using it as I prepare my skin for the big day!