作者: admin

  • The Ultimate Guide to Using Body Oil: Tips and Benefits

    The Ultimate Guide to Using Body Oil: Tips and Benefits

    Body oil is a fantastic way to lock in moisture and keep your skin hydrated, but like any product, it’s important to use it correctly to reap its full benefits. Whether you want to hydrate dry skin, fight signs of aging, or give your skin a healthy glow, body oil can be a game-changer in your skincare routine. Here’s everything you need to know about using body oil and the amazing benefits it provides for your skin.

    How to Apply Body Oil

    1. Moisturize First, Then Apply Oil It’s essential to apply body oil after your moisturizer, not the other way around. Oils are heavier than lotions, creating a protective barrier on your skin. If you apply oil first, it can prevent your moisturizer from absorbing properly. To get the best results, apply your moisturizer first, then layer the oil on top to lock in that moisture.
    2. Apply Before You Shower It may sound strange, but applying body oil before you shower is a great way to protect your skin from drying out. While washing away dirt and sweat, soap also removes natural oils and moisture from your skin. By applying body oil before showering, you can help shield your skin from the drying effects of soap, keeping it nourished during your wash.
    3. Apply After Your Shower Your skin is most receptive to absorbing moisture after a warm shower. After drying off, apply body oil to damp skin to lock in that moisture and keep your skin hydrated throughout the day. The oil helps seal in the water, leaving your skin soft and supple.
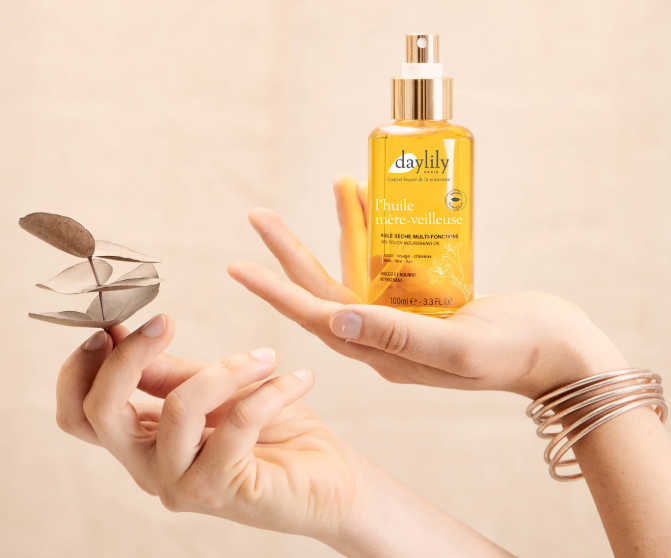
    4. Choose High-Quality Oil Not all body oils are created equal. A good body oil should absorb quickly and never leave your skin feeling greasy. Opt for a high-quality oil from trusted brands, and consider your skin type when choosing the right product. For example, argan oil is a great option if you have oily skin, as it absorbs quickly and won’t leave your skin feeling greasy.
    5. Add Oil to Your Bath If you love baths but worry about dry skin, add a few drops of body oil to your bathwater. Hot water can strip your skin of moisture, but adding body oil will help retain hydration, turning your bath into a luxurious, moisture-boosting experience.
    6. Massage It Into Your Skin Give your skin some love by massaging the oil in. Not only does this help distribute the product evenly, but it also allows you to relax and relieve tension. Take your time and enjoy the moment while pampering your skin.

    5 Key Benefits of Body Oil

    1. Fights Signs of Aging While most of us focus on anti-aging products for our face, we often forget about our body. Good body oils are packed with antioxidants like vitamins A, C, and E, which help boost collagen production, reduce the appearance of stretch marks, and make your skin look younger.
    2. Seals in Moisture Body oil creates a barrier that locks in moisture, helping to keep your skin hydrated for longer. While moisturizers are great for adding moisture, they can sometimes wear off throughout the day. Body oil, however, acts as a shield to prevent moisture loss, leaving your skin feeling soft and nourished.
    3. Restores Lipids to the Skin Lipids are natural fats that help keep your skin smooth and create a protective barrier. When your skin becomes too dry, it can lose these lipids. Body oils work to replace lost lipids, filling in the cracks in dry skin and making it feel soft and smooth. If your skin is severely dehydrated, body oil can be a lifesaver.
    4. Gives Your Skin a Healthy Glow When your skin is dry, it can start to look dull and lifeless. Body oils mimic the natural oils your skin loses over time, helping to restore that youthful, radiant glow. By incorporating body oil into your routine, you can give your skin a natural sheen without looking greasy.
    5. Lasts All Day Body oils absorb quickly and stay in place longer than moisturizers, making them ideal for all-day hydration. Even in hot weather when you’re sweating more than usual, body oil will stick to your skin and continue to hydrate, keeping your skin moisturized and glowing.

    When to Avoid Body Oil

    1. If Your Skin is Breaking Out If you have acne-prone skin, body oil might exacerbate the problem. While not all oils are comedogenic (pore-clogging), it’s better to use lighter oils, like argan oil, if you’re dealing with a breakout. For severely oily or acne-prone skin, it’s best to avoid using body oil on your face or affected areas.
    2. While Sunbathing Applying body oil while sunbathing can speed up skin damage and make your skin burn more quickly. Body oils can enhance the tanning effect, but they also make your skin more vulnerable to harmful UV rays. Instead, use sunscreen to protect your skin, and consider using a sunless tanner for a safe glow.

    Conclusion

    Body oil is a fantastic addition to any skincare routine, providing deep hydration, promoting a youthful glow, and protecting your skin from environmental damage. Whether you’re applying it after a shower, adding it to your bath, or massaging it in for extra relaxation, body oil can help keep your skin soft, smooth, and nourished. Just make sure to choose the right product for your skin type, and you’ll be on your way to glowing, healthy skin in no time.

  • Can You Dye Wet Hair? Here’s What You Need to Know

    Can You Dye Wet Hair? Here’s What You Need to Know

    If you’re considering dyeing your hair at home, it’s easy to get a little confused about the process. With so many different methods out there, you might wonder if it’s okay to dye wet hair. While you may have seen hairstylists applying dye to dry hair, there are a few things to consider before you decide what works best for you.

    Can You Dye Wet Hair?

    The short answer is yes, but there are some important things to keep in mind. Dyeing wet hair is not ideal, as it can cause the color to be less vibrant and lead to uneven results. Wet hair has trouble absorbing color because it’s already saturated with water, much like a sponge that can’t soak up any more liquid. This means the dye doesn’t adhere to your strands as well, and you could end up with splotchy or muted color.

    Additionally, wet hair is more fragile, which means applying permanent dye can lead to potential damage. On the plus side, dyeing wet hair may make less of a mess, as the water can help dilute the dye and make it go further, but the color payoff will be much weaker.

    Is It Better to Dye Hair When It’s Wet or Dry?

    In general, it’s best to dye your hair when it’s dry. Dry hair gives you more control and precision, allowing you to see exactly where you’re applying the color. It also helps avoid color bleeding into areas you didn’t intend to color, especially if you’re only doing touch-ups.

    While it’s okay to apply dye to damp hair, this isn’t recommended with permanent dye. For semi-permanent or demi-permanent colors, however, it’s more common to apply them to damp hair in salons, since these types of dyes don’t contain harsh chemicals like ammonia or peroxide, making them less damaging.

    Can You Wet Your Hair on the Day You Dye It?

    It’s important to keep your hair dry before and after dyeing it. Experts recommend avoiding wetting your hair on the day of your dye job and for at least 72 hours afterward. During this time, your hair’s cuticles are still open from the coloring process, and getting your hair wet too soon can cause the color to fade faster. For the best results, aim to wait 72 hours before washing or wetting your hair after dyeing it.

    Should I Shampoo My Hair Before or After Dyeing?

    While you don’t need to wash your hair right before dyeing it, it’s important to wash it 12-24 hours before applying color. This helps remove any buildup from products like styling gels or oils, allowing the dye to distribute more evenly. A clarifying shampoo is a great choice before dyeing because it clears away excess residue, giving you a cleaner base for the color.

    After you dye your hair, it’s crucial to wait at least 48 hours before washing it, but 72 hours is even better. Washing your hair too soon after dyeing can cause the color to fade faster. The same goes for wetting your hair—resist the urge to rinse it out immediately.

    Can You Dye Wet Hair with Semi-Permanent or Demi-Permanent Colors?

    Semi-permanent and demi-permanent dyes are generally much gentler on your hair compared to permanent dyes. They can be applied to damp hair in salons, and since they don’t contain strong chemicals like ammonia or peroxide, they’re less likely to cause significant damage. These dyes are great for anyone looking for a temporary change or a subtle boost to their color without committing to something long-term.

    Regardless of the dye type, always follow the instructions that come with the product. This will ensure you get the best results and avoid damaging your hair.

    How to Protect Color-Treated Hair

    After dyeing your hair, it requires extra care to keep it looking healthy and vibrant. Here are some tips for maintaining your color:

    • Use a shampoo specifically designed for color-treated hair.
    • Condition your hair every time you wet it, even if you don’t wash it.
    • Limit heat styling; if you must use styling tools, always apply a heat protectant.
    • Let your hair air dry to avoid additional heat damage.
    • Avoid swimming in chlorinated water, as it can strip your hair of its color.
    • Wash your hair 2-3 times a week to minimize color fading.

    Conclusion

    So, can you dye wet hair? While it is possible, it’s not the best choice for achieving vibrant and lasting results. Dyeing dry hair ensures better color absorption, more control, and less risk of uneven coverage. For semi-permanent and demi-permanent dyes, applying to damp hair is more common and generally safe. Just remember to follow product instructions and give your hair some extra care to keep it looking its best.

  • How Long Do Highlights Last? Here’s What You Need to Know

    How Long Do Highlights Last? Here’s What You Need to Know

    Highlights are a popular way to add dimension and brightness to your hair, but like any hair treatment, they don’t last forever. Whether you’ve just gotten a fresh set of highlights or are wondering when to expect them to fade, understanding the process can help you maintain your hair’s vibrancy for as long as possible.

    So how long do highlights actually last, and what can you do to prevent them from fading too quickly? Let’s explore the truth behind highlighted hair and how to keep it looking its best.

    How Long Do Highlights Last?

    On average, highlights start to fade after about 6 to 8 weeks. While they will still be visible, the vibrancy and shine tend to diminish over time. You’ll notice the change gradually, and before you know it, it’s time to touch up your roots. However, the exact timeline can vary depending on your hair type, maintenance routine, and other factors.

    Do Highlights Damage Hair?

    Highlighting involves bleaching, which can cause some level of damage to the hair. The bleach strips natural oils from the strands, which can lead to dryness. Blonde highlights, in particular, can be harsh because they often involve lifting the color several levels.

    Darker highlights cause less structural damage, but they can still contribute to hair dryness. To keep your hair healthy, it’s important to focus on aftercare. Regularly use a good conditioner, and consider adding a deep-conditioning hair mask (like Olaplex Hair Perfector No 3) to your routine to keep your strands moisturized and repair any damage.

    How to Slow Down the Fading Process

    While highlights will fade over time, there are ways to slow this down. The color fading happens due to oxidation, not from washing your hair. Protecting your hair from the elements, including heat, can help maintain the brightness of your highlights.

    Using a heat protectant, such as a thermal conditioning mist, shields your hair from heat styling, which helps prevent the oxidation process. This also keeps your hair looking shiny and healthy.

    When Should I Touch Up My Roots?

    The rate at which your hair grows varies, but on average, you’ll need to touch up your roots every 6 to 8 weeks. The great thing about highlights is that they blend seamlessly with your natural color, so when your hair grows out, the roots aren’t as noticeable as they would be with a full hair color.

    Even though highlights blend well with natural hair growth, it’s still a good idea to visit your stylist regularly to keep your look fresh.

    Can I Color Over My Highlighted Hair?

    Yes, you can color over highlighted hair, but the process depends on the type of highlights you have. If you’ve used bleach for blonde highlights, adding color on top is relatively easy, though it can cause some additional dryness. However, you can minimize this by using nourishing conditioners and hair masks.

    If you have dark hair and want to add blonde highlights, the process is more complicated. Bleaching dark hair, especially if it’s already color-treated, can be more damaging and take longer. If you want to bleach color-treated hair, it’s best to wait until the color fades a little, and allow 8 to 10 weeks for the hair to recover before attempting a second treatment.

    What If I Want to Remove My Highlights?

    If you’re not happy with your highlights or just want a change, there are a few ways to tone them down or remove them. Using a semi-permanent dye that matches your natural color can help blend the highlights and create a more uniform look. This method also minimizes further damage compared to permanent dye.

    For those with blonde highlights, using a clarifying shampoo can help fade the color faster. However, resist the temptation to use harsh cleansers like dish soap to speed up the process—this can seriously damage your hair. While the highlights may not be perfect, it’s better to wait them out than to strip your hair of its health with overly aggressive treatments.

    Final Thoughts

    Highlights are a great way to refresh your hair and add depth and dimension, but they do require maintenance. If you’re considering highlights, remember that they will fade gradually, and you’ll need touch-ups every 6 to 8 weeks. With the right aftercare, including moisturizing treatments and heat protection, you can keep your highlights looking fresh for longer.

    If you’re still unsure, start with a few shades lighter than your natural color. This can give your hair a subtle lift without causing too much damage, and it will help you achieve a natural, vibrant look.

  • Brow Lamination: The Truth Behind the Trend

    Brow Lamination: The Truth Behind the Trend

    Brow lamination is quickly gaining popularity, and it’s easy to see why. This beauty treatment promises to give you sleek, full, and defined brows without the need for daily effort. Whether you’re dealing with unruly brows or want to achieve a more polished look, brow lamination is here to help. Celebrities like Cardi B and Lizzo have embraced the trend, and now it’s your turn to learn more about this brow-transforming treatment.

    What Exactly is Brow Lamination?

    At its core, brow lamination is a process that uses a chemical solution to straighten and lift the brow hairs, setting them in place for a smooth, well-groomed look. The result is like having your brows professionally styled and shaped for up to six weeks. This treatment can give you the appearance of fuller, perfectly groomed brows with little effort.

    The technique is similar to a perm, but instead of curly hair, you’re working with straightening and lifting the brows. It’s ideal for anyone looking to tame unruly brows or those who want to achieve a voluminous, sleek look.

    What to Expect During Your Appointment

    A typical brow lamination session takes around 20 minutes. The process starts with a lifting cream applied to your brows, which softens the hair and makes it easier to manipulate. Once the hairs are combed into the desired shape, a neutralizer is applied to lock the style in place. Finally, a nourishing oil is used to give the brows a shiny, healthy finish.

    If you want additional services, such as eyebrow tinting or waxing, these can be done in the same session, adding about 10 to 20 minutes to the overall treatment.

    Can I Do Brow Lamination at Home?

    While there are DIY brow lamination kits available, it’s important to approach home treatments with caution. Just because you can do it yourself doesn’t necessarily mean you should. It’s essential to follow instructions carefully, and you should always conduct a patch test before applying any chemicals to your brows to avoid allergic reactions.

    Additionally, using vaseline around your brows can help prevent over-processing. If you do attempt it at home, be sure to have a professional stylist’s contact information handy in case you need help fixing any mistakes.

    Alternatives to Chemical Lamination

    If you love the laminated look but want to avoid chemicals, there are some great products that can give you a similar effect. One of the easiest and most popular options is West Barn Co Soap Brows, which allows you to shape and hold your brows in place without the use of harsh chemicals. Simply apply the product with the included brush, shape your brows, and enjoy a natural, fluffy finish that’s easily removable at the end of the day.

    Another great option is Anastasia Beverly Hills Clear Brow Gel, which provides a natural look with nourishing ingredients that strengthen your brows while keeping them in place. It gives a polished finish without the stiffness of traditional brow gels.

    Keeping Your Brows Looking Great Between Appointments

    After your brow lamination treatment, proper care is key to maintaining the health and appearance of your brows. Just like you would with your hair, you should nourish and moisturize your brows regularly.

    • Castor Oil: A simple yet effective remedy for keeping your brows healthy is castor oil. Apply it with a clean mascara spoolie every night to keep your brows hydrated and encourage growth.
    • Lash Brow and Toxx: For those willing to spend a bit more, products like Lash Brow and Toxx contain ingredients like hyaluronic acid, keratin, and biotin, which nourish both your brow hairs and the skin underneath, helping to prevent damage and dryness.

    Brow Lamination vs. Microblading

    While both brow lamination and microblading aim to enhance the appearance of your brows, they are quite different in terms of technique and results.

    • Microblading involves using tiny needles to create hair-like strokes in your brows, giving them a fuller, more defined look. It’s a more invasive procedure that can take up to two hours, and the results last for about a year before a touch-up is needed. However, it requires more aftercare, including avoiding makeup on your face for several days, and can cost between $450 and $750.
    • Brow Lamination, on the other hand, is less invasive and much more affordable. The procedure takes about 20 minutes, costs around $100, and requires minimal aftercare. However, the results are not permanent and will need to be maintained with appointments every 6 to 8 weeks.

    Conclusion

    Brow lamination is a great alternative to more permanent eyebrow treatments like microblading. It’s quick, affordable, and provides stunning results for anyone looking to tame their brows. Whether you’re opting for a professional treatment or trying it at home, be sure to follow the instructions carefully and take good care of your brows to keep them looking their best. For those who want a similar look without the chemicals, there are plenty of products that can help you achieve the laminated brow effect at home.

  • Mushroom Blonde Hair: The New Trend Celebrities Are Loving

    Mushroom Blonde Hair: The New Trend Celebrities Are Loving

    Mushroom blonde is quickly becoming the go-to hair color, and it’s easy to see why. Whether you have blonde or brown hair, this versatile shade is an effortless way to add depth and dimension to your locks. Celebrities like Hailey Bieber, Gigi Hadid, and Margot Robbie are making the switch from their bright blonde hues to this softer, muted color, and it’s becoming a trend that’s hard to ignore.

    What is Mushroom Blonde?

    Mushroom blonde is a trendy, muted hair color that sits somewhere between dark blonde and light brown. It’s often referred to as “bronde” because of its in-between tone. What sets this color apart from other ash tones is its gray undertones, which give it a sophisticated, cool look. It’s a fantastic choice for those who want to transition to darker hair but aren’t ready to fully commit to brunette shades.

    If you’re unsure about going darker but still want to tone down your blonde, mushroom blonde is a perfect middle ground. It allows you to ease into a darker color without the harsh contrast of a dramatic change.

    Is Mushroom Blonde Low Maintenance?

    One of the best things about mushroom blonde is how easy it is to maintain. This shade blends naturally with your roots, making it perfect for those who want to extend the time between salon visits. Unlike platinum blonde hair, which can show regrowth quickly, mushroom blonde allows you to go longer without worrying about noticeable roots. It’s a practical option for those looking to save time and money on frequent touch-ups.

    How to Achieve Mushroom Blonde Hair

    To get the mushroom blonde look, you’ll need to start with a light blonde base. If you have virgin brown hair, your stylist will likely bleach your hair to lift it a few levels and then apply a cool blonde color on top. If you already have bleached blonde hair, all that’s required is adding icy blonde highlights or lowlights to create the mushroom tone.

    While it’s possible to attempt this look at home, I highly recommend visiting a professional colorist. Achieving the perfect mushroom blonde requires skill and the right shades, especially if you want to minimize damage. However, if you’re determined to try it yourself, here are a few tips for at-home success:

    Achieving Mushroom Blonde at Home

    If you have naturally brown hair, the process is relatively straightforward. You can use boxed hair color like L’Oreal Superior Preference in 7A Dark Ash Blonde, which provides a cool blonde shade similar to mushroom blonde. It’s also effective for blending in with bleached hair, but make sure to address your roots to ensure even color coverage.

    For those with bleached hair, a toner can help neutralize any brassiness and create that cool, muted mushroom blonde. Wella’s Shinefinity Zero Lift Glaze in 06/02 Dark Blonde Natural Matte is an excellent choice to cancel out warm tones and provide a more natural, muted finish.

    While experimenting with home hair color can be tempting, be prepared for some trial and error. If things don’t turn out as expected, your colorist can always help you fix it.

    Caring for Mushroom Blonde Hair

    Once you’ve achieved your beautiful mushroom blonde color, keeping your hair healthy is key. Here are some tips to help maintain the color and keep your locks looking shiny and vibrant:

    1. Never Skip Conditioner
      Dyed hair tends to be more brittle, so it’s essential to use conditioner regularly. Opt for a lightweight conditioner like Olaplex Hair Perfector No. 3 to protect your strands without weighing them down.
    2. Use a Hair Mask
      To keep your hair soft and glossy, try incorporating a hair mask into your routine. Briogeo’s Don’t Despair, Repair Mask is great for over-processed hair, providing deep hydration and nourishment.
    3. Protect Your Hair from Heat
      If you’re using heat styling tools, always apply a heat protectant. Chi Silk Infusion is a fantastic option, offering a glossy finish without the heavy feeling.

    Final Thoughts

    Mushroom blonde is a gorgeous, low-maintenance hair color that’s gaining popularity among celebrities and beauty enthusiasts alike. Whether you’re looking to transition from platinum blonde or simply add some depth to your brunette locks, this cool, ashy shade is a perfect choice. With its easy upkeep and sophisticated look, mushroom blonde might just be the color to try next!

  • Does Sudocrem Help Acne? Here’s What You Need to Know

    Does Sudocrem Help Acne? Here’s What You Need to Know

    If you’ve ever been to the UK or Ireland, chances are you’ve heard people rave about Sudocrem. This multi-purpose cream has been a household staple for years, especially for treating diaper rash. But as its popularity grows, many people are curious if Sudocrem can do more than just soothe babies’ bottoms—specifically, does it work for acne?

    Let’s dive into the details about Sudocrem, its ingredients, and how it can be used for acne treatment.

    What Exactly is Sudocrem?

    Sudocrem is an antiseptic cream originally designed to treat diaper rash in babies. It’s made with five key ingredients:

    • Zinc Oxide: Known for its astringent properties, it helps calm inflammation, prevent infection, and absorb excess oil.
    • Benzyl Alcohol: This ingredient works as a preservative and has mild pain-relieving properties, often used to dry out infections.
    • Benzyl Benzoate and Benzyl Cinnamate: These are known for their soothing properties and help reduce inflammation.
    • Lanolin: A moisturizing agent derived from sheep’s wool, it helps prevent irritation, itching, and dryness.

    Together, these ingredients form a barrier on the skin, which is why Sudocrem works so well for treating skin conditions like diaper rash and eczema.

    Benefits and Alternative Uses for Sudocrem

    Though it was originally created for babies, Sudocrem has found many uses beyond diaper rash. Some of the common alternative applications include:

    • Anti-aging: Zinc oxide promotes the production of elastin, which can reduce the appearance of fine lines and wrinkles.
    • Eczema Relief: Sudocrem can help relieve eczema symptoms by fighting infections and reducing inflammation.
    • Moisturizing Dry Skin: Lanolin helps the skin retain moisture, which is great for dry areas of the body.
    • Bed Sores: Much like diaper rash, bedsores are a type of skin irritation that Sudocrem can help soothe.
    • Treating Minor Cuts and Scrapes: The antibacterial properties of Sudocrem make it effective for small skin lesions.

    Sudocrem and Acne: Does it Work?

    Now, let’s address the burning question—does Sudocrem help acne?

    The answer is yes, it can. While it’s not marketed as an acne treatment, many people use Sudocrem as a spot treatment for acne, especially cystic acne. The key ingredient here is Zinc Oxide, which is commonly found in many acne products because it helps absorb excess oil and shrink pores.

    Additionally, Benzyl Alcohol has drying properties that can help reduce inflammation and soothe pain associated with acne, making it effective for treating cystic acne. Sudocrem can also aid in reducing the appearance of acne scars over time, as it helps accelerate wound healing and brightens dark spots thanks to its zinc content.

    Does Sudocrem Clog Pores?

    This is where things can get a bit tricky. Sudocrem’s lanolin content can be comedogenic, meaning it has the potential to clog pores. If you have oily skin, this could lead to more breakouts. However, if you have dry or combination skin, the moisturizing properties of lanolin may actually help prevent irritation.

    For those with balanced skin, Sudocrem may be a great addition to your routine without causing further breakouts. But if you have oily skin, it’s best to be cautious and monitor how your skin reacts.

    How to Use Sudocrem for Acne

    For acne treatment, it’s important to apply Sudocrem to clean, dry skin. Use a small amount, gently dabbing it onto problem areas. You can apply it as a spot treatment before bed and let it work overnight. Just remember to use a light layer to avoid any potential irritation.

    Are There Any Side Effects?

    Generally, Sudocrem is safe for most people, but if you have sensitive skin or an allergy to any of its ingredients, it could cause redness, irritation, or burning. It’s especially important to avoid using it if you have rosacea, as the benzyl alcohol could aggravate the condition.

    Where to Buy Sudocrem

    If you’re in Europe, Sudocrem is easy to find in most drugstores. However, if you’re in the US, it’s a bit trickier to get your hands on it. While it’s available on sites like eBay, it’s not commonly found in American stores.

    Conclusion: Should You Use Sudocrem for Acne?

    So, does Sudocrem help with acne? Yes, it can be an effective treatment for acne and acne scars due to its combination of anti-inflammatory, oil-absorbing, and healing ingredients. However, it’s not suitable for everyone, especially those with oily skin prone to clogged pores.

    Is Sudocrem a miracle product? While it’s certainly versatile and affordable, whether it’s the right choice depends on your skin type. For many people, it’s a great option, but it’s always a good idea to patch-test first.

    Next time someone asks about Sudocrem’s benefits, you’ll have all the answers ready!

  • Derol Lip Plumper: Is It Really Effective?

    Derol Lip Plumper: Is It Really Effective?

    If you’re looking for fuller lips but want to avoid injections or fillers, lip plumpers can be a great alternative. Derol Lip Plumper has gained popularity recently, especially on TikTok, with users raving about its ability to plump lips without the need for needles or downtime. But does it live up to the hype? Let’s find out.

    How Do I Use Derol Lip Plumper?

    Achieving a fuller pout without needles is easy with Derol Lip Plumper. You can apply it in a few different ways depending on your needs. It can be used as a base to smooth and hydrate your lips before applying other products like lip balm or gloss. Alternatively, you can apply it on top of lipstick for added shine and a subtle plumping effect.

    Derol Lip Plumper is available in both daytime and nighttime formulations. The daytime version provides an instant hydration boost and plumps the lips with a touch of shine, while the nighttime formula works to nourish and hydrate your lips while you sleep, giving you fuller lips by morning.

    One standout feature of Derol Lip Plumper is its inclusion of nourishing ingredients like vitamin E and collagen, which help keep your lips soft and healthy while they’re plumped.

    How Long Does It Take to See Results?

    You’ll notice a slight difference in your lips immediately after applying the Derol Lip Plumper. The tingling sensation signals that the product is working, and your lips will look fuller right away. If you use it consistently, you’ll see even better results over time. With regular use of the full Derol Lip Plumper set, you can expect to see more significant results within two weeks.

    The daytime formula provides instant plumping, while the nighttime version continues to work on your lips, making them softer and fuller by morning.

    Does It Hurt?

    While it’s not painful, the sensation of applying Derol Lip Plumper can be a bit intense. The peppermint and ginger in the formula create a mild burning and tingling feeling that is similar to the discomfort you might experience from spicy food or extremely chapped lips. It’s not unbearable, but it’s definitely noticeable.

    The tingling lasts for about five minutes, and while it may feel odd at first, it’s a sign that the plumper is working. If you have sensitive skin, the burning sensation might last a bit longer, but it’s typically tolerable.

    Is Derol Lip Plumper Cruelty-Free?

    Yes! Derol Lip Plumper is cruelty-free. Unlike some other lip plumpers that use bee venom as an active ingredient, which can harm honeybees, Derol uses a blend of peppermint oil and ginger to create that signature tingling sensation. This means no bees are harmed in the process, and you can feel good about your beauty routine.

    Can Derol Lip Plumper Damage My Lips?

    One common issue with many lip plumpers is that they can leave your lips dry or irritated over time. Some plumpers, especially those that use bee venom, can cause inflammation or allergic reactions. However, Derol Lip Plumper is designed to be gentler on your lips. The added collagen and vitamin E help keep your lips hydrated and prevent dryness, even with daily use. These ingredients also work to prevent fine lines and peeling, which is a bonus for anyone concerned about the long-term health of their lips.

    The Verdict

    Lip plumpers are a popular alternative for those who want fuller lips without the needles, but not all of them are created equal. Some products use harsh ingredients that can irritate the skin or harm animals. Derol Lip Plumper, on the other hand, has earned its reputation thanks to its effective formula and cruelty-free ingredients.

    It’s affordable, works quickly, and doesn’t dry out your lips, making it a standout in the world of lip plumping products. The combination of plumping action and nourishing ingredients like vitamin E and collagen ensures your lips will stay soft and smooth while they become fuller.

    If you’re looking for a lip plumper that delivers results without the harsh chemicals, Derol is definitely worth trying.

  • Should You Wash Your Hair Before A Haircut? Here’s Why You Should

    Should You Wash Your Hair Before A Haircut? Here’s Why You Should

    When it’s time for a hair appointment, I make sure I’m the best client possible. I bring a coffee for my stylist, a few pictures of the cut and color I have in mind, and, most importantly, freshly washed hair.

    There’s a misconception floating around about not washing your hair before a haircut, but trust me, it’s not a rule you should follow. In fact, arriving with clean hair is not just polite, it also ensures you get the best cut possible.

    Why You Should Always Wash Your Hair Before Your Appointment

    1. Clean Hair is a Courtesy
      Dirty hair is uncomfortable for both you and your stylist. When your hair is greasy, you’re less likely to run your hands through it, which is exactly what your stylist needs to do to work with your hair. It’s not a pleasant experience for anyone to work with unwashed hair, and it can make the whole process less enjoyable. Arriving with clean hair is common courtesy that will make the session smoother.
    2. A Better Cut
      Your stylist needs to understand how your hair behaves in its natural state before cutting. Clean hair gives your stylist insight into your hair type, texture, and how it naturally falls. If you show up with dirty hair, they won’t have a clear understanding of how your hair reacts after washing, and your cut might not be as precise. A fresh wash allows your stylist to give you a cut that works with your hair’s natural flow, so you can style it easily once you’re home.

    How to Prepare for Your Haircut

    1. Style Your Hair Like Normal
      It’s not the time to experiment with a new part or style. If you typically part your hair in a certain way, keep it that way before your appointment. Your stylist will need to know your usual part to ensure your cut is even and works with your hair’s natural lines.
    2. Skip the Hair Products
      Clean hair is much easier to work with than hair coated in products. After washing, avoid using mousse, hairspray, or styling gels. While a light application of heat protectant or conditioner is fine, avoid overloading your hair with products before you head to the salon. This will give your stylist a cleaner canvas to work with.
    3. Clarify Your Hair
      If you use styling products regularly, you might want to apply a clarifying treatment a day or two before your appointment. This will help remove any product buildup and leave your hair in its most natural state. I personally love using Ion Crystal Clarifying Treatment, especially if you have hard water, as it helps remove minerals that can also accumulate in your hair.

    What About Washing After Your Haircut?

    You may wonder if you should wash your hair as soon as you get home from your appointment. Don’t worry—it won’t harm your cut. In fact, washing your hair after a haircut can help you get familiar with styling your new look.

    Your stylist has all the tools and products to get your hair styled perfectly, but it can take some time to master styling your cut at home. It’s normal to need a few tries before you feel confident with your new style. After cutting off 8 inches for a sleek bob, it took me about a week to figure out the best way to style it. So, don’t worry if you struggle at first!

    Struggling to Style Your New Hair?

    If you’re finding it hard to recreate your salon look, don’t panic. You can always go back to your stylist for advice. They can give you helpful tips on how to style your hair and suggest products that will make it easier to manage.

    Final Thoughts

    Washing your hair before your haircut is simply a courtesy, and it will make the process smoother for both you and your stylist. Clean hair allows for a more precise cut, and skipping the product buildup makes your stylist’s job easier. If you’re making a big change to your hairstyle, give yourself some time to get the hang of styling your new look. And remember, washing your hair after your appointment is totally fine—it gives you the chance to practice your new style!

  • How Often Should You Dermaplane? A Complete Guide

    How Often Should You Dermaplane? A Complete Guide

    Dermaplaning may sound intimidating at first, as it involves gently scraping away the outer layer of skin with a scalpel, but it’s actually a quick, painless process that can be done at home. If you’re looking for an effective way to exfoliate without relying on harsh scrubs or chemical peels, dermaplaning is the solution.

    While you can visit a professional for the full spa experience, it’s easy to do it yourself at home with the right tools. Before diving in, though, it’s important to understand the basics of dermaplaning. Here’s everything you need to know:

    What Is Dermaplaning?

    Dermaplaning, developed in the 1970s, is a method of exfoliating the skin that not only removes dead skin cells but also peach fuzz and dirt. This technique uses a small, specialized scalpel or blade, which a trained professional will use at a precise angle to safely remove these layers. At home, you’ll use a tool designed for safety, though you should still be cautious to avoid cuts.

    The Pros and Cons of Dermaplaning

    Like any beauty treatment, dermaplaning comes with its advantages and disadvantages. Let’s break them down:

    Pros

    • Easy to do at home
    • Quick procedure
    • Encourages collagen production, which can help reduce fine lines
    • Removes peach fuzz for a smoother complexion
    • Works well with most skin types
    • Enhances the absorption of skincare products
    • Painless
    • No harsh chemicals involved
    • Helps fade discoloration and scarring

    Cons

    • Not recommended for those with acne, acne scars, active breakouts, sensitive skin, rosacea, or eczema
    • Results are temporary and need to be repeated
    • Can become costly if done frequently
    • Requires precision, as improper technique could result in cuts, which might get infected
    • Results may vary based on the quality of the tool used

    How Often Should You Dermaplane?

    One of the most common questions people ask about dermaplaning is, “How often should I do it?” Generally, dermaplaning should be done once a month. If your skin is more resilient, you may be able to do it every two weeks, but it’s important to avoid overdoing it.

    Can You Dermaplane Too Often?

    Yes, over-dermaplaning (or over-exfoliating) can lead to skin irritation. Removing too many layers of skin makes your face more vulnerable to irritants and contaminants. If you notice your skin becoming overly sensitive, or if it starts to look shiny—indicating that essential oils and proteins have been stripped away—it’s a sign to slow down. Minor red bumps can occur after dermaplaning, but these typically resolve on their own without treatment.

    Should You Dermaplane With Wet or Dry Skin?

    For the best results, make sure your skin is completely dry when dermaplaning. Though the process is similar to shaving, this is a crucial difference. You can shower beforehand if you like, but it’s important to thoroughly dry your face before starting.

    Here’s how to do it:

    1. Cleanse your face with a gentle cleanser to remove makeup, dirt, and oils.
    2. Dry your face completely.
    3. Gently pull your skin taut.
    4. Hold the dermaplaning tool at a 45-degree angle and lightly glide it down your face (always move from top to bottom).
    5. Avoid using the tool on sensitive areas like your eyelids, nostrils, and hairline.
    6. Finish the treatment by applying a hydrating serum, followed by a moisturizer to lock in hydration. If you’re heading outside afterward, don’t forget to apply SPF to protect your fresh skin.

    Can I Use Vitamin C After Dermaplaning?

    After dermaplaning, it’s important to be mindful of the products you apply, especially if your skin is sensitive. Vitamin C is a powerful hydrating ingredient but can be irritating if your skin isn’t accustomed to it. The same applies to other active ingredients like retinol or AHAs and BHAs. Stick with gentle, hydrating products right after dermaplaning, and save the stronger treatments for use between sessions.

    Conclusion

    Dermaplaning is a fantastic way to rejuvenate your skin, leaving it feeling smooth, bright, and fresh. Not only does it enhance the effectiveness of your skincare routine, but it also creates a flawless base for makeup. As for how often to dermaplane, once a month is typically enough, though you may be able to do it every two weeks if your skin tolerates it.

    If you’re new to dermaplaning, be careful not to overdo it, and always pay attention to how your skin reacts. If you experience irritation or discomfort, it’s best to consult with a dermatologist. For the vast majority of people, dermaplaning is a great addition to your skincare routine that can provide noticeable improvements in skin texture and appearance.

  • Five Minutes to Glowing Skin: My Effortless Glow Routine

    Five Minutes to Glowing Skin: My Effortless Glow Routine

    I’ve always been a bit of a skincare and makeup enthusiast, constantly experimenting with new tricks to enhance my routine. Recently, a makeup artist taught me an important lesson about using powder—less is definitely more! Instead of piling it all over your face in hopes of keeping makeup in place, applying it strategically helps maintain a fresh look without going overboard. When you try to eliminate all shine, it can leave your skin looking flat and dull. A little shine is a good thing, and incorporating highlighters and luminizers adds the perfect dimension to your skin, making it look fresh and glowing.

    Before diving into makeup, it’s essential to focus on a few skin basics. Good skin is the key to any glowing look, and that starts with taking care of yourself. Drink plenty of water, aim for a balanced diet, get enough sleep, and try to stay calm—those are the basics! Washing your face twice a day is also crucial. I prefer using warm water and a gentle cleanser over harsh foaming products. My current favorite is Dr. Hauschka’s cleansing milk. Twice a week, I treat my skin to an exfoliating mask, such as the Andalou Naturals glycolic pumpkin mask and the Fresh Black Tea Perfecting Mask.

    I also swear by exfoliating more often than recommended—about every other day. Using a gritty washcloth when washing my face has made a huge difference in removing product buildup and dead skin cells. If you don’t exfoliate, makeup won’t apply smoothly, no matter how great the products are. Moisturize generously; your skin will thank you for it! And don’t forget about your makeup brushes—washing them regularly is essential to avoid breakouts.

    Perfecting Your Base

    Start by applying your preferred foundation. I don’t always wear foundation, but I think a little layer helps protect your skin from environmental factors. My go-to foundation is Bobbi Brown’s Moisture Rich Foundation— it matches my skin tone perfectly. I use a stippling brush to apply it for a smooth, even finish.

    For concealing dark circles, I use a creamy formula and gently tap it in with my ring finger, getting as close to the lash line as possible and covering the inner corners. If I have blemishes, I use a heavier concealer to cover those up. To set everything in place, I apply translucent powder under my eyes and wherever I’ve applied concealer, using a small, semi-fluffy brush. If the day is going to be long or muggy, I’ll set my foundation lightly with powder, concentrating on areas like my eyelids, chin, nostrils, and forehead. I use a small blush brush for precise powder application since the goal is to keep that healthy glow intact.

    Amping Up the Glow

    For a natural finish, I prefer to use cream products instead of powders. Cream blushes, highlighters, and eyeshadows blend seamlessly into the skin, creating a softer, more natural look. For blush, I use Bobbi Brown’s cream blush in two shades of pink. I apply the darker shade beneath my cheekbones for contour and the lighter one above the cheekbones for a subtle lift, blending them out toward my temples.

    Luminizers are a must-have for adding that ethereal, glowing effect to your skin. I’m obsessed with Fresh’s Satin Luster Face Palette, which has peach, pink, and white highlighters. Depending on my skin tone, I choose the one that complements me best. I apply the white highlighter as eyeshadow in my inner corners, and then smudge it onto my temples for a soft glow.

    But why stop there? I also use a Maybelline white sparkly eye pencil under my eyes, concentrating on the inner corners, and sometimes layer it with a liquid glitter liner for a dramatic pop. The same eye pencil works wonders on my cupid’s bow, adding a touch of sparkle to my lips.

    For a fuller lip effect, I love using a white-gold lip gloss. NARS Lip Gloss in Albatross is a must-have for this. I dab it in the center of my lips for added dimension and fullness. I usually apply a sheer red lipstick first, as it wears off nicely and provides a great base for the gloss.

    Once I’ve applied blush and highlighted my skin, I keep things simple. A swipe of mascara and a thin line of eyeliner on top, and that’s it! The key to this look is keeping it natural and effortless.