作者: admin

  • Simple and Effective Tips to Achieve Long, Natural Eyelashes at Home

    Simple and Effective Tips to Achieve Long, Natural Eyelashes at Home

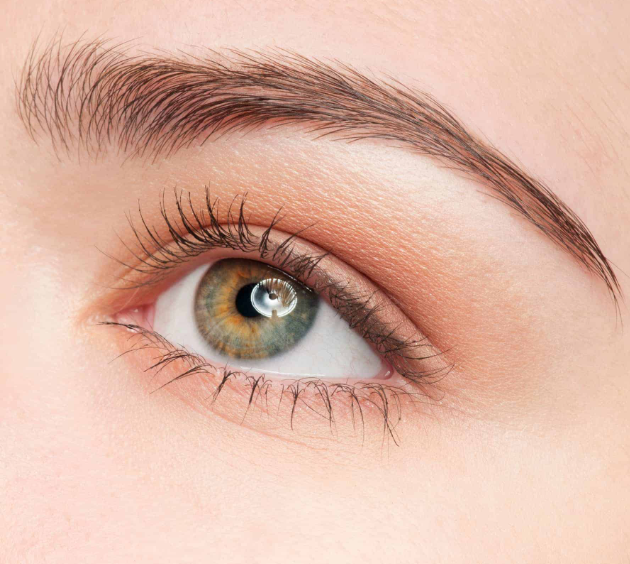
    Long, voluminous eyelashes are often considered one of the most attractive features of the face. While some are naturally blessed with long lashes, others may find it challenging to achieve the same look. The good news is, with a few simple tips and natural remedies, you can enhance your lashes over time and enjoy long, healthy lashes without relying on mascara or falsies. Here are some easy and natural ways to grow long lashes at home.

    1. Be Gentle with Your Lashes

    One of the most important aspects of growing healthy, long lashes is being gentle with them. Avoid harsh rubbing or pulling when removing makeup or cleansing your eyes. Use cotton pads to gently wipe away makeup and be cautious around the delicate lash area. Excessive rubbing can cause lashes to weaken and fall out, so always handle your lashes with care.

    2. Use Castor Oil

    Castor oil is a well-known remedy for promoting hair growth, and it works wonders for eyelashes too. To use castor oil, simply apply a small amount to your lash line before bed using a cotton swab. Over time, this can help your lashes grow thicker and longer. For even better results, you can mix castor oil with coconut oil in equal proportions. This combination nourishes the lashes and helps stimulate growth.

    3. Try Vitamin E Serum

    Vitamin E is another essential ingredient that can help strengthen and lengthen your lashes. Combining Vitamin E serum with castor oil creates a powerful mix that encourages lash growth. Apply this mixture to your lash line before going to sleep and leave it on overnight. Wash it off in the morning, and after using it consistently for two weeks, you’ll start noticing visible improvements.

    4. Use Petroleum Jelly

    Petroleum jelly (Vaseline) has long been used as a remedy for lash growth. Its moisturizing properties help keep your lashes hydrated, preventing breakage and encouraging them to grow longer. Simply apply a small amount of petroleum jelly to your lashes before bed and wash it off with lukewarm water in the morning. This simple step can help enhance the overall health of your lashes.

    5. Green Tea Treatment

    Green tea is a surprising yet effective remedy for longer lashes. The antioxidants found in green tea help promote hair growth and strength. To use green tea, brew a cup and allow it to cool. Soak a cotton ball in the tea and gently apply it to your lashes. Leave it on for a few minutes before rinsing it off. Repeat this process daily for two weeks, and you should start noticing a difference.

    6. Maintain a Healthy Diet

    What you eat plays a significant role in the health of your hair, including your eyelashes. To encourage healthy lash growth, make sure your diet is rich in vitamins, proteins, and water. A balanced diet will nourish your body from the inside out, providing the nutrients your lashes need to grow strong and thick.

    By following these natural tips, you can achieve long, beautiful eyelashes without relying on synthetic products. Patience is key, as these remedies take time to show results. With consistent care and the right ingredients, you’ll soon be able to enjoy the lashes you’ve always dreamed of.
  • How to Achieve a Fresh and Natural No-Makeup Look for Summer

    How to Achieve a Fresh and Natural No-Makeup Look for Summer

    Achieving a Natural No-Makeup Look for Summer and Spring

    As the temperatures rise and the sun shines brightly, your skin may start to feel the effects of dehydration, becoming rough and dull. One of the most noticeable changes during the hot summer months is the tendency for your skin to dry out, leading to a tan. To counteract this, many people rely on heavy makeup to achieve a flawless look. However, piling on makeup can mask your natural beauty and detract from that fresh, natural glow. Instead, why not try a more natural approach to your beauty routine? Below, we share some simple and effective tips to help you achieve that “no makeup” look that will complement any summer outfit.

    1. Embrace Glowing Skin

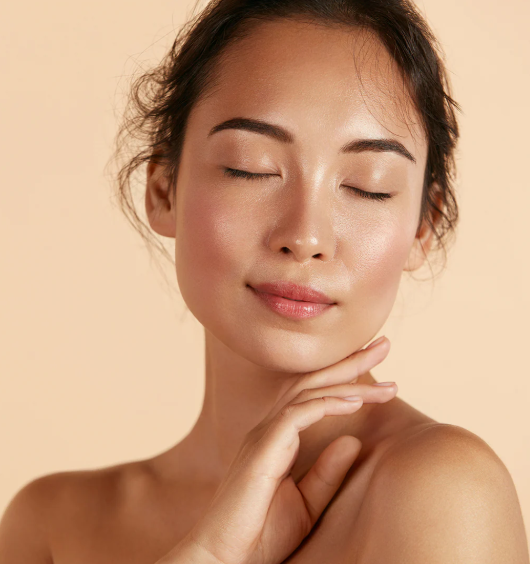
    The key to a fresh and natural appearance during the warmer months is glowing skin. This year’s spring/summer fashion shows showcased models with a naturally radiant look, as seen in collections from Christian Dior and Stella McCartney. These looks featured light foundation finishes with soft blush and a subtle highlight on the cheekbones and nose. The result was a natural, angelic vibe that highlighted their skin’s natural beauty.

    2. Focus on Light, Dewy Coverage

    To create the perfect no-makeup look, celebrity makeup artist Lisa Eldridge recommends focusing on dewy skin. Begin by using a lightweight foundation or a tinted moisturizer to even out your skin tone. A tinted moisturizer offers a natural finish and light coverage, making it perfect for the warm months. For any blemishes or imperfections, use a heavier concealer, applying it directly to the problem areas with a brush. Set everything in place with a light dusting of translucent powder to ensure your makeup lasts throughout the day.

    3. Highlight Your Features Naturally

    To keep the look fresh and glowing, use highlighters to accentuate your natural features. Apply a subtle shimmer to the high points of your face, such as the cheekbones, bridge of the nose, and the cupid’s bow. These touches will enhance your skin’s radiance without appearing overdone. Makeup artist Charlotte Tilbury suggests using her “Wonderglow” product for a soft, natural glow, which is perfect for the summer months.

    4. Soft Accents for a Fresh Look

    Instead of bold, dramatic makeup, go for soft accents to enhance your natural beauty. Charlotte Tilbury’s products, including the Core Light Diffuser, are designed to help your skin absorb UV particles, maintaining a fresh, glowing complexion. If you’re looking for a pop of color, products like MAC’s “Barbados Girl” and Dior’s “Glowing Gardens” collection offer a soft, radiant finish that blends effortlessly into your skin for a fresh, dewy look.

    5. Keep It Simple

    The beauty of a natural, no-makeup look is its simplicity. Avoid layering heavy products and focus on keeping your makeup light and fresh. Whether you’re attending a casual event or a formal gathering, the goal is to feel confident and comfortable in your skin. A simple routine that highlights your natural features will leave you feeling refreshed and beautiful all summer long.

  • Step-by-Step Guide to Creating Bold Black Smokey Eyes

    Step-by-Step Guide to Creating Bold Black Smokey Eyes

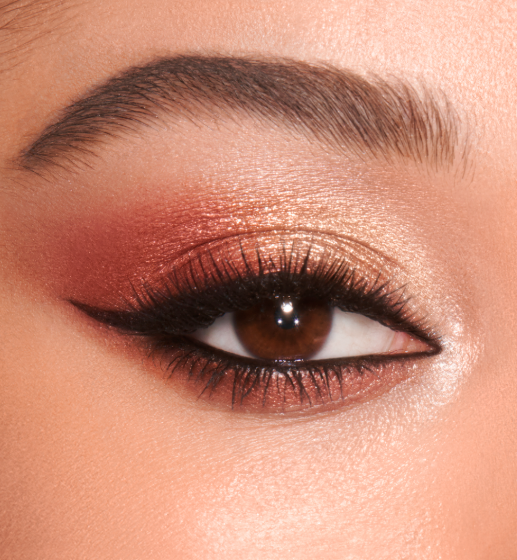
    Black smokey eyes are the epitome of bold, glamorous makeup. Whether you’re preparing for a formal evening or a casual night out, this dramatic eye look can elevate any outfit. Known for its depth and allure, smokey eye makeup enhances the beauty of your eyes, making them the focal point of your face. If you’re ready to master this striking look, follow this step-by-step guide to achieving perfect black smokey eyes, just like a pro.

    1. Prep Your Eyes with Concealer and Primer

    Before diving into your eye makeup, it’s important to start with a clean canvas. Gently clean your eyelids and the surrounding areas to remove any excess oils or dirt. Apply a concealer to brighten and even out the skin tone on your eyelids. This creates a smooth base for the makeup and ensures that your eyeshadow lasts longer throughout the day or night.

    2. Apply a White Base on the Lids

    Next, apply a white base or primer to your upper eyelids. Spread it evenly across the surface using your fingers or a brush. This step helps create a seamless foundation for the dark shadows to follow. Smudge it lightly with a blending brush to ensure the product stays in place.

    3. Apply Black Liner or Shadow

    Now it’s time to add that bold black color. Use either a black eyeliner or a dark eyeshadow along your lash line. Focus on the upper lash line and corners of your eyes, where you want the deepest intensity. Layering different shades of black will give your eyes a more dramatic, multi-dimensional effect.

    4. Blend for That Smokey Look

    Smudging is key to getting the signature smokey eye look. Use a brush to gently blend the black liner or eyeshadow, working from the outer corners inward. Be sure not to smudge too much; you want to enhance the natural shape of your eyes without overdoing it. The goal is a smooth, gradient effect where the black deepens at the outer corners and softens as it moves inward.

    5. Highlight the Browbone

    Highlighting your browbone is crucial to making your eyes stand out. Use a light, shimmery shade, such as soft gold or a highlighter, and apply it just beneath your eyebrows. Gently blend it in, keeping it above the lid line. This step adds contrast and makes your smokey eyes even more striking.

    6. Darken the Corners

    To add more definition and depth to your smokey eye, darken the outer corners of your eyes. You can apply more of the black eyeshadow or try using a metallic shade for a shimmering effect. This will create a sharp contrast and enhance the boldness of your eye makeup.

    7. Add Shadow Under the Eyes

    One of the key elements of smokey eyes is the shadow that circles the eye. Apply black eyeliner or eyeshadow along the lower lash line, focusing mainly on the outer corners. Smudge the product outwards, moving from the inner corner of the eye to the outer edge. This will complete the rounded, intense look of your smokey eyes.

    8. Define the Lower Lash Line

    For an even more defined look, take a black eyeliner pencil and line the inner lower lash line. Gently apply the liner to the entire length of the lower lash line, blending it into the shadow from step 7. This will create a seamless, bold look that enhances the intensity of your smokey eyes.

    9. Finish with Mascara

    The final step to completing your smokey eye look is applying mascara. Use a lash curler to give your lashes a natural curl before coating them with a thick layer of mascara. Be sure to apply mascara to both the upper and lower lashes to make your eyes pop. Allow the mascara to dry and add any final touches for extra volume.

    And there you have it—the perfect black smokey eyes! With a bit of practice, you can master this sultry look at home, transforming your eyes into a bold statement.

  • Top Hair Removal Methods for Unwanted Body Hair

    Top Hair Removal Methods for Unwanted Body Hair

    Dealing with unwanted body hair can be a constant struggle. No matter how often you remove it, it seems to grow back faster than you’d like. The key to solving this problem could be finding the right hair removal method for your needs. Here’s a look at some of the most popular and effective hair removal techniques to help you decide what works best for you.

    1. Shaving: Quick and Convenient

    Shaving is one of the most common and accessible methods for removing unwanted hair. While it doesn’t offer long-lasting results, it’s a quick and easy solution for those in need of an immediate fix. To make shaving more effective, always shave against the direction of hair growth, and use a shaving gel to minimize the risk of ingrown hairs. Though shaving offers a smooth finish, hair tends to regrow in just a few days, with the effects typically lasting no more than a week.

    2. Waxing and Sugaring: Longer-Lasting Results

    If you’re looking for a more durable solution, waxing or sugaring might be right for you. Both of these methods are more effective than shaving because they remove hair from the root, meaning you won’t see regrowth for a longer period—usually between two to six weeks. Waxing or sugaring adheres to the hair and pulls it out entirely, leaving your skin smoother for longer. These methods can be painful, but they are among the most popular for achieving long-term hair removal.

    3. Clinical Treatments: Laser Hair Removal

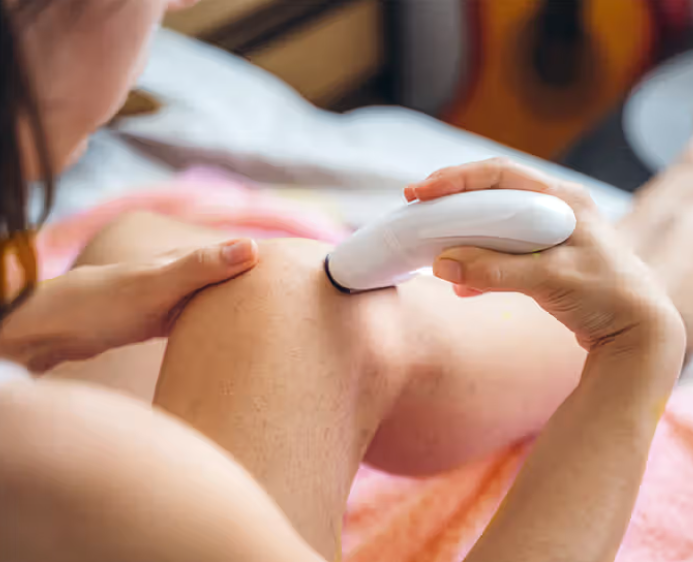
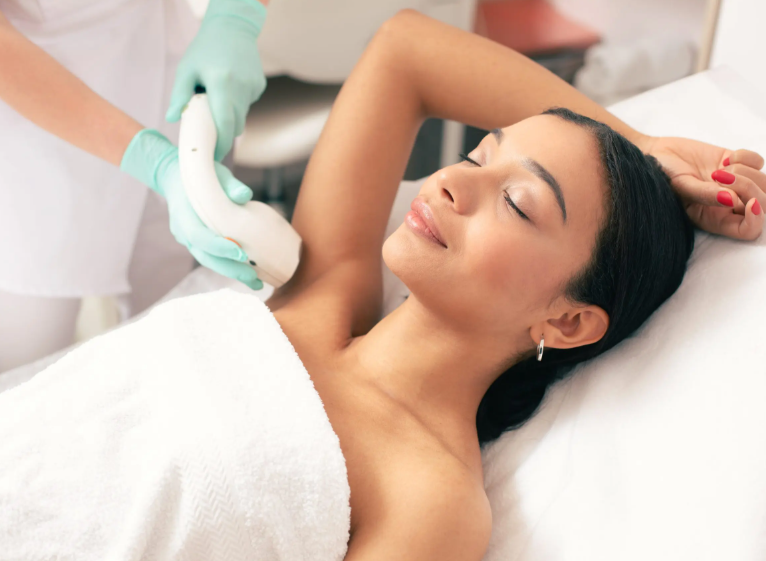
    For those willing to invest in more permanent solutions, clinical treatments like laser hair removal are excellent options. Laser machines target individual hairs with precision, using beams that penetrate the skin’s layers to destroy the hair follicle. Unlike razors or waxing, lasers can reach deeper layers of the skin, making them more effective for longer-lasting results. Multiple sessions are typically needed, but the results can last for months or even years, making it a popular choice for those seeking permanent hair removal.

    4. Electrolysis: Targeting Stubborn Hair

    Electrolysis is another professional treatment used to remove unwanted hair. It involves using electrical currents to destroy the hair follicles, including the roots that are not visible. While it is effective for smaller areas or individual stubborn hairs, it can be uncomfortable and time-consuming. Electrolysis is not as commonly used for larger areas due to the discomfort, but it remains a reliable solution for precision and permanent results.

    5. Depilatory Creams: Slow and Steady Maintenance

    Depilatory creams offer a slower but effective way to remove unwanted hair. These creams contain chemicals that break down the hair’s structure, causing it to fall out. While they aren’t as fast-acting as other methods, they can be used as a maintenance solution after other hair removal treatments like shaving or waxing. Regular application of depilatory creams can slow down hair regrowth and, in some cases, prevent it for longer periods.

    Combining Methods for Best Results

    There is no one-size-fits-all solution for hair removal. You may find that combining methods—such as waxing followed by the use of depilatory creams—can offer enhanced results. The key is experimenting to find the right combination that fits your preferences and needs.

  • DIY Acne Masks to Combat Skin Issues Naturally

    DIY Acne Masks to Combat Skin Issues Naturally

    Acne is a common skin problem that affects many of us. While it’s often thought of as a teenage issue, acne can persist well into adulthood, impacting not just your appearance but also your confidence. The physical discomfort and emotional distress caused by acne are very real, and for some, it feels like there’s no solution in sight. Fortunately, natural remedies like DIY acne masks can help manage and reduce breakouts. Here’s how you can create simple yet effective treatments at home.

    Understanding Acne: What Causes It?

    To properly tackle acne, it’s essential to understand what causes it. Acne develops when hair follicles become clogged with oil, dead skin cells, and bacteria. Normally, our skin sheds dead cells, but when this process is disrupted—due to clogged pores or excess oil production—bacteria can thrive in the blocked pores. This leads to inflammation and the formation of acne. Various factors such as hormones, stress, sun exposure, and even genetics can contribute to the severity of acne.

    While regular cleansing can help keep your pores free from buildup, if your acne is severe, it’s important to consult a dermatologist. That said, there are plenty of at-home remedies that can help manage and treat mild to moderate acne.

    Natural DIY Acne Masks to Try at Home

    Rather than spending money on expensive skincare products, why not try using natural ingredients that are effective and gentle on your skin? Here are some simple DIY masks that can help you reduce acne and improve skin health:

    1. Cucumber and Baking Soda Mask

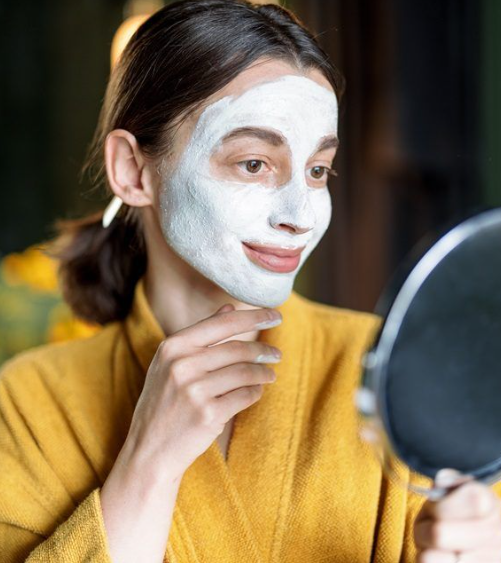
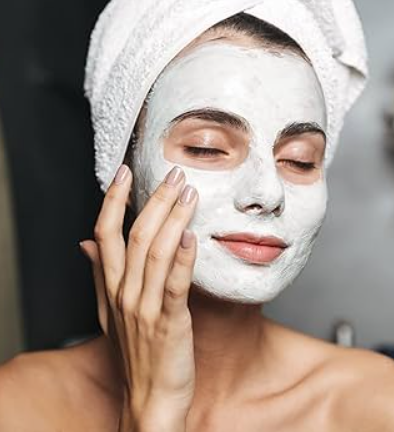
    Cucumber is great for soothing the skin and reducing inflammation. It also helps to balance the skin’s pH, which is a key factor in preventing acne. To make an easy mask, grate an unpeeled cucumber and mix it with half a tablespoon of baking soda. Apply the mixture to your face and leave it on for 20 minutes. The cucumber hydrates and nourishes the skin, while the baking soda exfoliates, removing dead skin cells. Rinse off with warm water, and you’ll notice a more balanced, refreshed complexion with regular use.

    2. Cucumber and Egg White Scrub for Oily Skin

    If you have oily skin, this mask can help purify your skin and reduce acne outbreaks. Grate an unpeeled cucumber and extract the juice. Mix the cucumber juice with egg whites, which are rich in protein and help tighten the skin. Apply this mixture to your face and leave it on for 20-30 minutes before rinsing with warm water. This scrub works wonders for controlling excess oil and preventing clogged pores, which are often the cause of acne.

    3. Garlic and Olive Oil Treatment for Bacteria

    Acne is often caused by bacteria, and garlic is a powerful natural antibacterial agent. To create a potent acne-fighting treatment, mince three cloves of garlic and mix them with olive oil. Using a clean cloth, apply this mixture to the affected areas, making sure not to apply it directly to the skin to avoid irritation. Leave it on for a few minutes, then rinse with cold water. Garlic and olive oil work together to fight off the bacteria causing acne, and repeated use can significantly reduce breakouts over time.

    Conclusion

    Acne can be frustrating, but with the right natural remedies, you can manage and even reduce breakouts. Incorporating these DIY masks into your skincare routine is a great way to tackle acne without relying on harsh chemicals or expensive treatments. Remember that consistency is key, and patience will pay off as you see your skin improve.

  • 5 Reasons Why an Essential Oils Diffuser is Essential for Your Wellness

    5 Reasons Why an Essential Oils Diffuser is Essential for Your Wellness

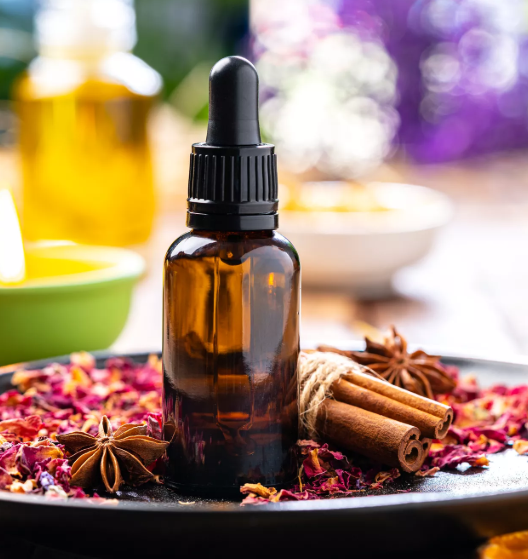
    Achieving optimal health and wellness requires consistent effort, but finding the right tools can make the journey a lot easier. Essential oils have become a popular choice for many people looking to boost their overall well-being. One of the most effective ways to harness the power of essential oils is by using a diffuser. If you haven’t considered adding a diffuser to your wellness routine, here are five compelling reasons why you should.

    1. Even Distribution of Oils

    One of the main benefits of using a diffuser is that it ensures the oils are spread evenly throughout the air. Unlike other methods of using essential oils, a diffuser works by gradually releasing the oils, allowing you to experience their full effects over time. This consistent diffusion helps to maintain a steady flow of the essential oils, promoting long-lasting wellness benefits.

    2. Create Custom Blends for Maximum Results

    While single essential oils can provide great benefits, blending multiple oils together can amplify their effects. Diffusers give you the flexibility to mix various oils, allowing you to create custom blends tailored to your specific needs. Whether you’re looking for relaxation, energy, or focus, combining oils can provide more targeted and effective results.

    3. Convenient and Portable

    For those always on the go, an essential oils diffuser is incredibly convenient. Compact and easy to use, it can be packed in your suitcase or carried in your bag for travel. Whether you’re in a hotel room or a rented cabin, having a diffuser with you ensures that you can continue to reap the benefits of essential oils no matter where you are.

    4. Supports Multiple Aspects of Health

    Essential oils are known for their versatility in supporting both physical and mental health. From reducing stress and anxiety to alleviating headaches and promoting better sleep, essential oils can play a significant role in improving your well-being. Using a diffuser allows you to address various health needs all at once, offering relief from pain and emotional stress.

    5. Budget-Friendly Wellness Solution

    When it comes to health and wellness products, many options can be expensive. However, essential oils are relatively affordable, and diffusers are a one-time investment that can last for years. By incorporating essential oils into your routine, you’re making a cost-effective choice for your wellness, helping you stay healthy without breaking the bank.

  • 7 Simple Homemade Face Masks for Brighter and Clearer Skin

    7 Simple Homemade Face Masks for Brighter and Clearer Skin

    Having a clear and glowing complexion is often considered a key aspect of one’s appearance, and many people seek ways to enhance their facial skin tone. While there are numerous expensive products and treatments available on the market, natural homemade masks can provide an affordable and effective solution. In this article, we will explore some of the best natural homemade face masks that can help you achieve brighter, fairer skin with consistent use.

    1. Orange Peel and Yogurt Mask

    This simple yet effective mask helps lighten spots and gives your skin a healthy glow. To create the mask, start by drying orange peels under the sun and storing them in an airtight container. When ready, grind the dried peels into a fine powder. Mix this powder with a small amount of yogurt to form a paste. Apply it to your face and leave it on for 20 minutes before washing off with lukewarm water. This mask is great for fading dark spots and rejuvenating your skin.

    2. Gram Flour and Turmeric Mask

    Turmeric is a well-known ingredient for promoting skin glow, and when combined with gram flour, it helps exfoliate and brighten the skin. To make the mask, mix a pinch of turmeric powder with gram flour and add a teaspoon of lemon juice or yogurt. Apply this mixture to your face and let it dry for about 20-25 minutes. Gently scrub the mask off and rinse with water. For the best results, repeat this process two to three times a week.

    3. Milk, Honey, and Lemon Juice Face Pack

    This easy-to-make face pack is excellent for whitening and smoothing the skin. Mix a few tablespoons of milk, honey, and lemon juice together to form a soft paste. Apply it to your face and neck, leaving it on for 20-30 minutes. Once dry, rinse with cold water. Use this mask two to three times a week to lighten skin marks, making your complexion softer and more radiant.

    4. Oatmeal, Yogurt, and Tomato Mask

    For a natural exfoliant, try this mask made from oatmeal, yogurt, and tomato juice. Combine one teaspoon each of oatmeal, tomato juice, and yogurt to make a paste. Apply the mask to your face and neck and leave it on for 30 minutes before rinsing with normal water. Tomato juice helps with acne and cleansing, while yogurt’s mild bleaching effect works to reduce blemishes and scars. Oatmeal gently exfoliates, removing dead skin cells, and together, these ingredients will help lighten your skin tone and remove suntan.

    5. Lemon Juice and Cucumber Mask

    Lemon juice is known for its bleaching properties, and combined with cucumber juice, it provides a refreshing and cooling effect. Mix one tablespoon of lemon juice with one teaspoon of cucumber juice, and apply the paste to your face. Leave it on for 15-20 minutes, allowing it to dry, before rinsing off with water. This mask is perfect for hot summer days as it also provides a soothing effect on the skin.

    6. Coconut Oil for Spot Reduction

    Coconut oil is widely used for its ability to lighten marks and scars. Apply a small amount of coconut oil directly to the affected areas on your face. Gently massage it into your skin daily. Over time, it will help fade scars and dark spots, leaving your skin looking brighter and more even-toned.

    7. Honey and Almond Mask

    Honey and almond work wonders for brightening the skin and removing sun tan. For this mask, mix one teaspoon of honey with one teaspoon of milk powder, half a teaspoon of almond powder (or almond oil), and another teaspoon of honey. Apply the mixture to your face before bedtime, leaving it on for 15-20 minutes. Rinse off with lukewarm water. Using this mask three times a week will help lighten your skin and give it a smooth, clear appearance.

  • The Ultimate Skincare Routine for Healthy, Glowing Skin

    The Ultimate Skincare Routine for Healthy, Glowing Skin

    Achieving radiant and healthy skin requires more than just using skincare products—it’s about applying them in the right order. Dermatologists often recommend a structured skincare routine to maximize the benefits of each product. By following a specific sequence, you can ensure that your skin absorbs the ingredients effectively, helping to keep it protected from harmful elements. Here, we’ll break down the ideal daily skincare routine that will give you the best results.

    The Perfect Skincare Routine: Step-by-Step

    When it comes to skincare, the order in which you apply your products matters. Each product serves a different purpose and is designed to penetrate the skin to varying depths. To get the best results, the general rule is to apply products from the thinnest to the thickest, starting with liquids and finishing with creams. This helps the skin absorb active ingredients more effectively.

    Morning Skincare Routine

    The morning routine is all about protecting your skin from external stressors such as the sun, pollution, and environmental damage. It’s essential to include products that create a shield against these elements, while reserving treatments like retinol for your evening routine. Here’s a breakdown of what to do:

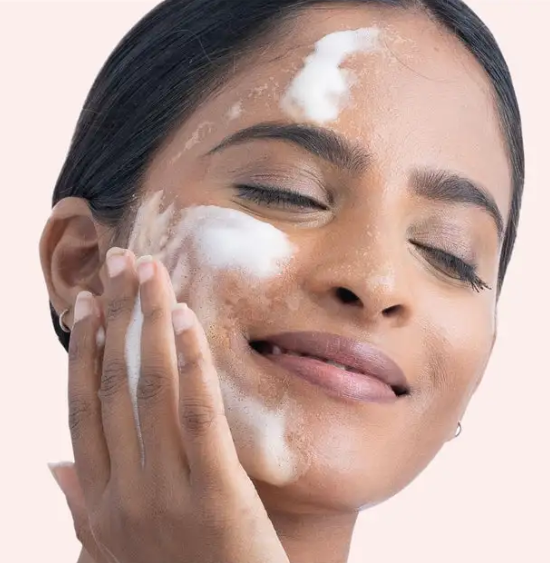
    1. Cleanser: Begin your morning routine by splashing your face with warm water and using a gentle cleanser suited to your skin type. This helps to remove dirt and impurities that may have built up overnight.
    2. Toner: While some people skip toners, thinking they’re too harsh, a good toner can do wonders for your skin. It delivers important antioxidants and vitamins, such as Vitamin B, which can rejuvenate and balance the skin. Choose a toner that addresses your skin’s specific needs.
    3. Antioxidant Serum: Antioxidant serums are concentrated treatments that help combat various skin concerns. These serums work best when applied directly onto your skin, offering protection against UV rays and environmental pollutants. Look for serums packed with multiple antioxidants for comprehensive skin protection.
    4. Eye Cream: The delicate skin around your eyes requires extra care. An eye cream helps maintain the health of this area, improving its texture and overall appearance. This step will help reduce puffiness and dark circles, making your eyes look refreshed.
    5. Spot Treatment: If you struggle with acne, spot treatments can be highly effective. These products target specific blemishes and should be applied directly to the affected area for optimal results.
    6. Moisturizer: After applying your treatment products, seal in the moisture with a good moisturizer. Apply it while your skin is still damp to help lock in hydration. Be mindful to avoid areas where you’ve applied spot treatments, as these products often contain active ingredients that can be drying.
    7. Sunscreen: The final step in your morning routine is sunscreen. Sunscreen is crucial for protecting your skin from harmful UV rays, which can lead to premature aging and skin damage. Apply sunscreen generously and make sure it contains zinc oxide, which offers the best protection against both UVA and UVB rays. If you prefer a chemical sunscreen, look for a formula that also provides moisturizing benefits.

    Choosing the Right Products

    When selecting products for your skincare routine, it’s important to focus on quality and choose those that suit your skin’s specific needs. Whether you’re purchasing from a well-known beauty supplier or trying something new, always remember that consistency is key. Pay attention to how your skin responds and adjust accordingly. Your skincare routine should be straightforward, making it easy to follow daily.

    Your skin is unique, so finding products that work for you is essential. Look for formulas that are gentle and designed to treat your individual concerns. With the right products and a structured approach, your skin will thank you with a healthy, glowing complexion.

  • The Benefits of Sabja Seeds for Lowering Cholesterol

    The Benefits of Sabja Seeds for Lowering Cholesterol

    Cholesterol is essential for the human body as it plays several important roles, including maintaining the flexibility of cell walls and helping to produce various hormones. However, when present in excess, cholesterol can lead to serious health issues. Since cholesterol does not dissolve in water, lipoproteins are necessary to transport it along with fat-soluble vitamins in the bloodstream. In this article, we will explore how Sabja seeds can help lower cholesterol levels and improve heart health.

    Excessive cholesterol, particularly the type carried by low-density lipoproteins (LDL), can build up on the walls of blood vessels. This accumulation can lead to narrowed arteries, increasing the risk of heart attacks, strokes, and kidney failure. On the other hand, high-density lipoproteins (HDL) help prevent cholesterol from settling in the arteries by carrying it away from blood vessels. There are many natural methods to boost HDL cholesterol in the body, and one of them includes incorporating Sabja seeds into your diet.

    What Are Sabja Seeds?

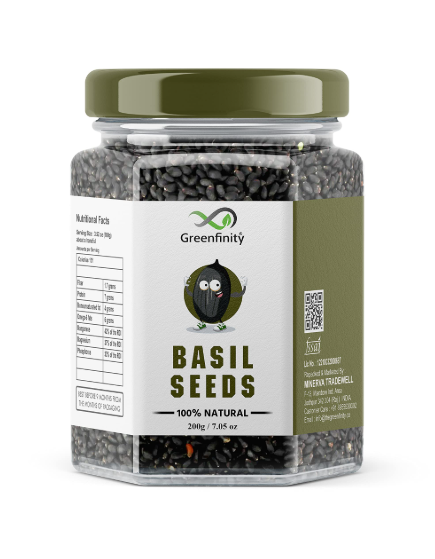
    Sabja seeds, also known as basil seeds, falooda seeds, or tukmaria seeds, are small, black seeds derived from the sweet basil plant (Ocimum basilicum). While similar in appearance to sesame seeds, Sabja seeds are packed with beneficial nutrients and immune-boosting properties. Native to India, these seeds have been used in both Ayurvedic and Chinese medicine for centuries. They are particularly known for their ability to regulate blood sugar, enhance metabolism, reduce inflammation, and lower cholesterol.

    How Sabja Seeds Help Lower Cholesterol

    One of the key components of Sabja seeds that aids in lowering cholesterol is soluble fiber. Soluble fiber dissolves in water and is not digested by the human body, but it is broken down by probiotics (beneficial bacteria) in the gut. These bacteria help reduce harmful lipoproteins like LDL and very-low-density lipoproteins (VLDL). According to a study published by the National Library of Medicine, consuming 3 grams of soluble fiber daily for several months resulted in an 18% reduction in LDL cholesterol.

    The soluble fiber found in Sabja seeds, particularly pectin, binds to cholesterol in the digestive tract, preventing its absorption into the bloodstream. This process helps lower cholesterol levels in the body and reduces the risk of heart disease by preventing cholesterol from building up in the arteries.

    How to Use Sabja Seeds

    Sabja seeds are readily available in Asian grocery stores or online. When purchasing, be sure to look for seeds labeled as “edible basil seeds,” as those intended for planting may be treated with pesticides and are more expensive.

    To use Sabja seeds, they must be soaked before consumption. For every tablespoon of seeds, add one cup of water. If you prefer a larger quantity, you can use more water, but ensure the seeds are properly soaked to prevent clumping. Let the seeds soak for at least 15 minutes, during which time they will expand and form a gel-like coating, turning grey. Once soaked, you can add the seeds to a variety of recipes.

    These seeds are versatile and can be added to smoothies, milkshakes, salads, puddings, oatmeal, muffins, and even bread. They can also serve as a replacement for eggs in baking by grinding them and using them in place of flour, making your baked goods healthier.

    Precautions to Keep in Mind

    While Sabja seeds offer numerous health benefits, there are a few precautions to consider:

    • These seeds can elevate estrogen levels in the body, so pregnant women should consult with a doctor before consuming them.
    • Small children may choke on the seeds if they are not properly soaked.
    • Sabja seeds have anticoagulant properties, which means they may reduce blood clotting. Avoid consuming them at least two weeks before any surgery.
    • Some potential side effects of Sabja seeds include diarrhea, nausea, loss of appetite, headaches, and vomiting.

    Aside from lowering cholesterol, Sabja seeds offer a range of other health benefits. They help regulate blood sugar levels, relieve constipation, reduce stress and anxiety, and may even lower the risk of heart disease.

    If you’re concerned about high cholesterol, consider speaking with your healthcare provider about incorporating Sabja seeds into your diet to enjoy their heart-healthy benefits.

  • What to Expect During Recovery After Brazilian Laser Hair Removal

    What to Expect During Recovery After Brazilian Laser Hair Removal

    If you’re considering making the switch from traditional hair removal methods to Brazilian laser hair removal, you’re not alone. Many people are opting for this treatment, but before diving in, it’s important to understand the recovery process, how long it takes, and what you can expect. This article will walk you through the recovery time, what happens after the procedure, and tips to help ensure the best results.

    How Long Does Recovery Take?

    Typically, the recovery time after Brazilian laser hair removal is quite short. Most individuals experience mild discomfort for about two days following each session. Recovery doesn’t usually interfere with your daily activities, such as work, school, or other commitments.

    To help speed up the recovery process, applying aloe vera or using ice packs on the treated area can help alleviate discomfort. If the pain persists, over-the-counter painkillers can provide relief. In rare cases, if the pain doesn’t subside after a day, you should consult with your doctor.

    One of the most crucial post-treatment care tips is avoiding sun exposure. Sunlight can significantly slow down the recovery process. If you’re someone who enjoys sunny outdoor activities or sunbathing, try to minimize your exposure for at least a few days after the procedure. Additionally, since laser treatments involve heat, it’s best to avoid hot showers, saunas, or any other activities that could further irritate the skin. Giving your skin at least 48 hours to recover before resuming your normal routine is ideal. Similarly, intense exercise can increase body heat and potentially worsen skin irritation, so opt for light activities like walking instead of strenuous workouts during the recovery period.

    What to Expect After the Procedure

    Immediately after the treatment, your skin may feel mildly irritated, similar to the sensation of a mild sunburn. Most people experience slight swelling, redness, or the appearance of goosebumps, but these side effects usually resolve within 48 hours. In addition, many clinics offer numbing creams to make the procedure more comfortable, but aloe vera is a great natural alternative for soothing the skin and promoting healing.

    It’s essential to allow time for your skin to heal fully, which can take up to two weeks at the cellular level. The procedure causes mild thermal damage to the skin, but this is normal and part of the process that helps remove hair follicles. Keep in mind that Brazilian laser hair removal typically requires multiple sessions to achieve the best results, as it doesn’t eliminate all hair in just one treatment. If you notice hair regrowth between sessions, it’s okay to trim or shave the area, but avoid plucking or using hair removal creams, as these can interfere with the healing process and the effectiveness of the treatment.

    How Soon Will You See Results?

    You’ll start to notice results from Brazilian laser hair removal within 10 to 12 days after the first session, as the hair follicles begin to die off. However, it’s important to manage your expectations. Most people see a reduction of 70% to 90% of hair after a series of treatments. While laser hair removal is highly effective, achieving permanent hair removal in one session is not yet possible.

    Final Thoughts

    Everyone’s recovery experience can vary depending on pain tolerance and how quickly their body heals. Fortunately, the majority of individuals recover without significant pain or complications. By following the post-treatment guidelines provided by your clinic, you can ensure a smooth and fast recovery. With the right care, Brazilian laser hair removal can offer long-lasting results that leave you with smooth, hair-free skin.